Enshrouded Blacksmith Quests Walkthrough

I tried keeping it sweet and simple, but some of the Blacksmith quests are more complex than others. If you see an error, please let me know, and I’ll work to fix it! All images used in this blog post are screenshots from the game Enshrouded.
- Quick Links To Help
SPOILER ALERT: There’s no way for me to avoid spoiling game play with the walkthrough.
NOTE: All content below is from BEFORE Hollow Halls Update - version number 510434. Content below is good for anything before March 26th, 2024. Content may still be relevant after March 26th, 2024 - but there may be gaps in the information below as more Lore and Quests were added by developers.
Blacksmith Quests
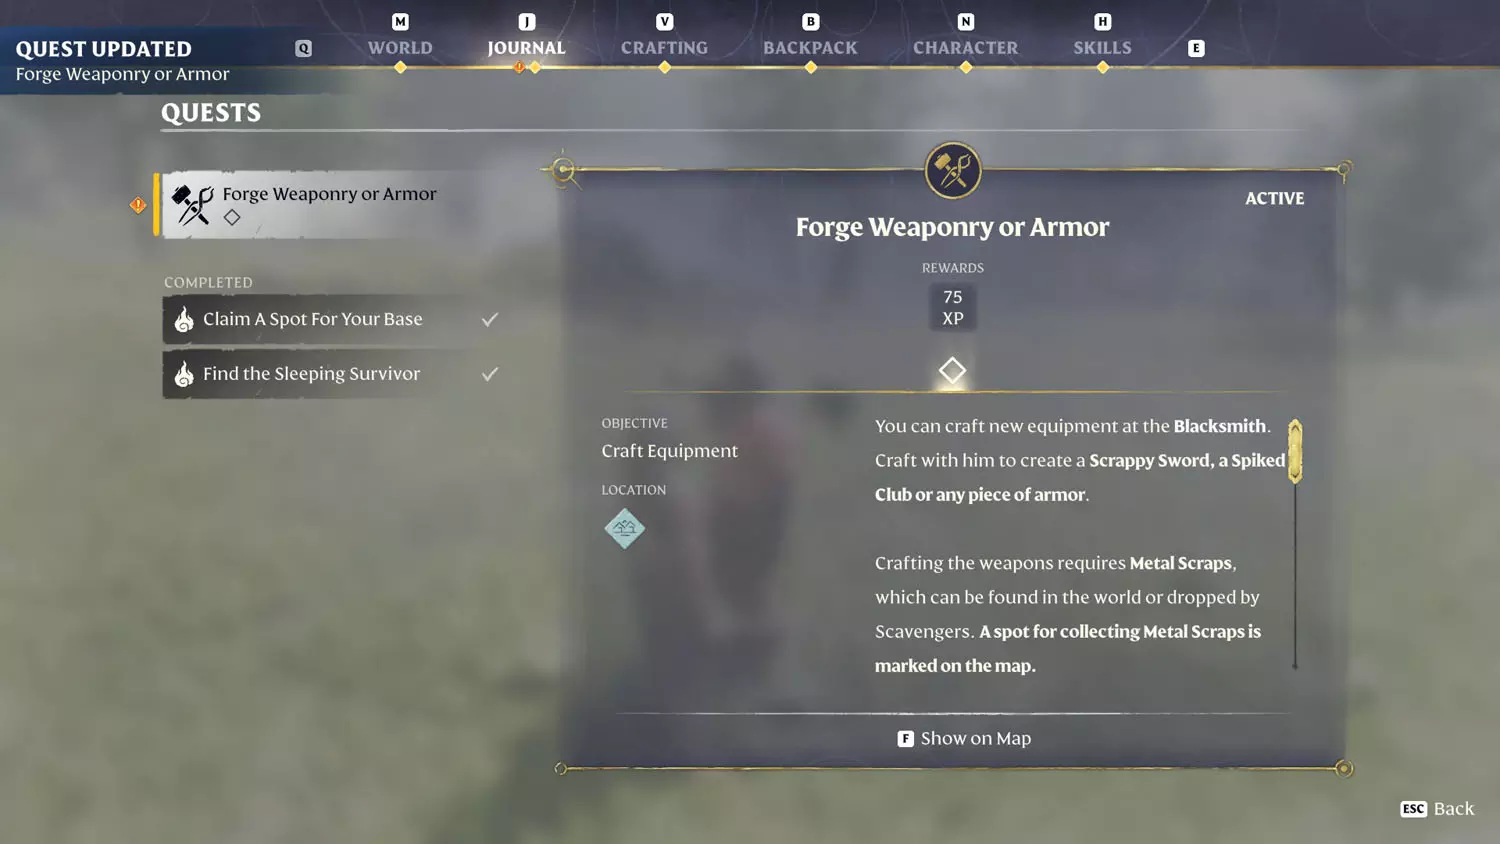
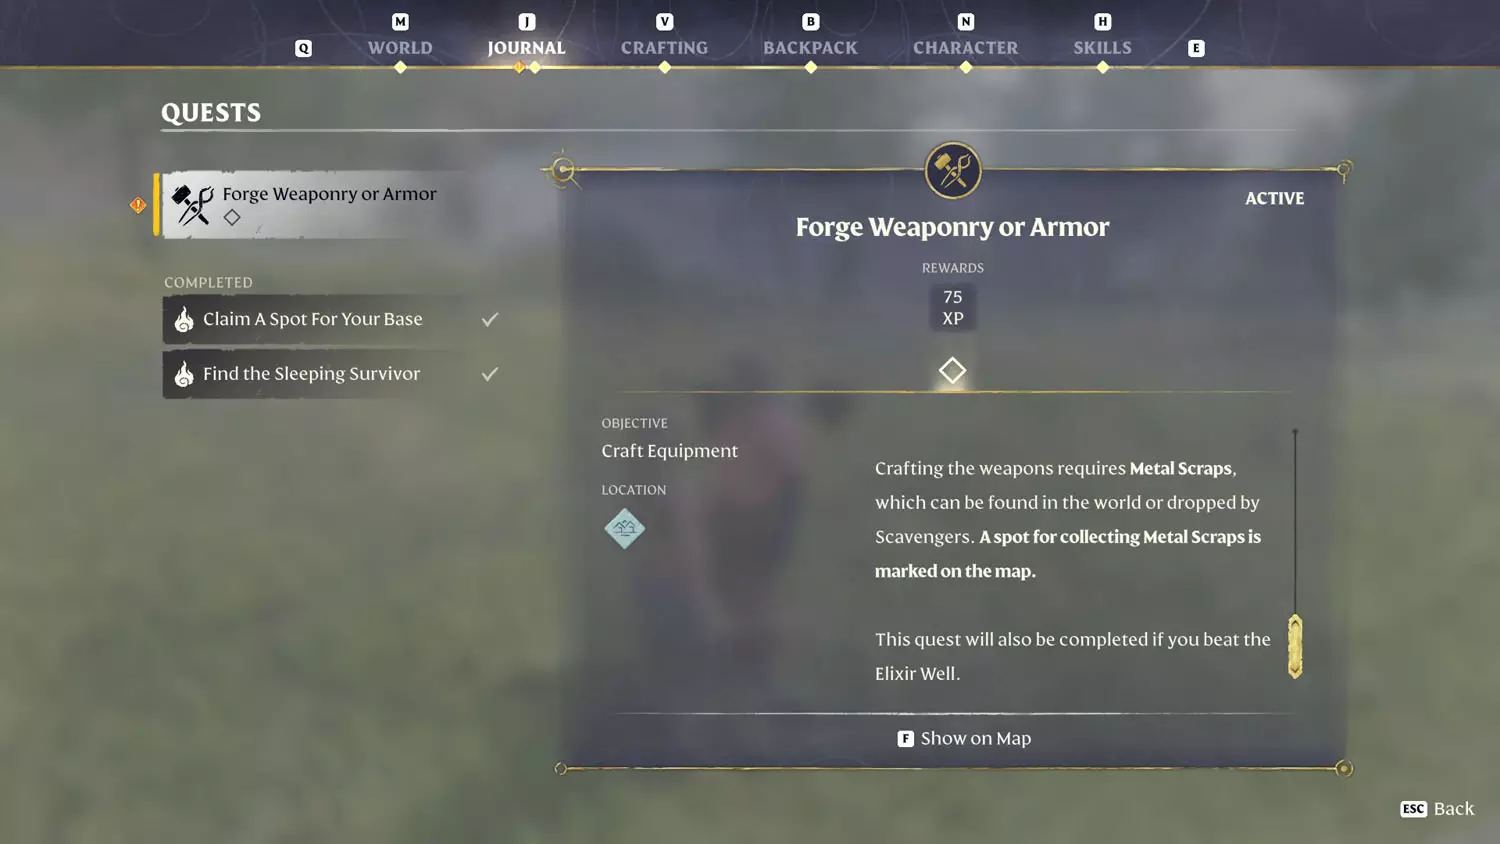
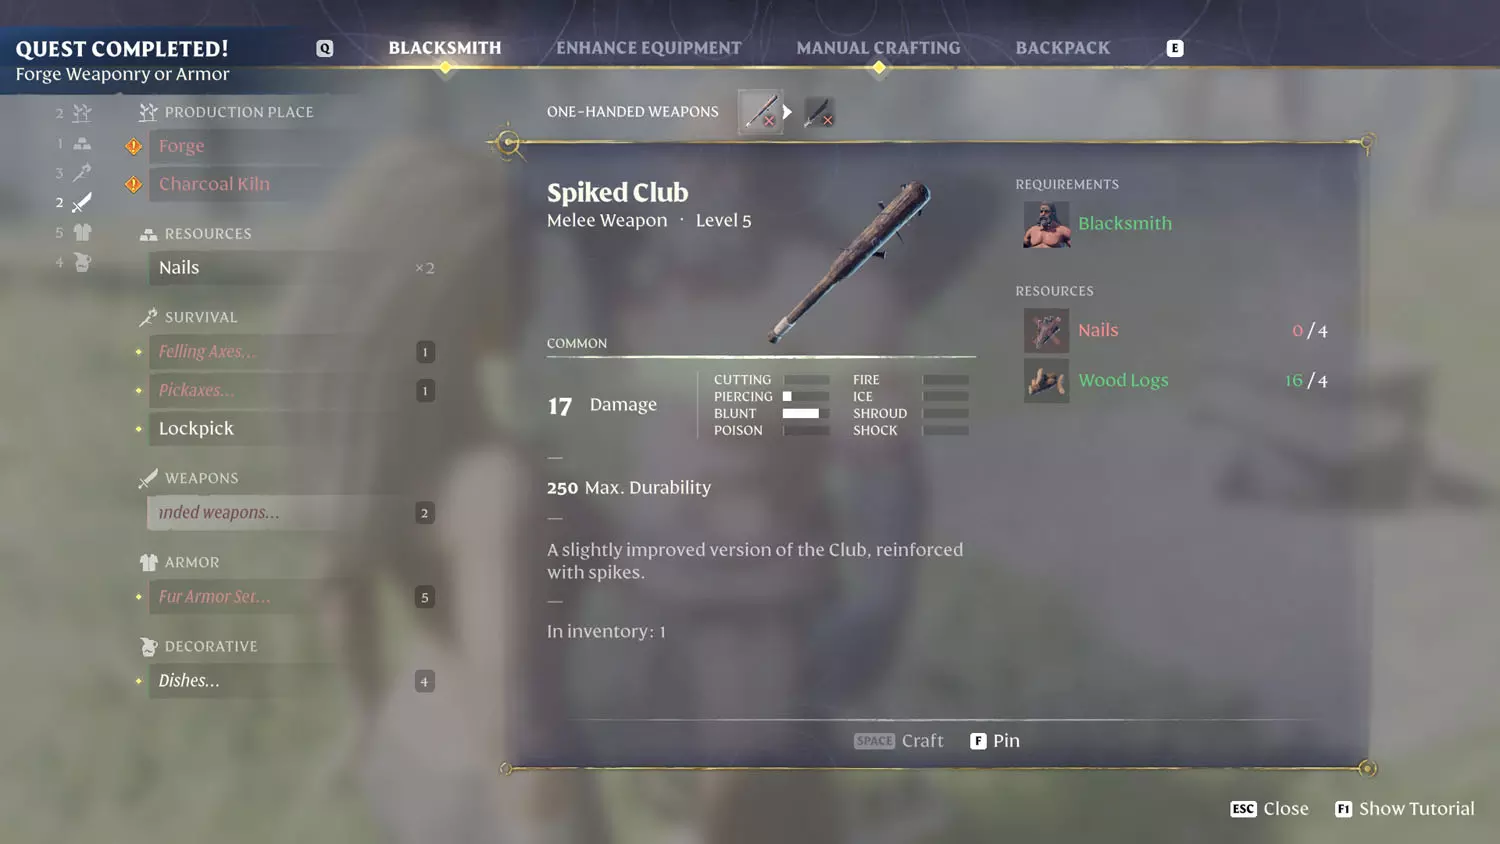
Forge Weaponry or Armor
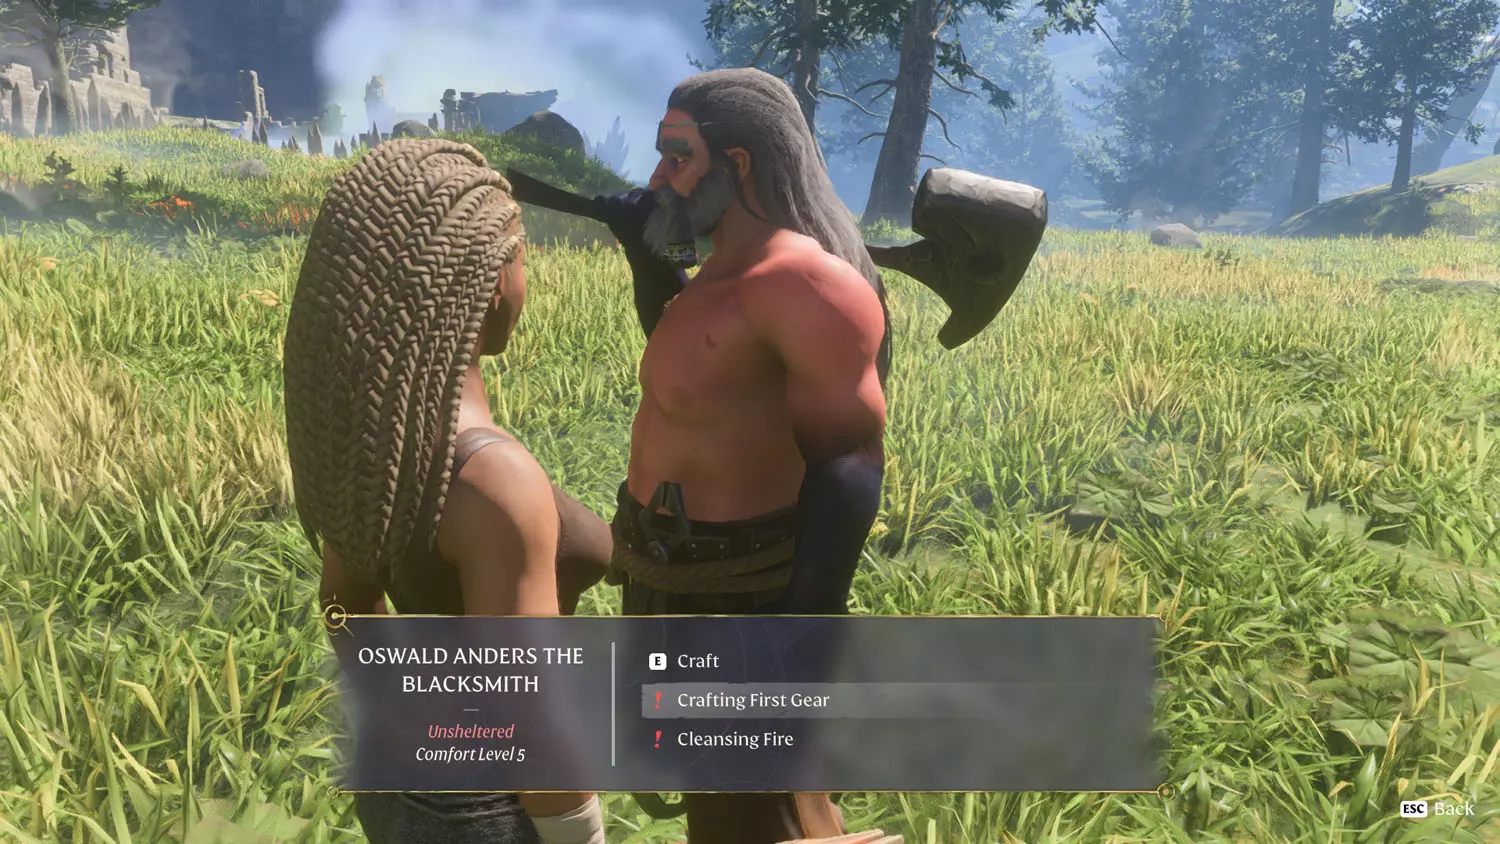
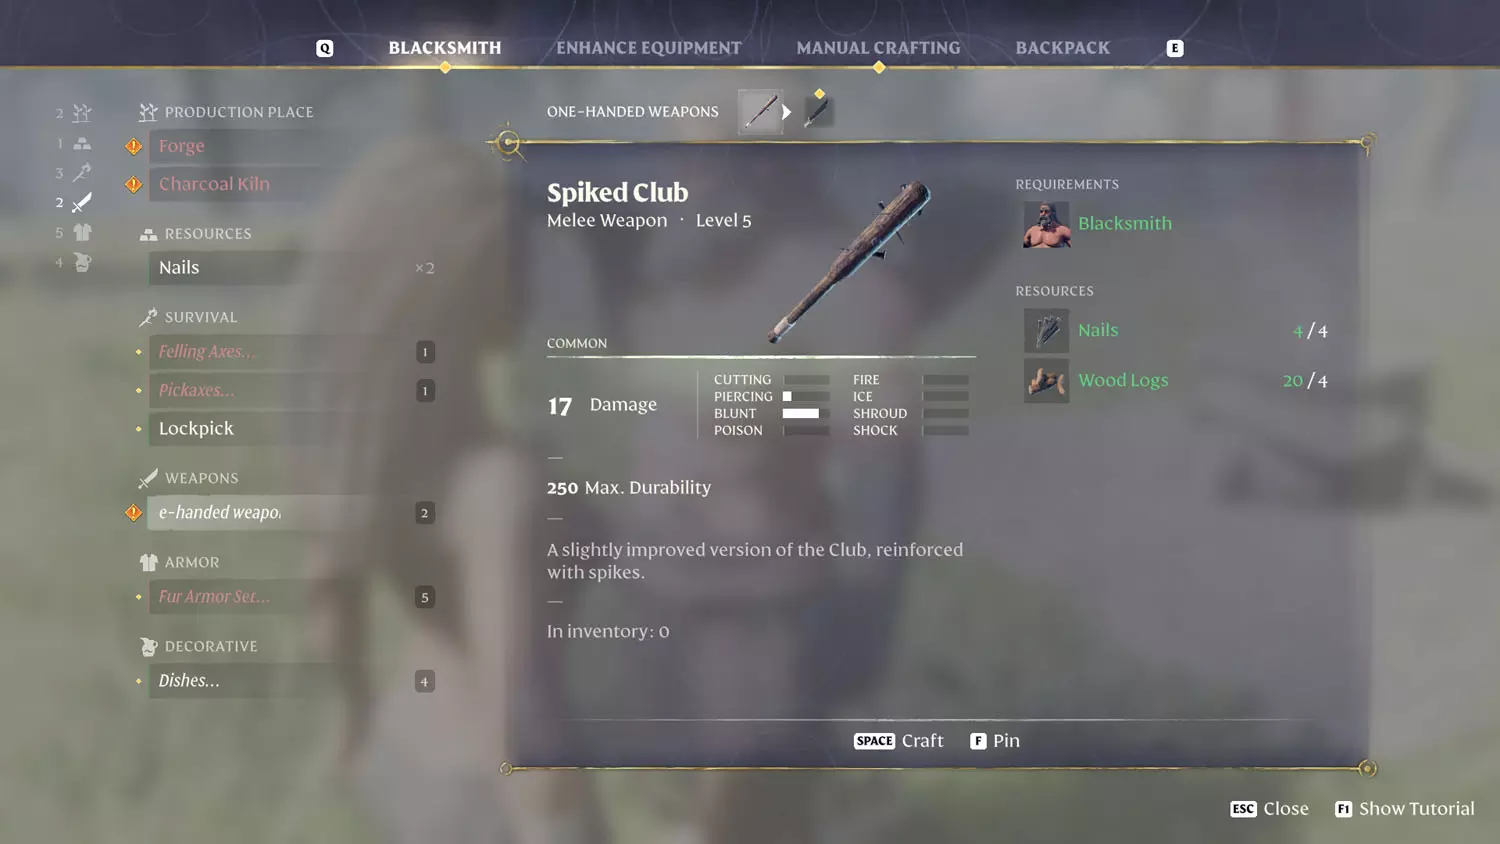
This quest is available the second you place the Blacksmith. He will have two options of dialogue. You’ll want to select “Crafting First Gear”. This quest requires that you either craft a piece of armor or a weapon. HOWEVER, if you complete the Blacksmith Quest: Clear The Elixir Well, this quest will be automatically completed. To craft armor with Oswald Anders, the Blacksmith, simply select the dialogue option “Craft”. Then, select an armor or weapon to craft with him, have the materials to craft the item, then craft it to complete the quest.
WARNING: If you skip the dialogue for the quest (in that you never activate it), the quest will not show up and the dialogue for it will disappear. I don't know if this is a glitch or not, but it seems glitchy.

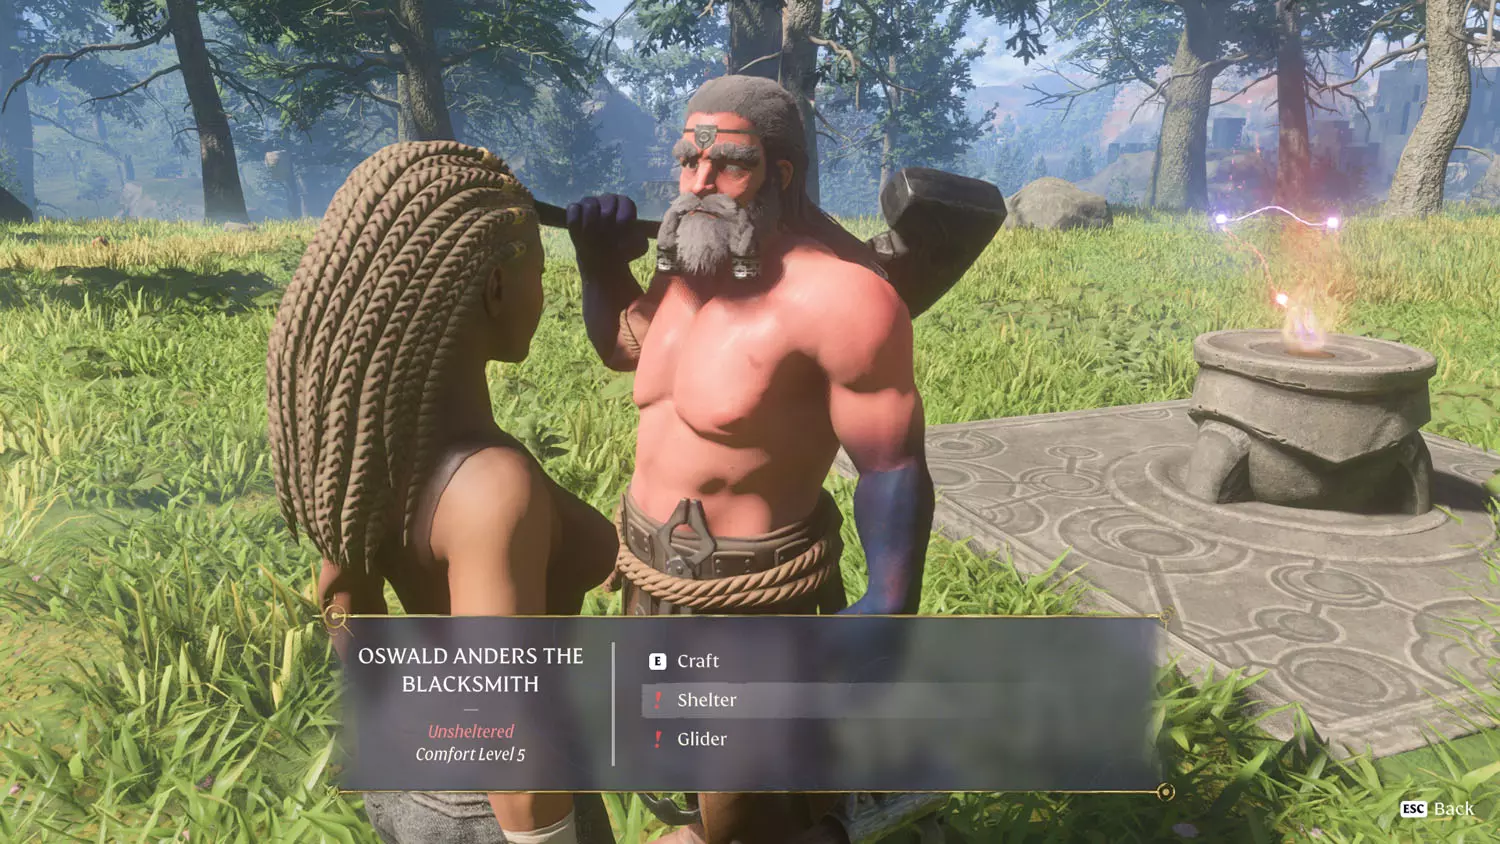
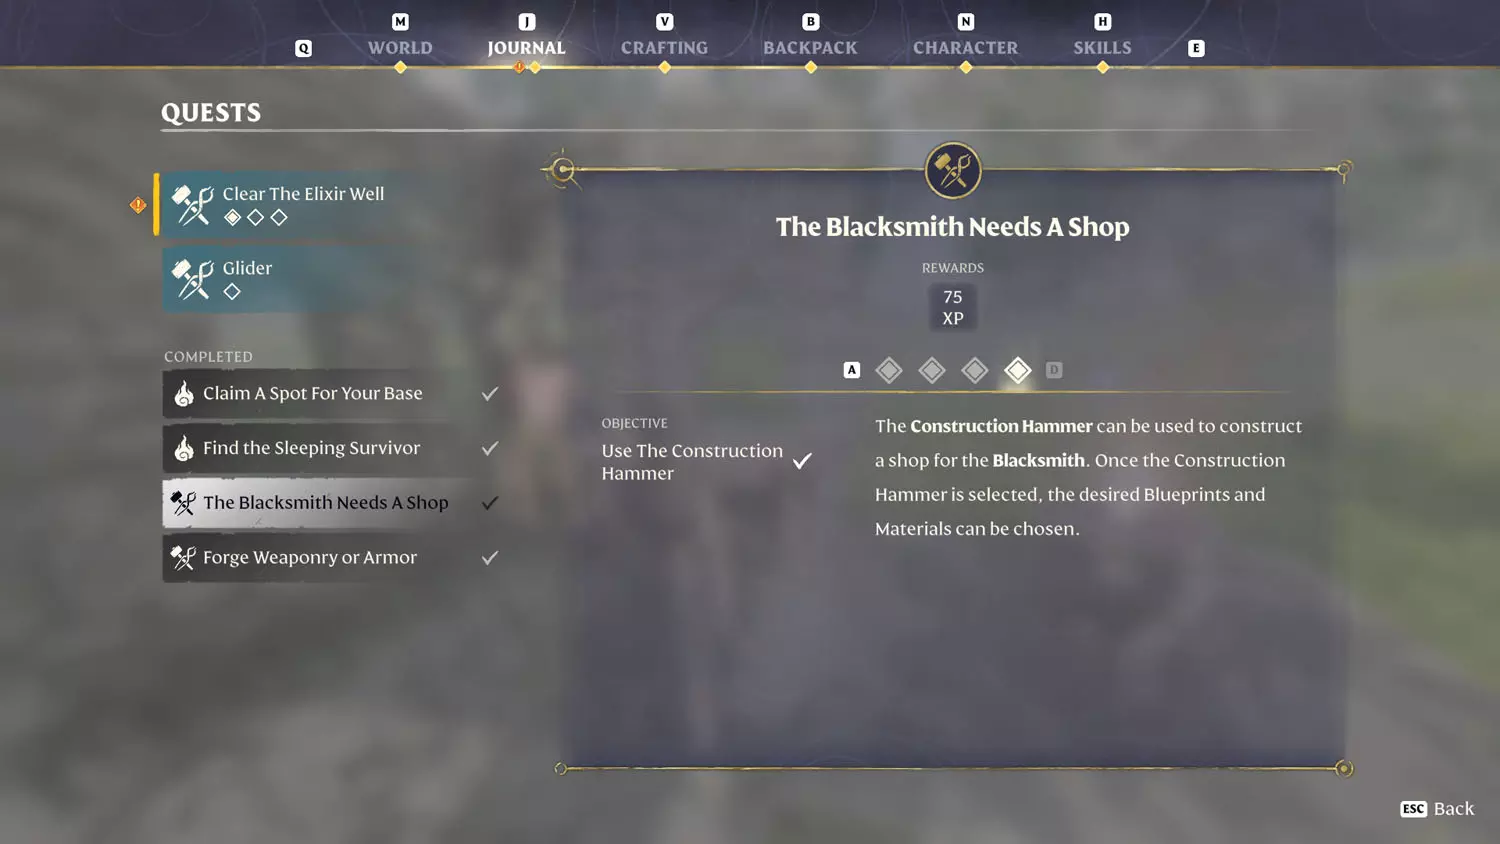
The Blacksmith Needs A Shop
After finishing the quest for crafting a weapon or armor, the Blacksmith will have the dialogue option for “Shelter”.
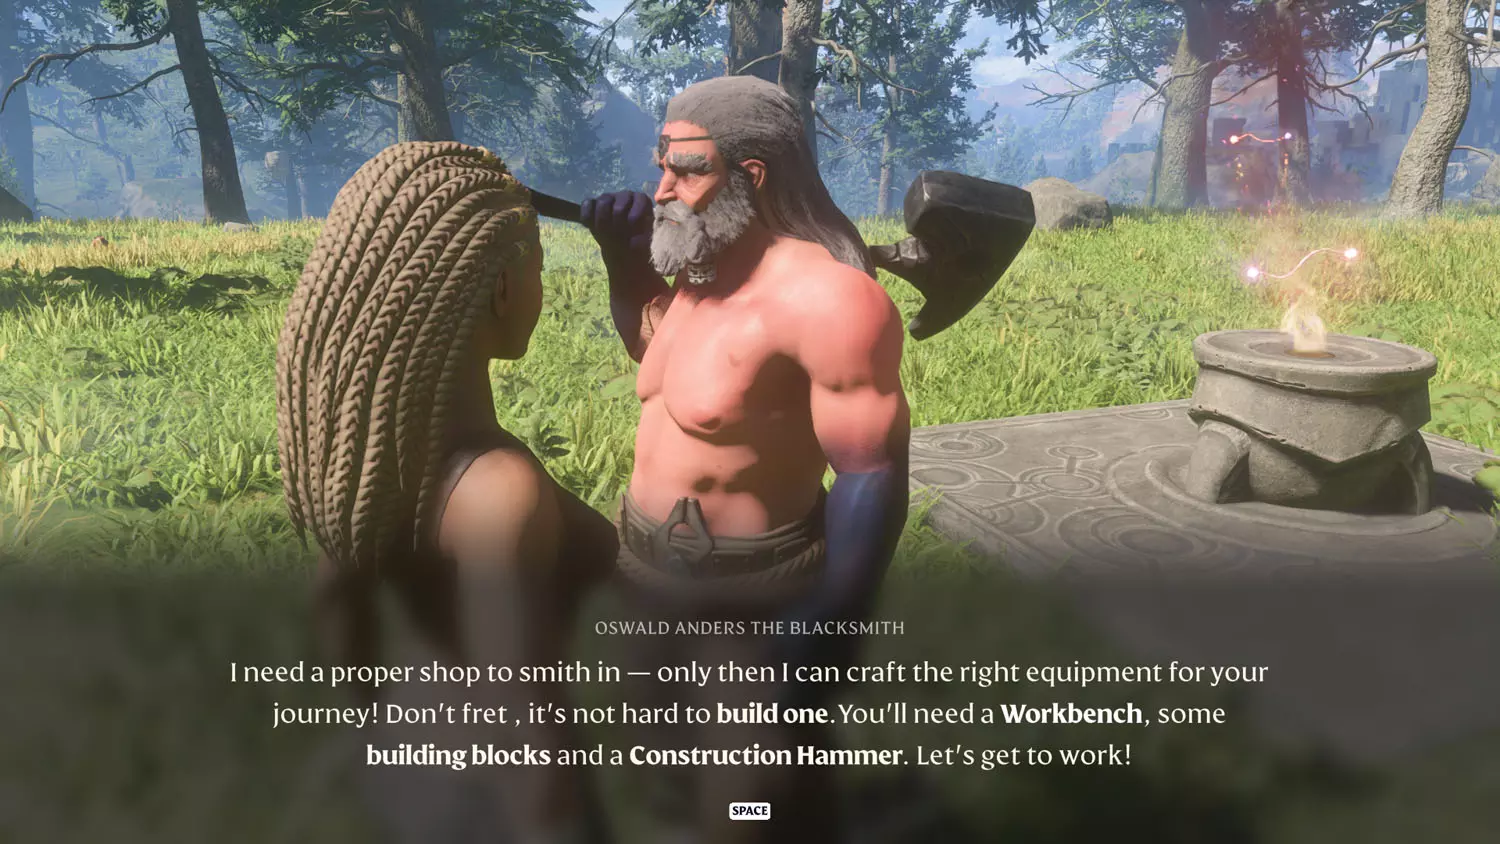
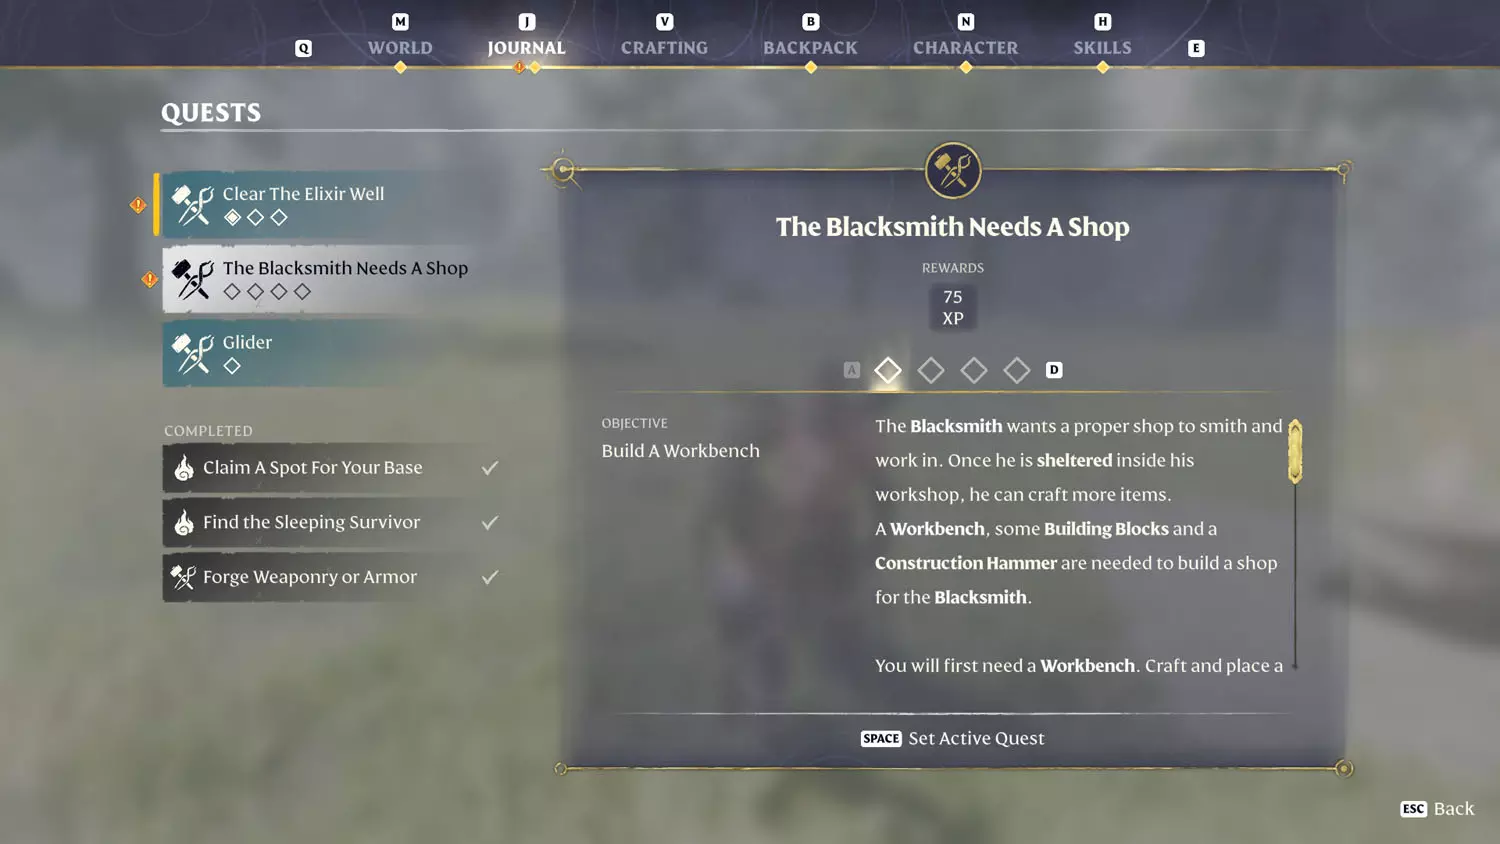
Crafting a workbench and a hammer will complete the first three parts of this quest.
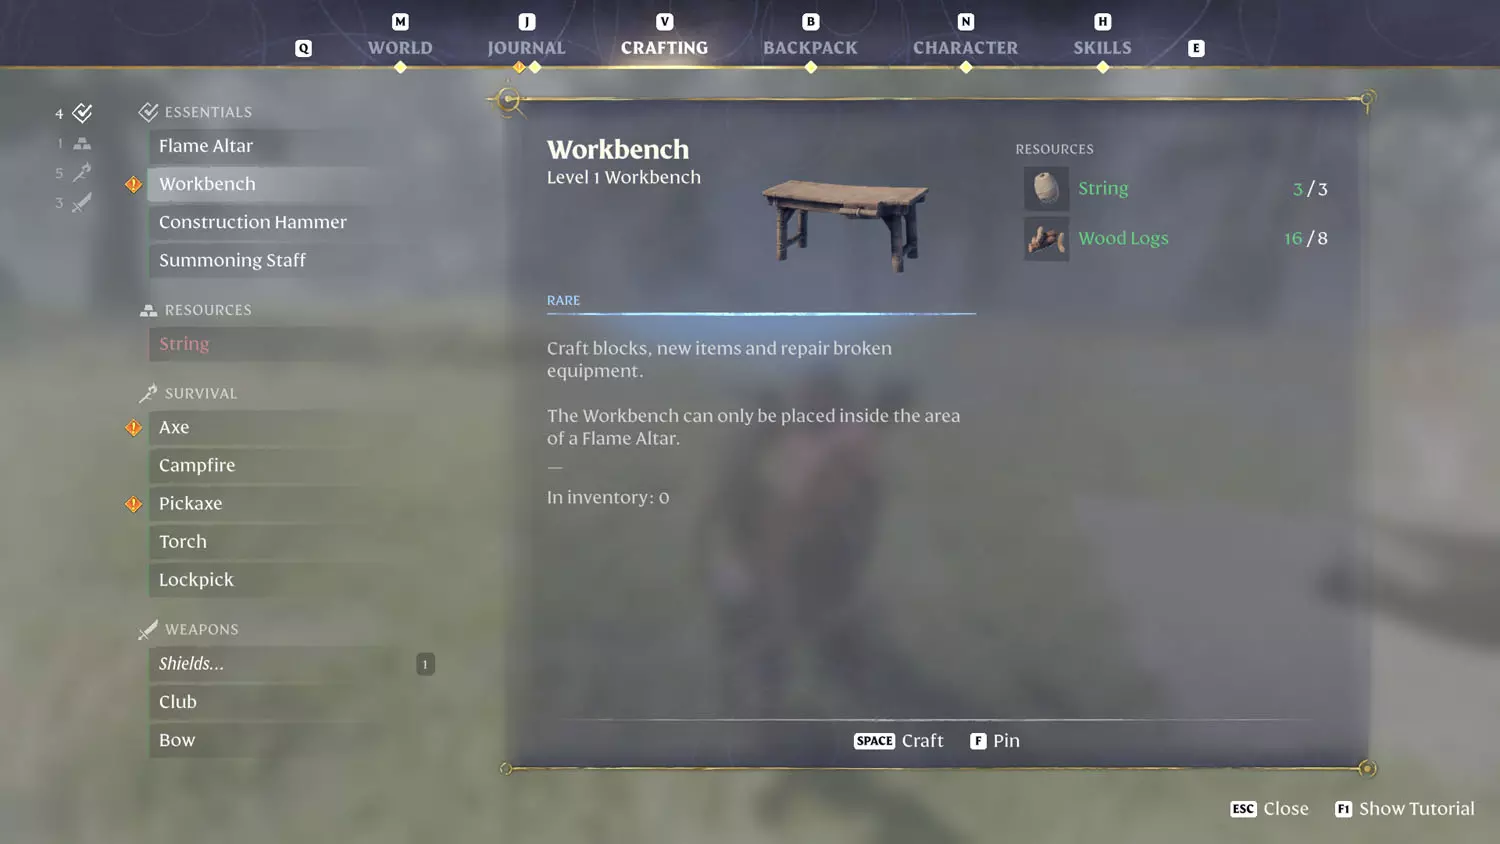
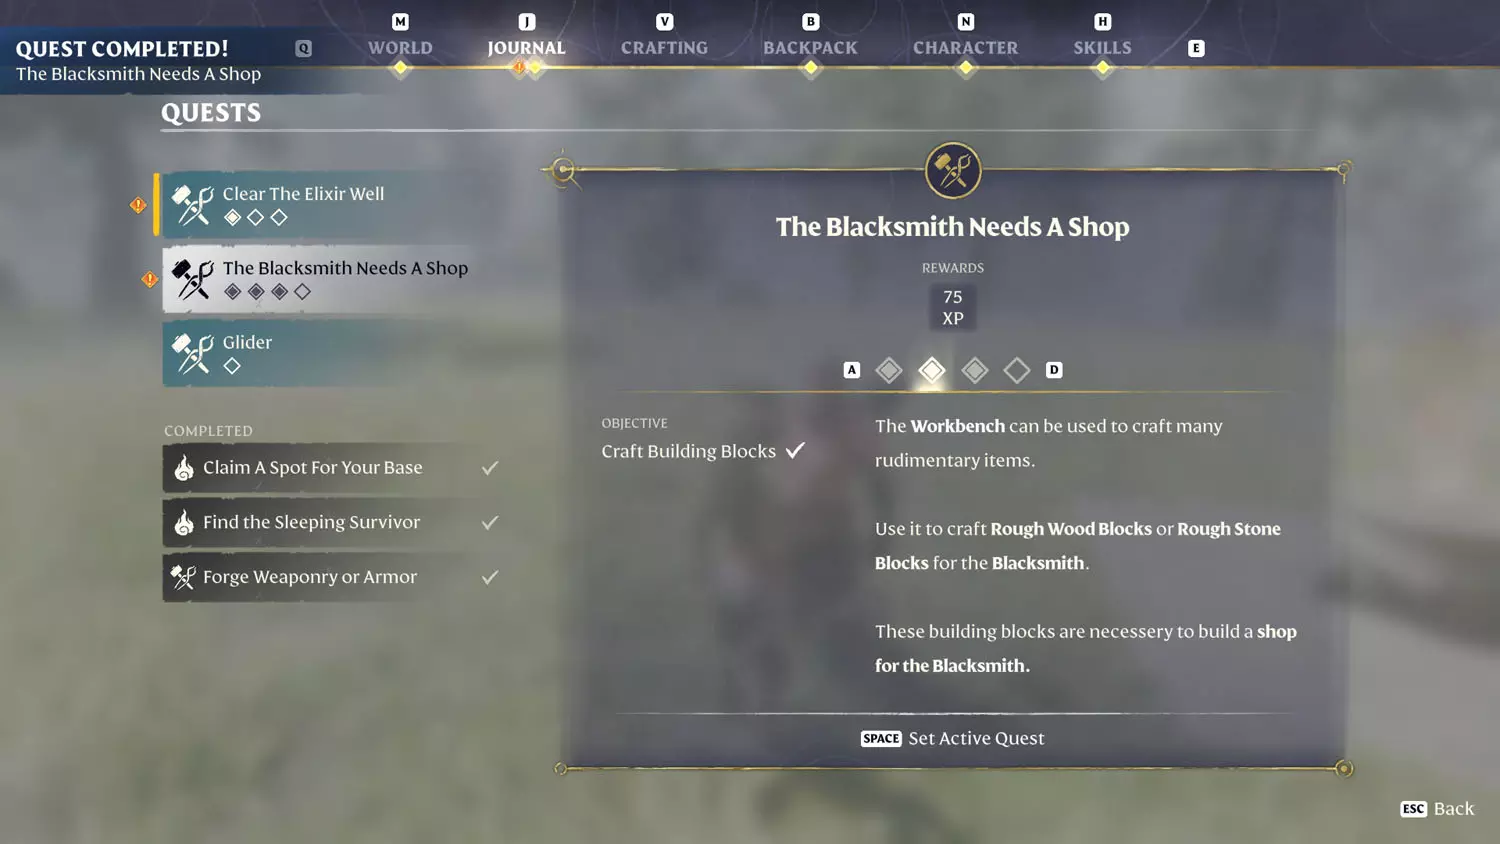

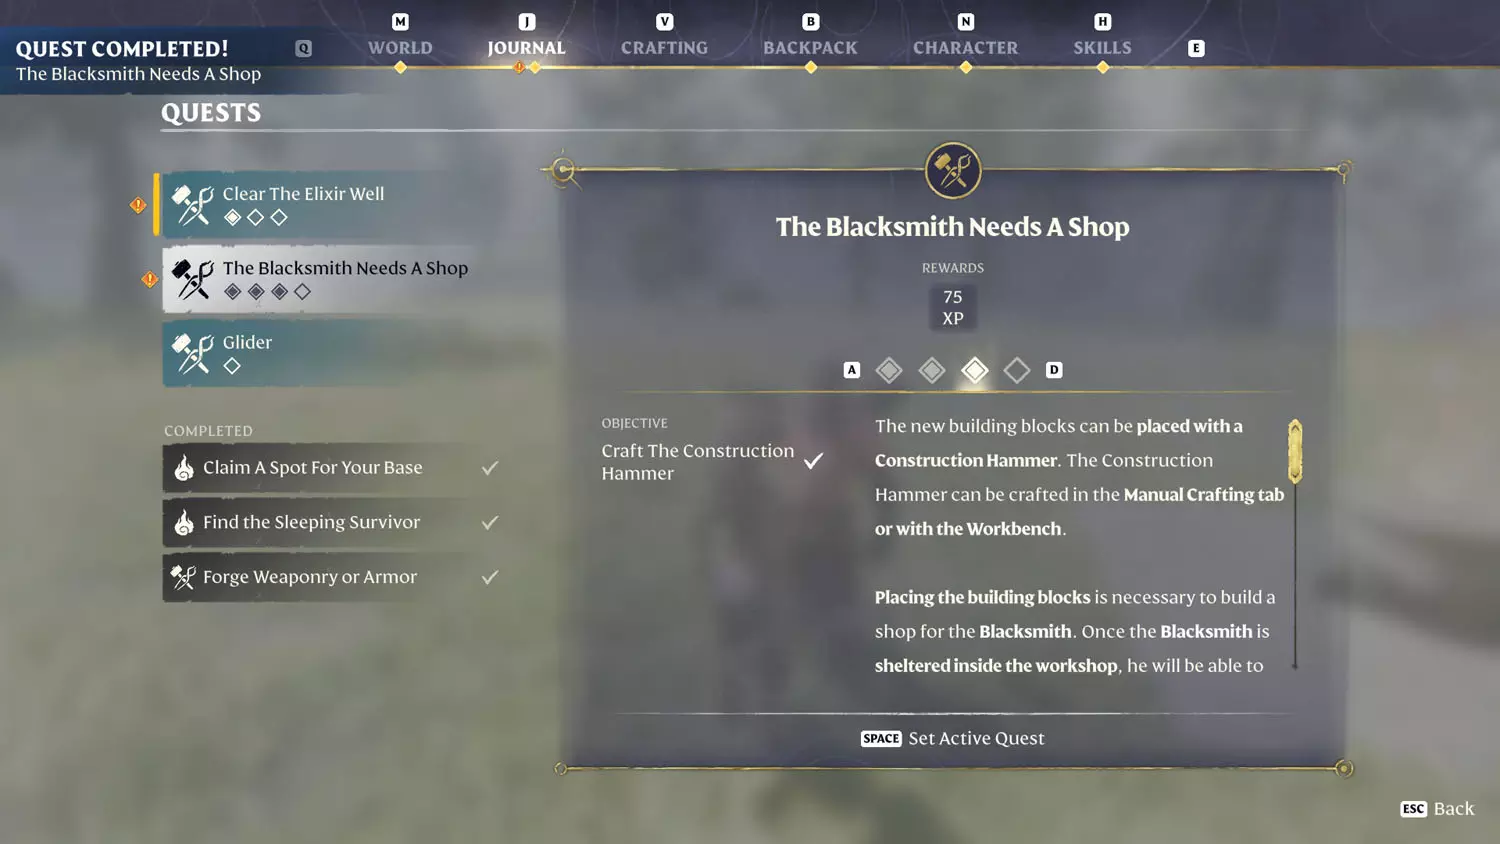
After that, craft some building blocks and make a rudimentary structure - floor, wall, roof. This should be enough to satisfy the requirements. Just make sure to place the Blacksmith inside to finish the quest!
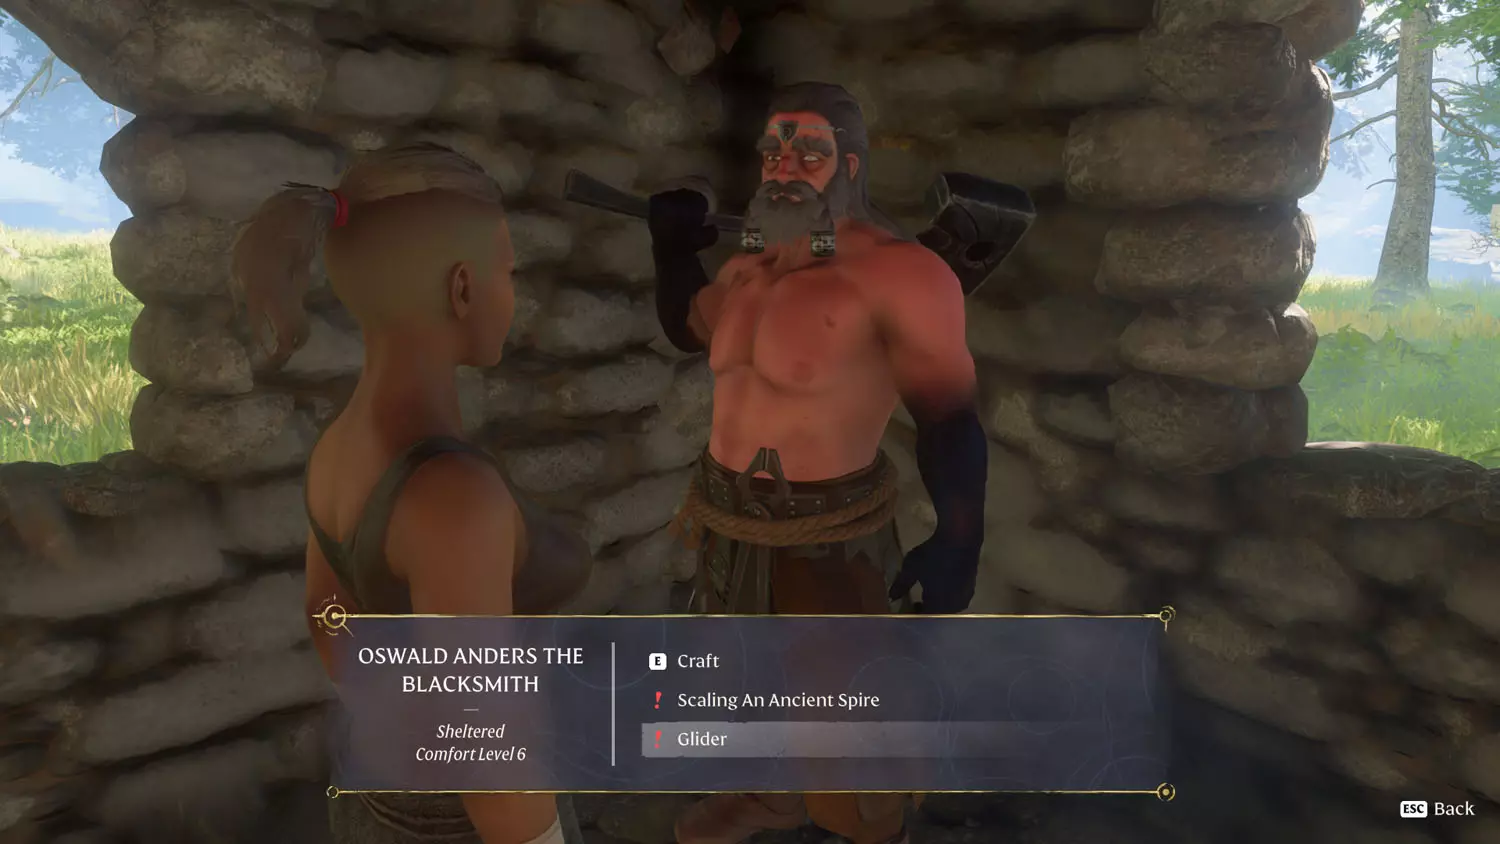
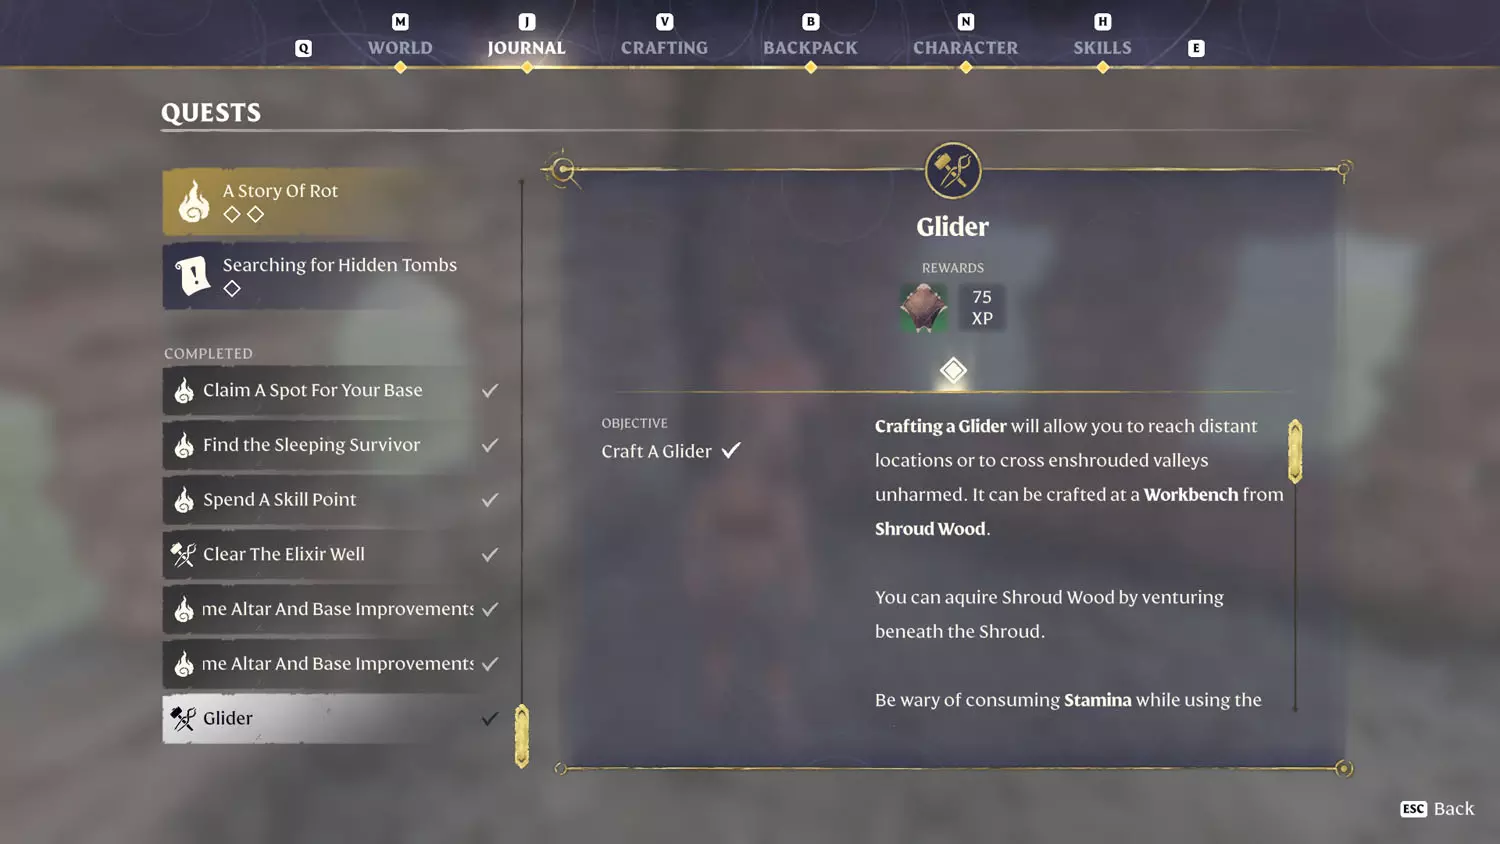
Glider
The Glider can be crafter before activating this quest, but if you haven’t done it yet, then talk to the Blacksmith. If you’ve explored enough, he’ll tell you to craft it.
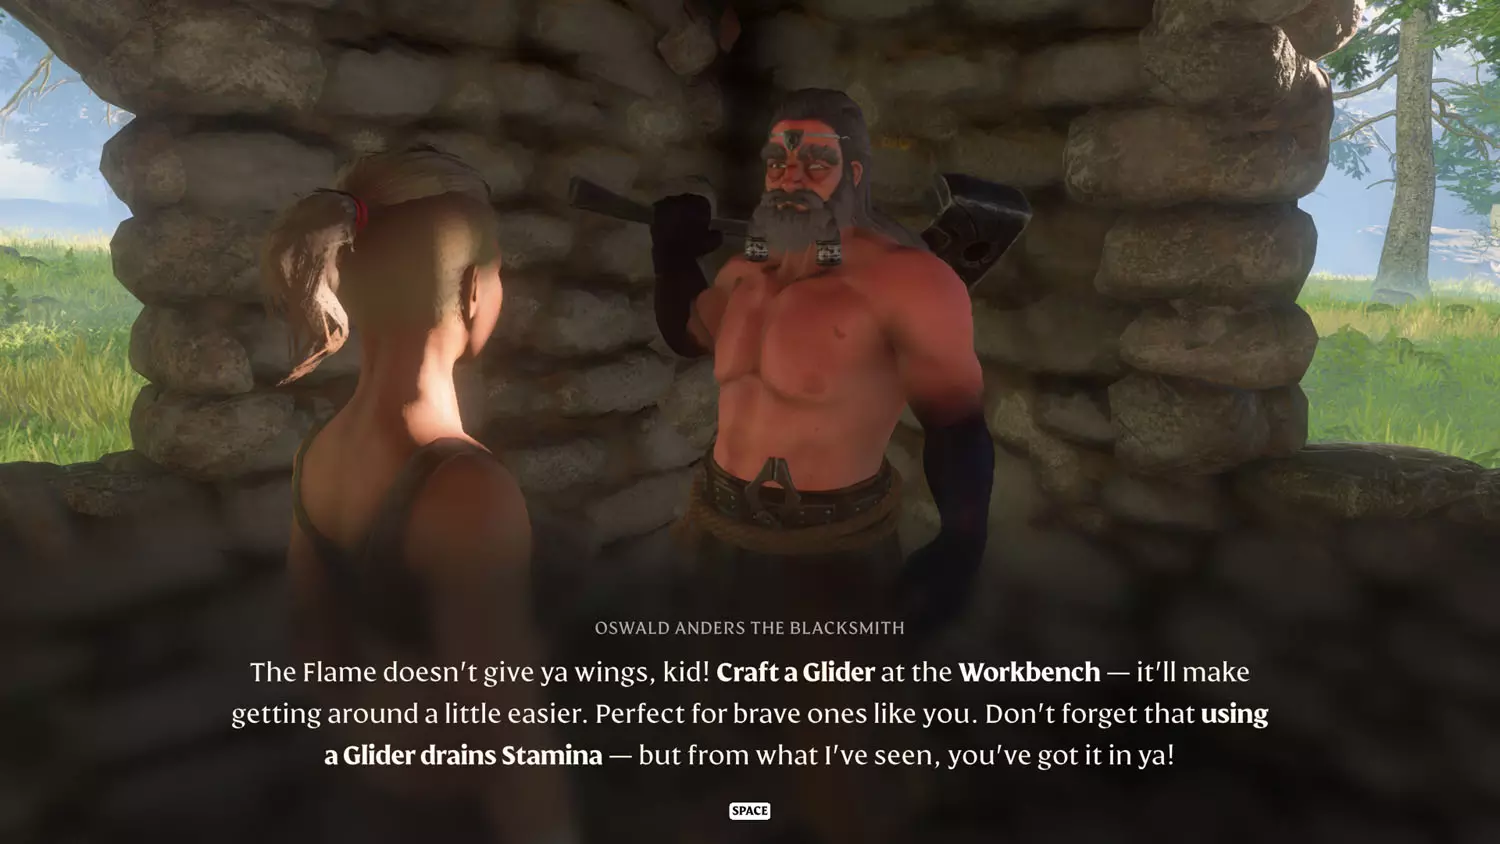
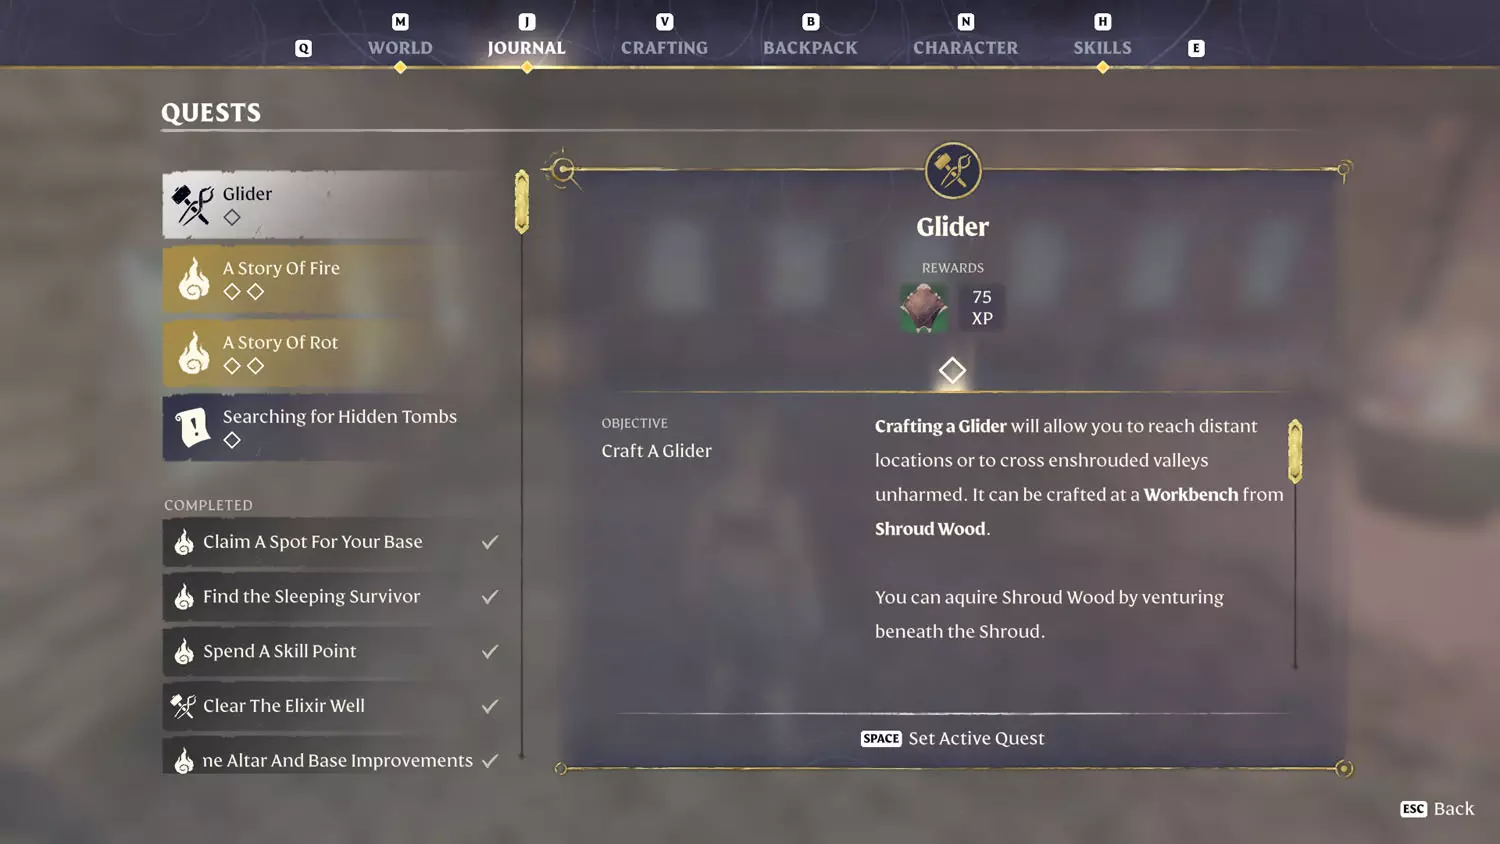
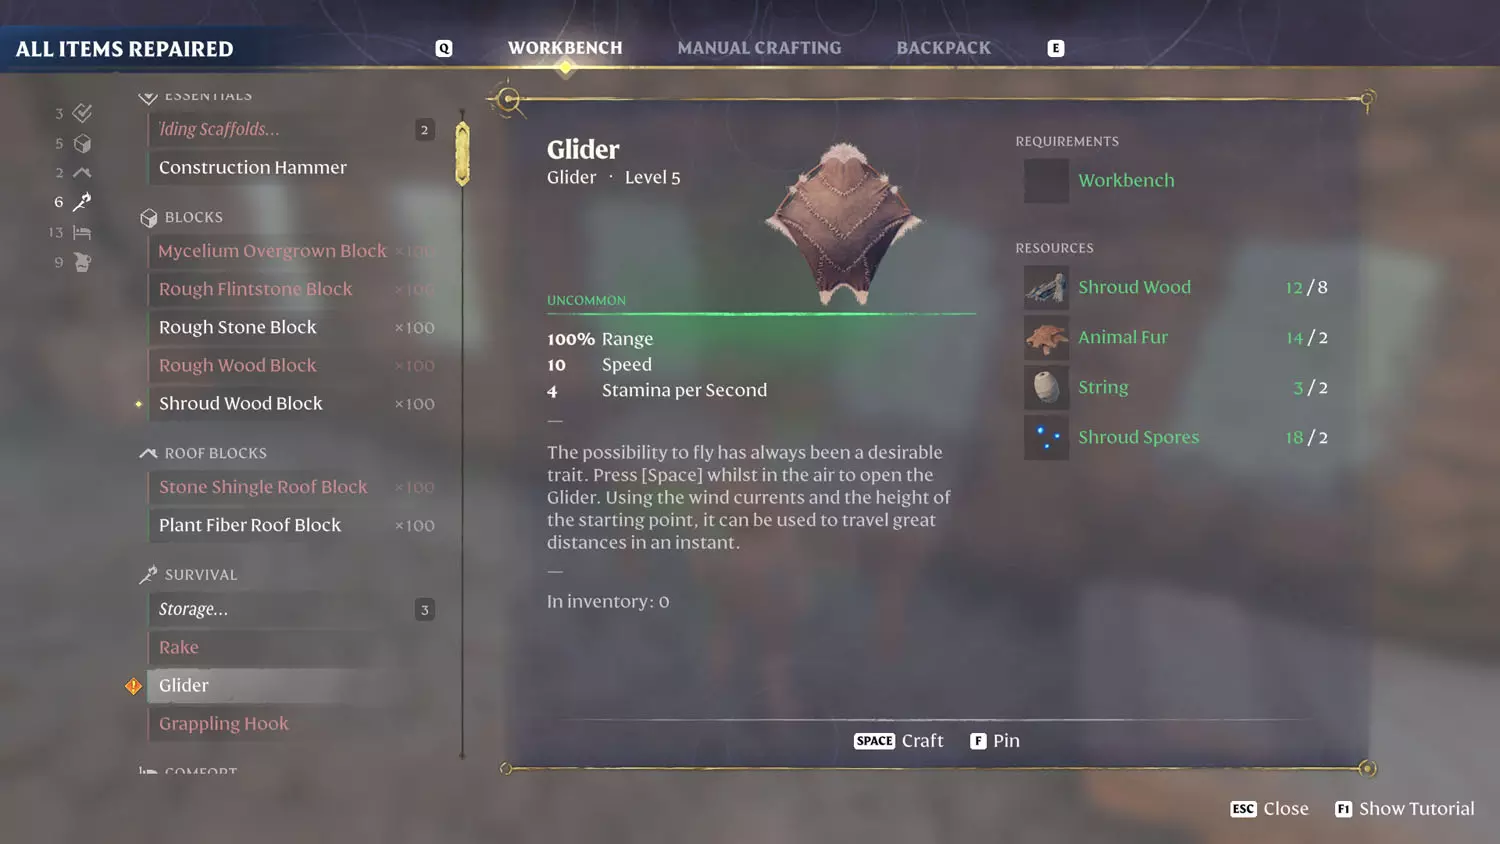
Head over to your Workbench, and craft a Glider, or at least see what you need to make one. Quest complete! Just don’t forget to equip it :)
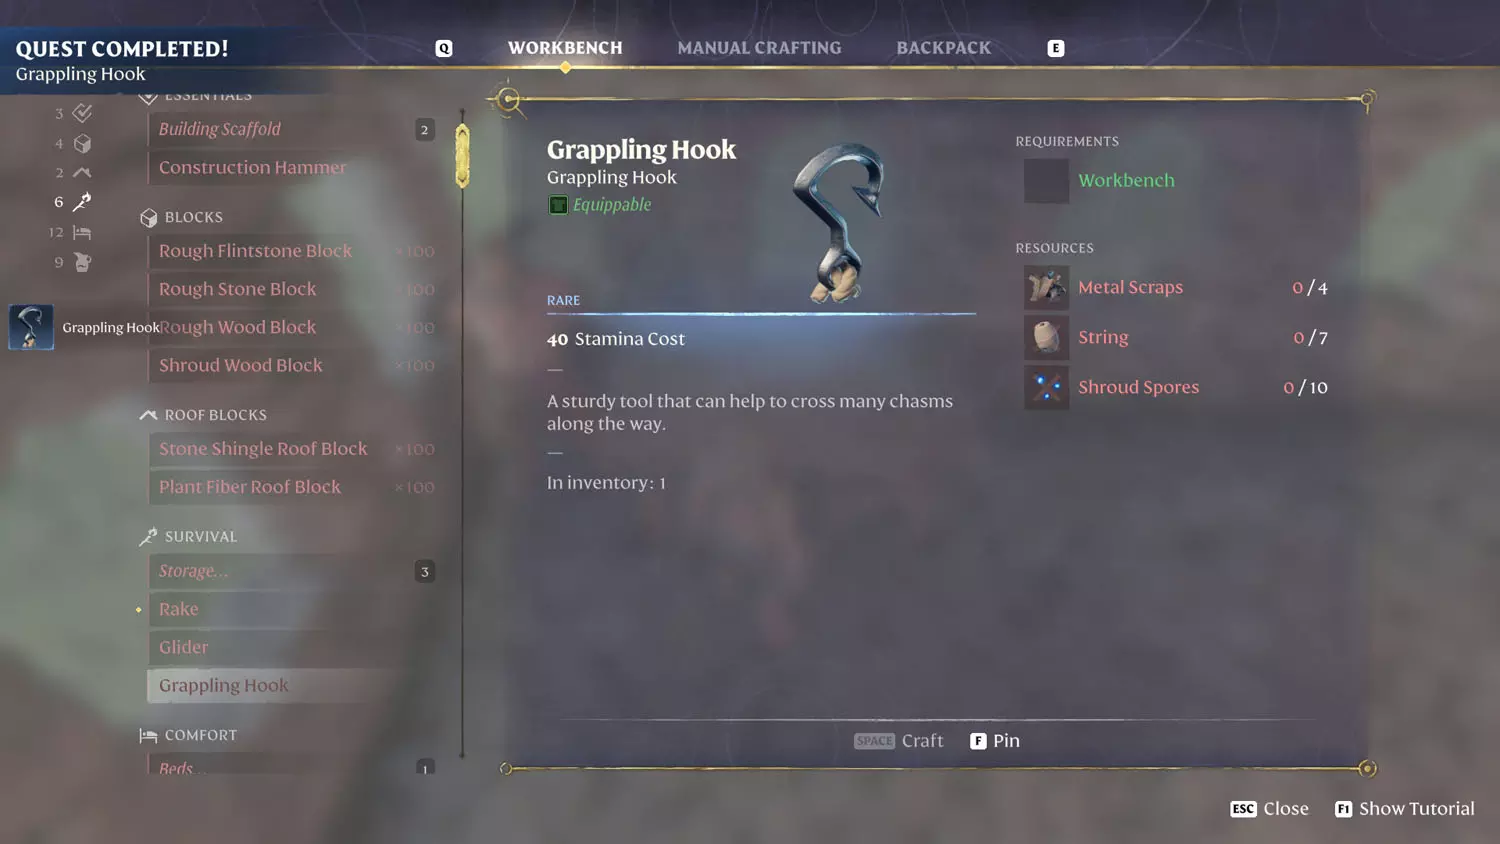
TIP: Shroud Wood comes from chopping down trees located in the Shroud. Animal Fur comes from slaying and looting animals. String comes from Plant Fiber (Manual Crafting Tab lets you craft String). Shroud Spores come from Shroud enemies (random loot drop).
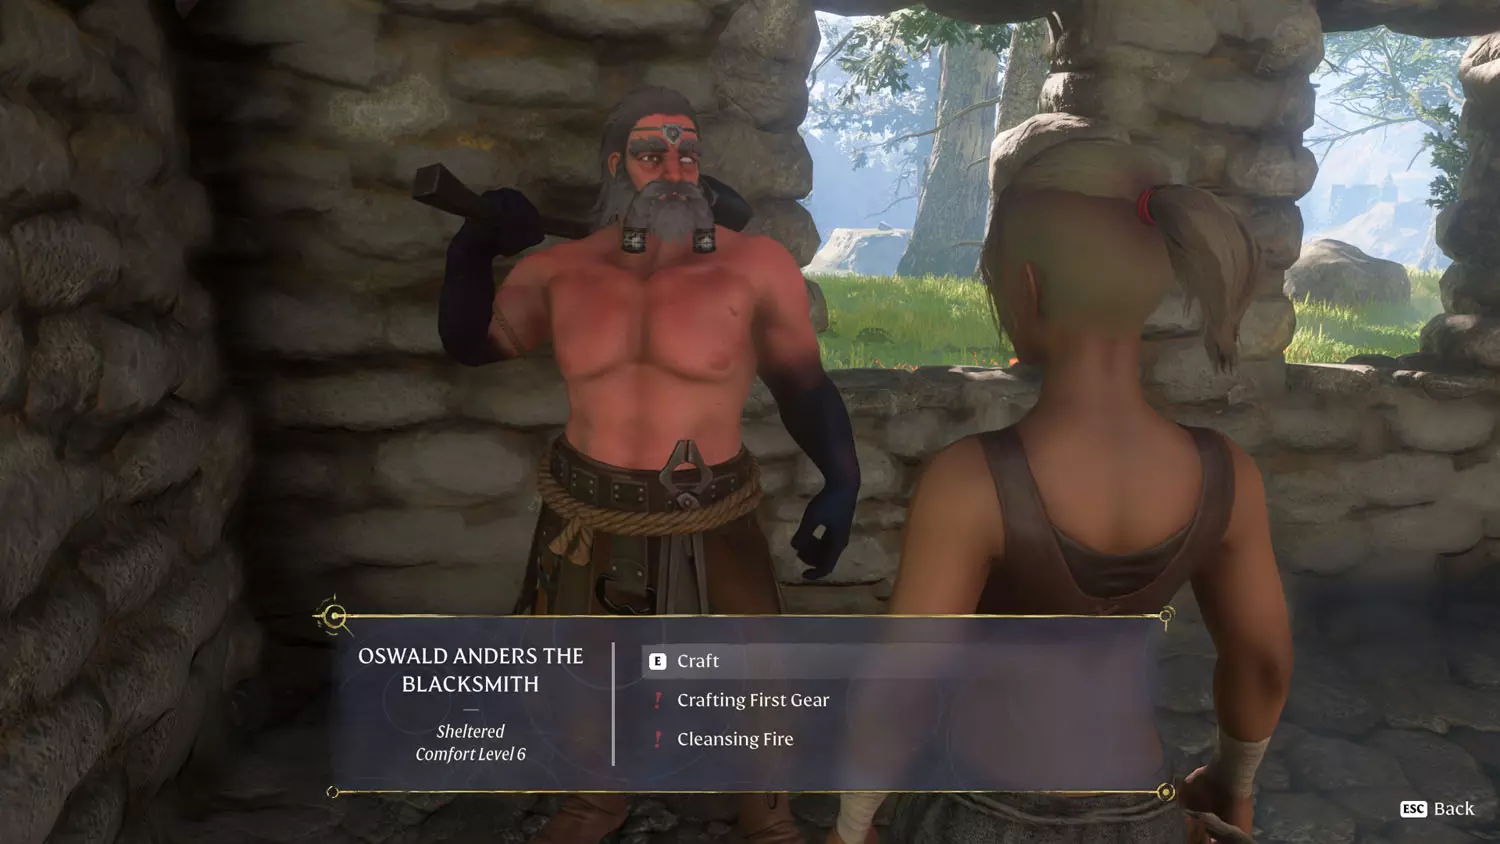
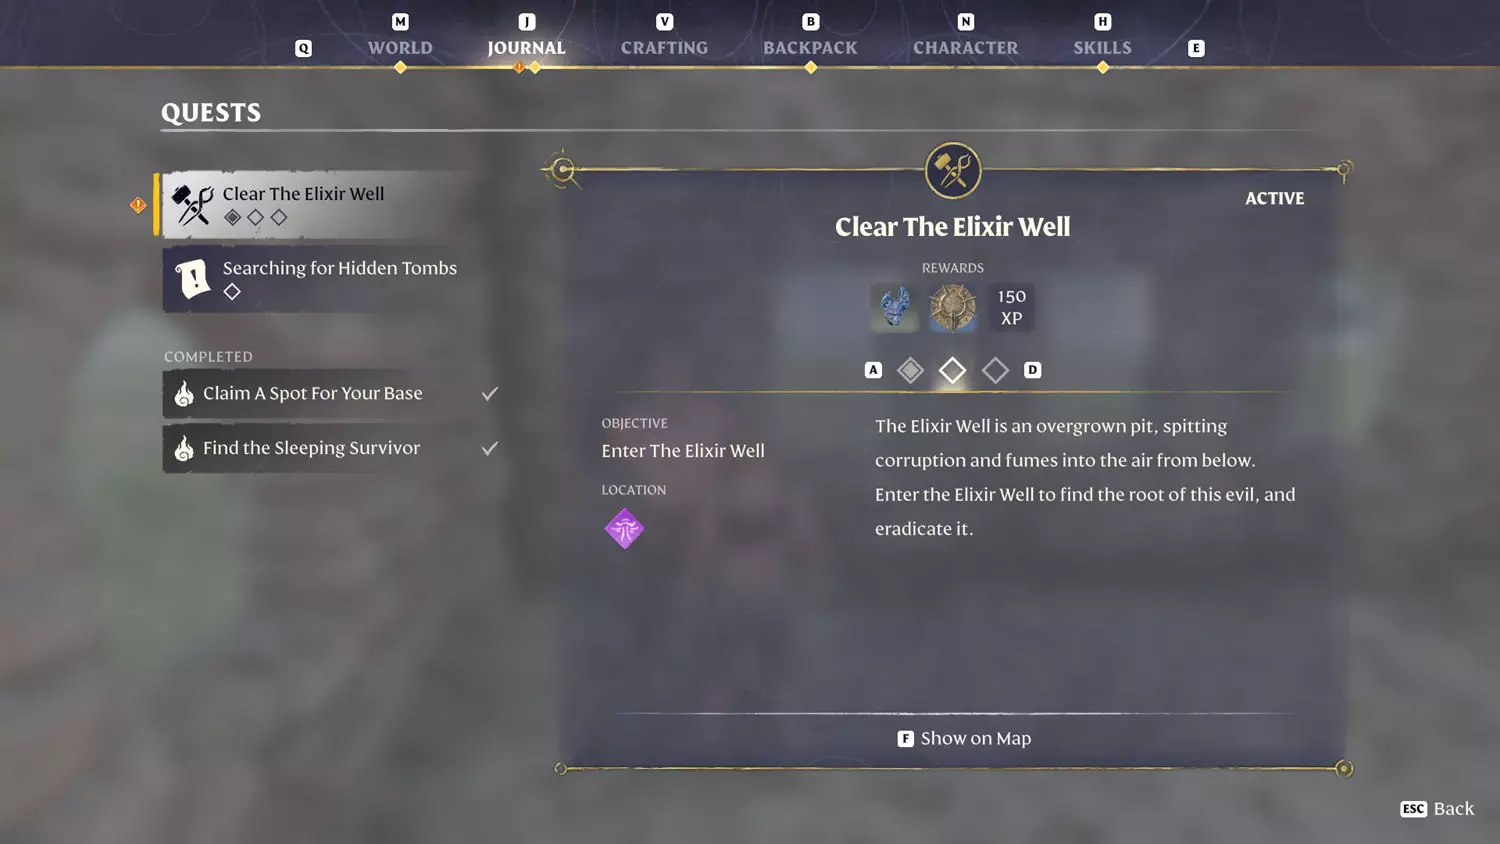
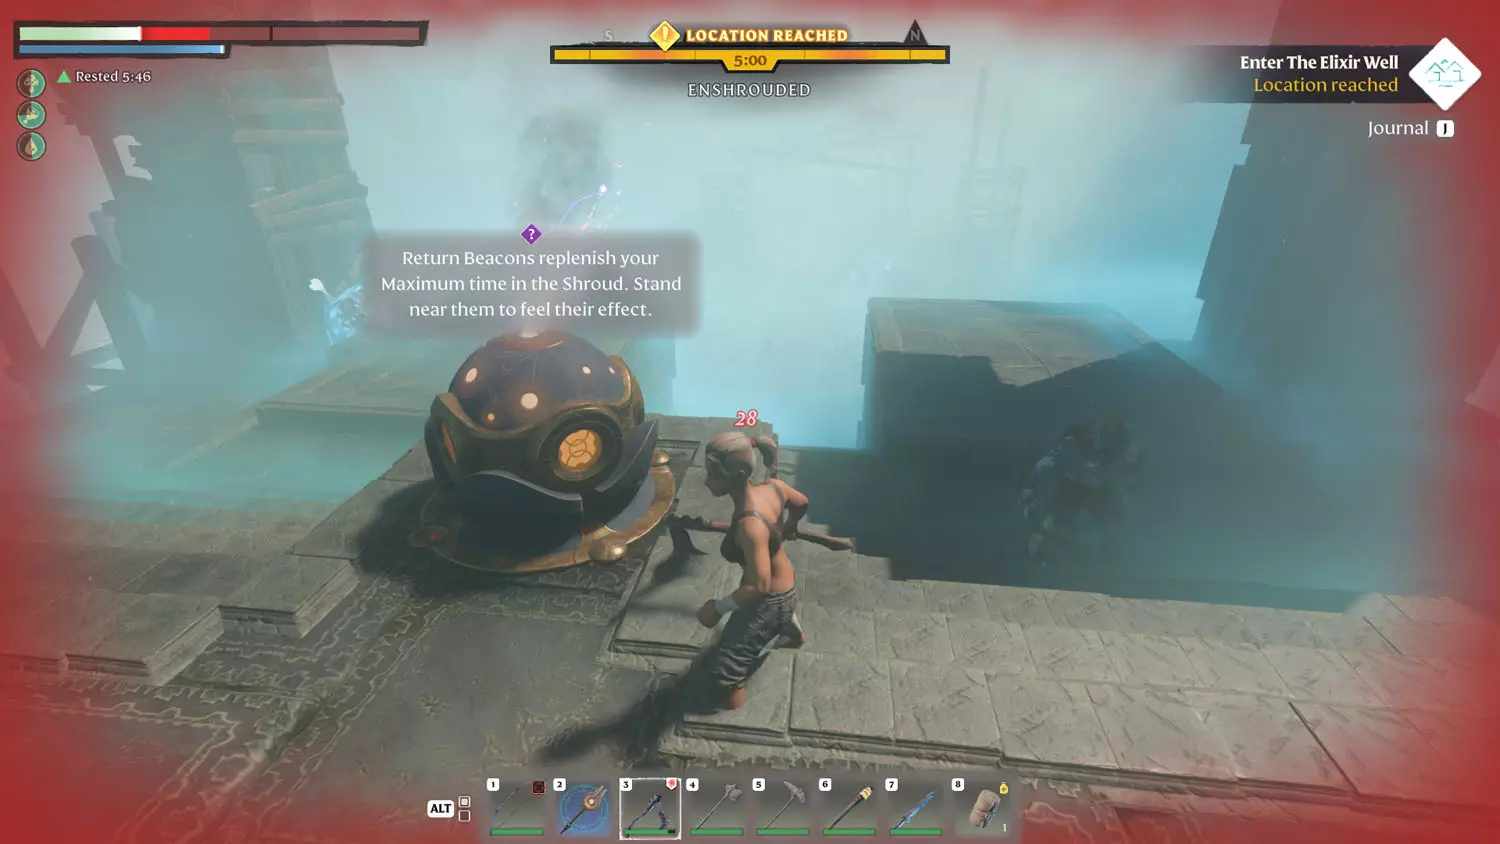
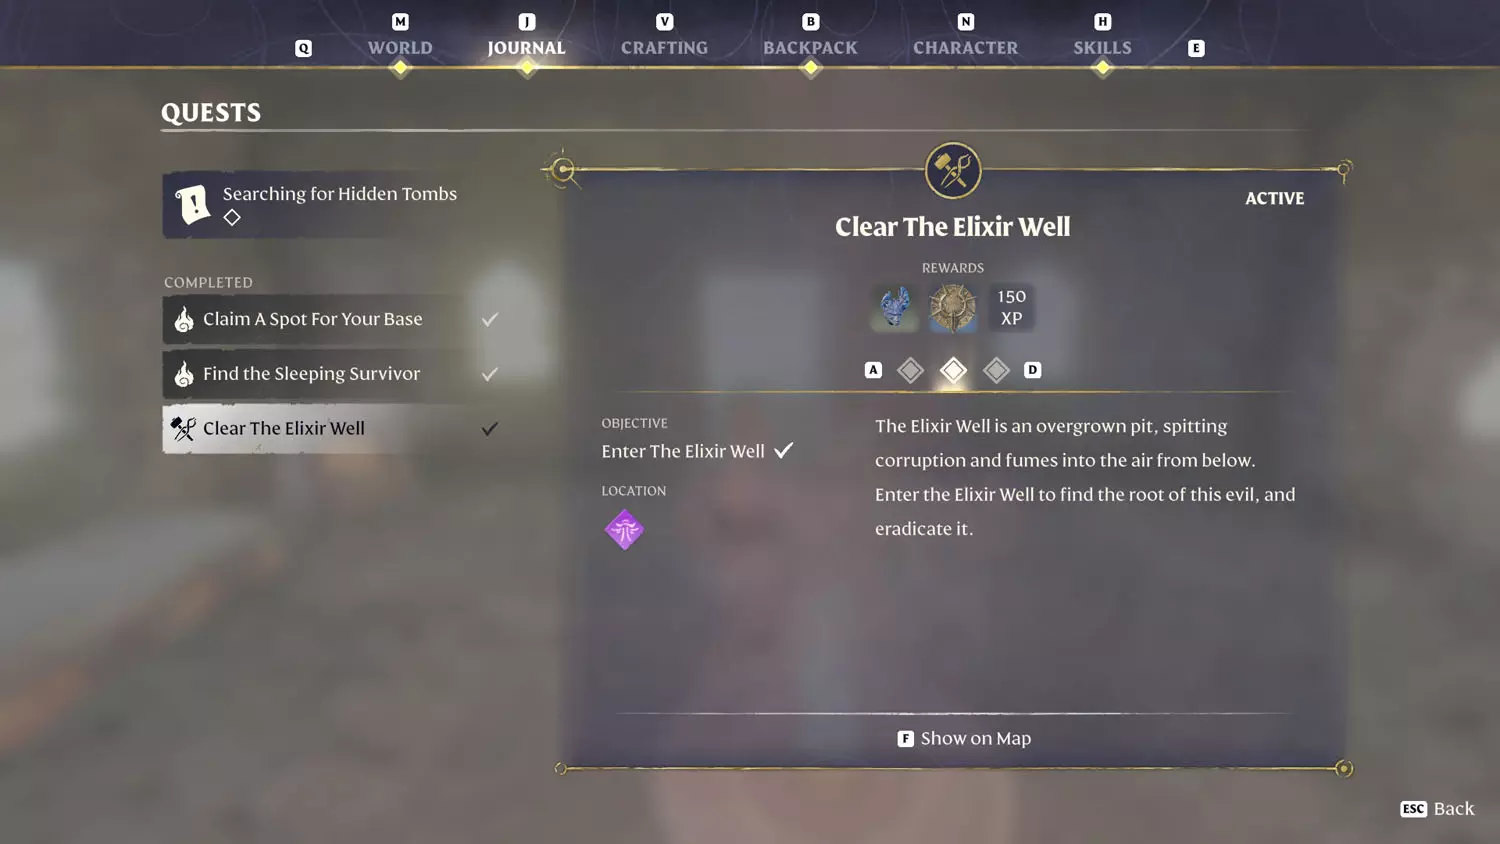
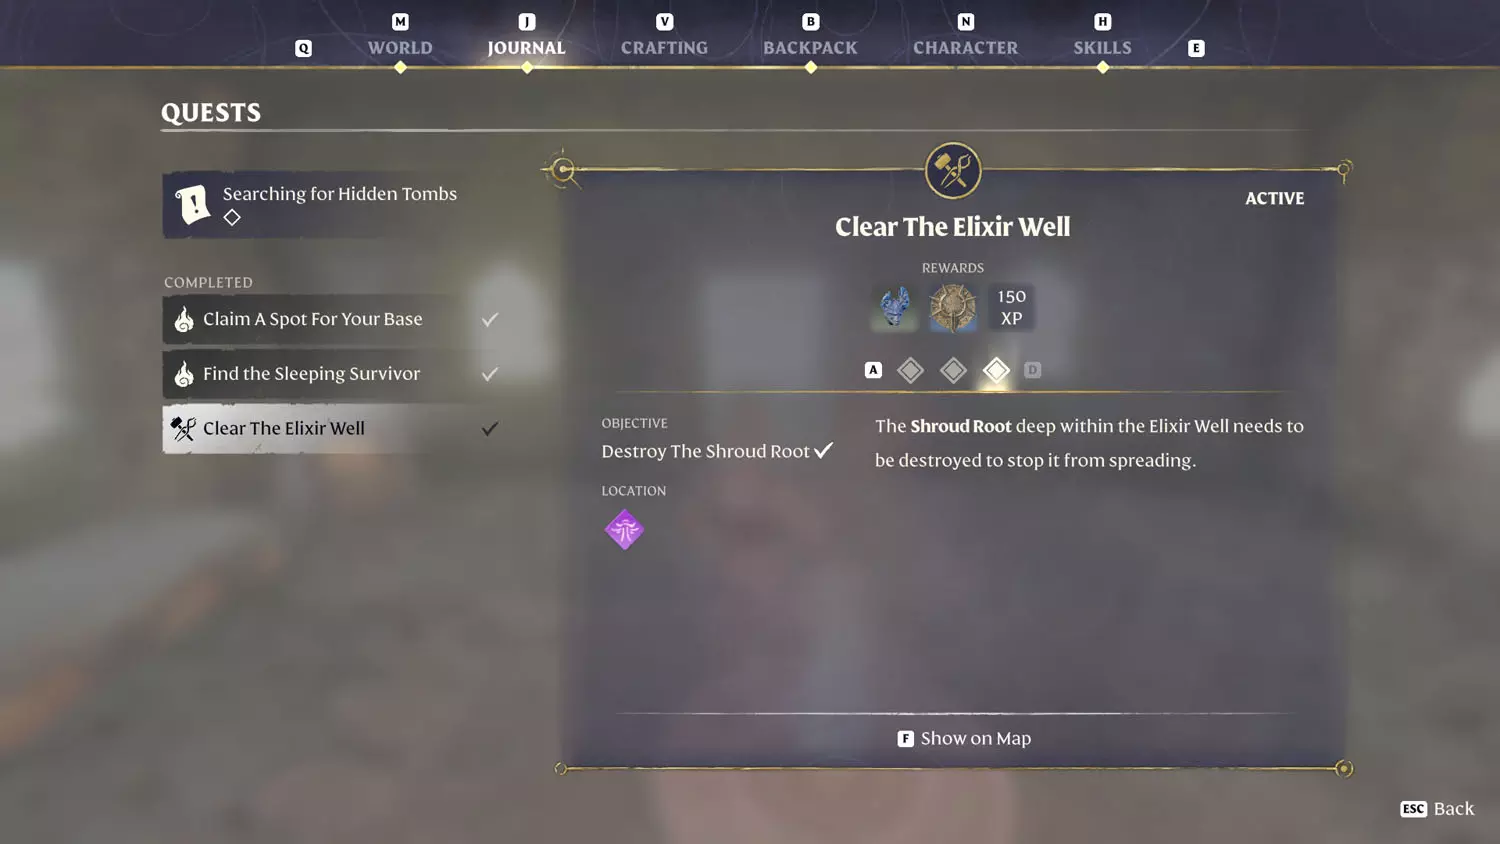
Clear The Elixir Well
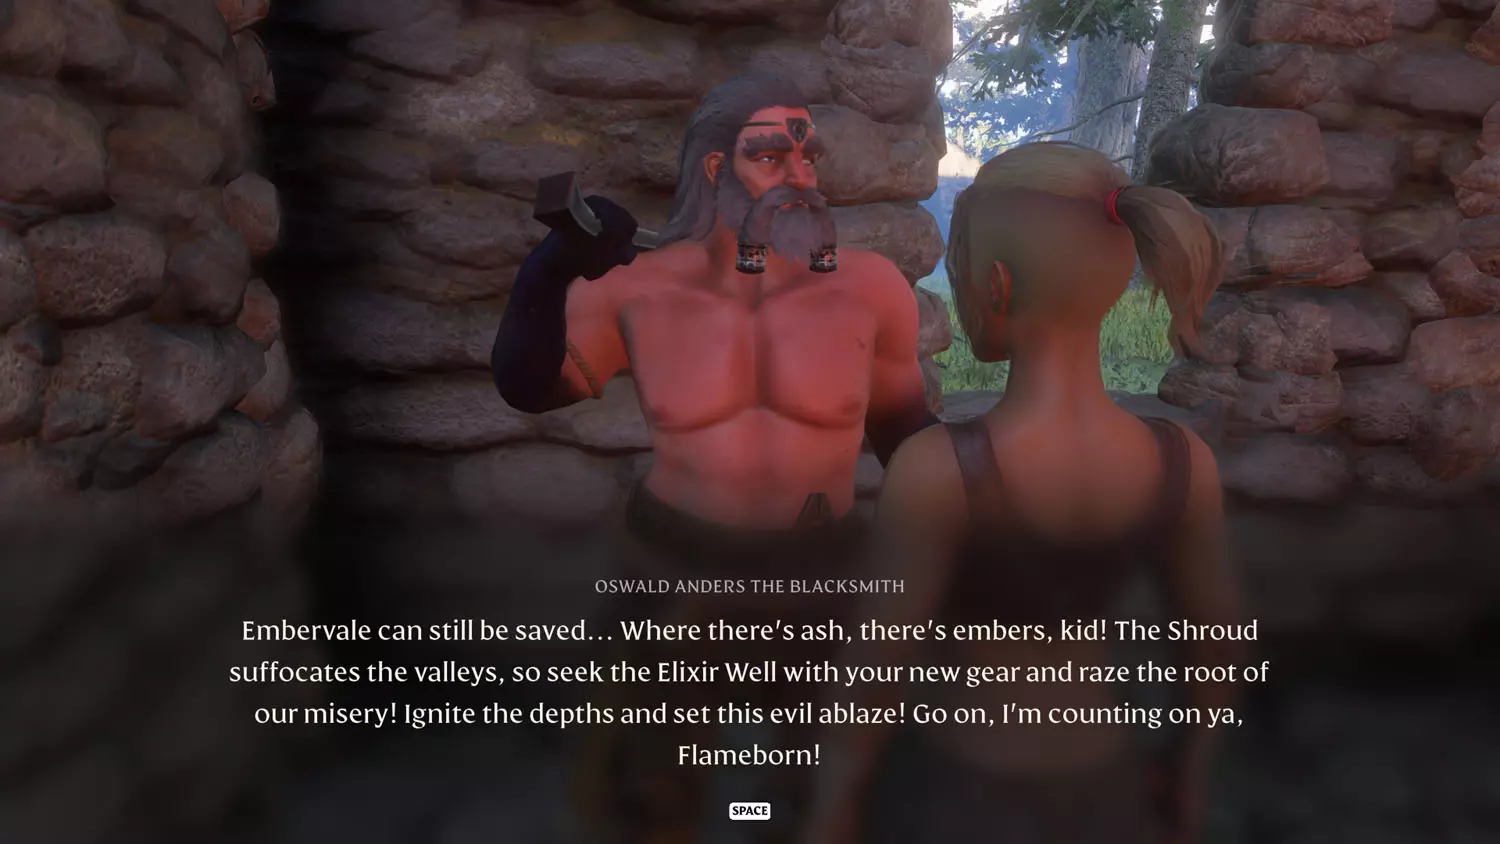
After obtaining Oswald Anders the Blacksmith, you can start this quest by choosing the “Cleansing Fire” dialogue option. This will start the quest and complete its first phase of three.
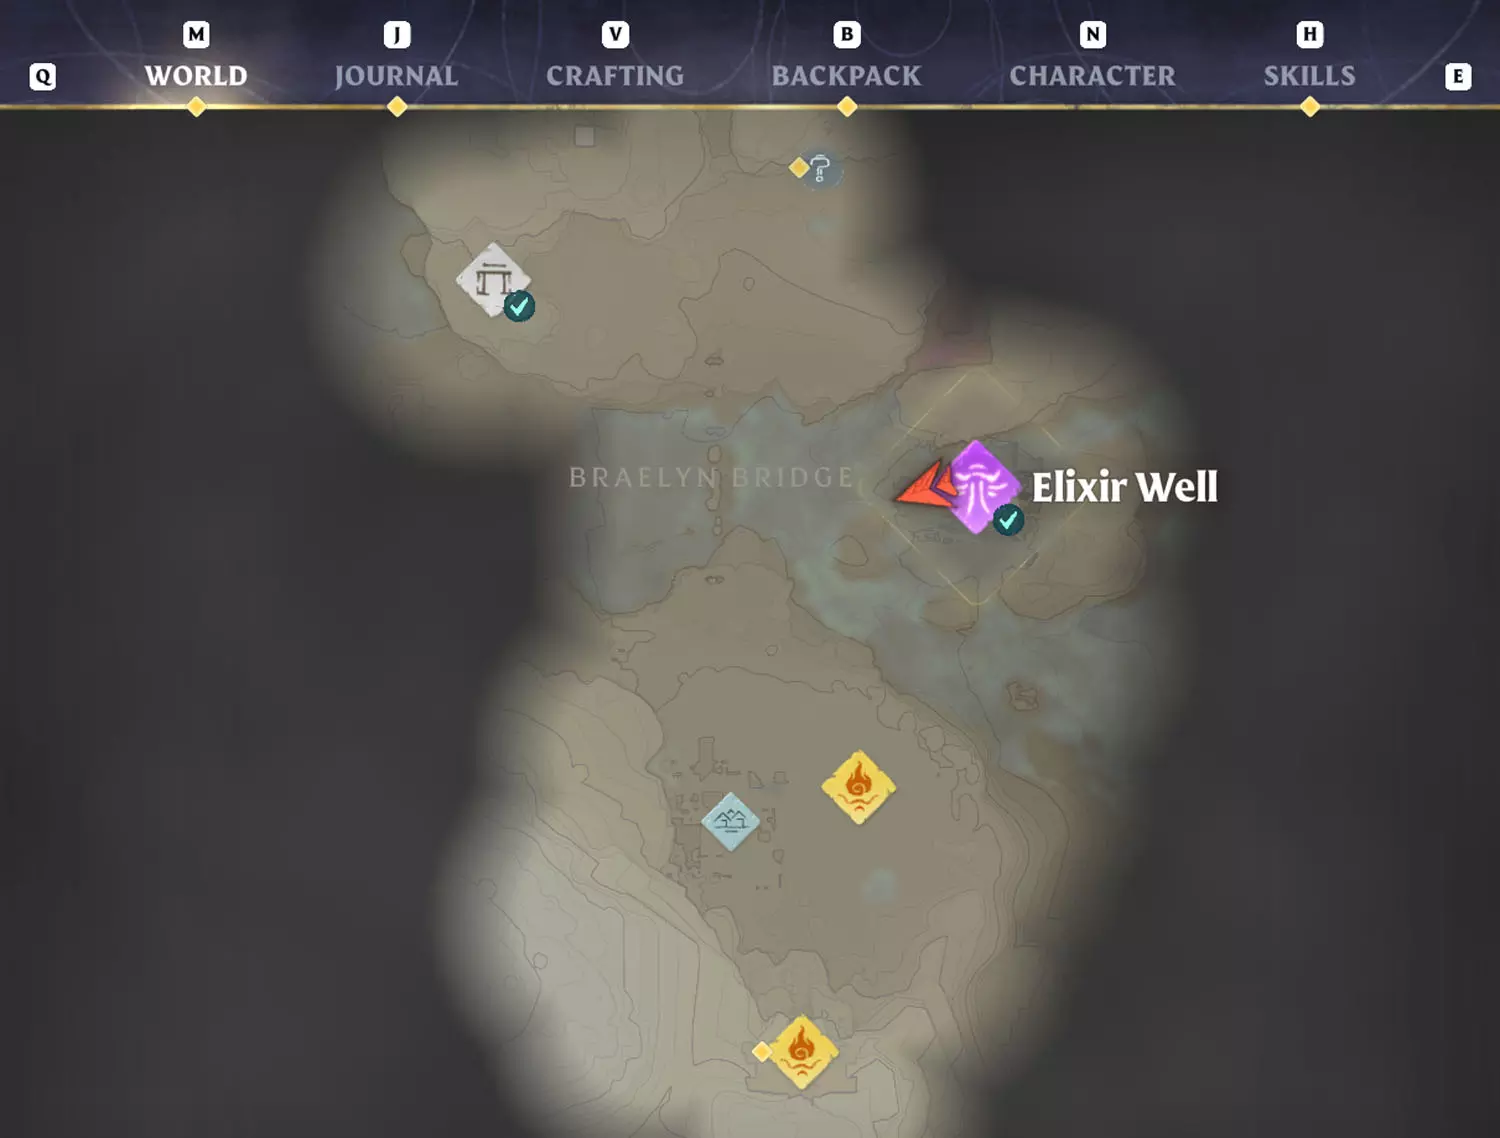
From there, pop open your map, if you want, and head out. (Just to get a general idea of the direction you’re going.) Then, head out for Braelyn Bridge. Don’t cross the bridge. Head right down the path into the Enshrouded area.
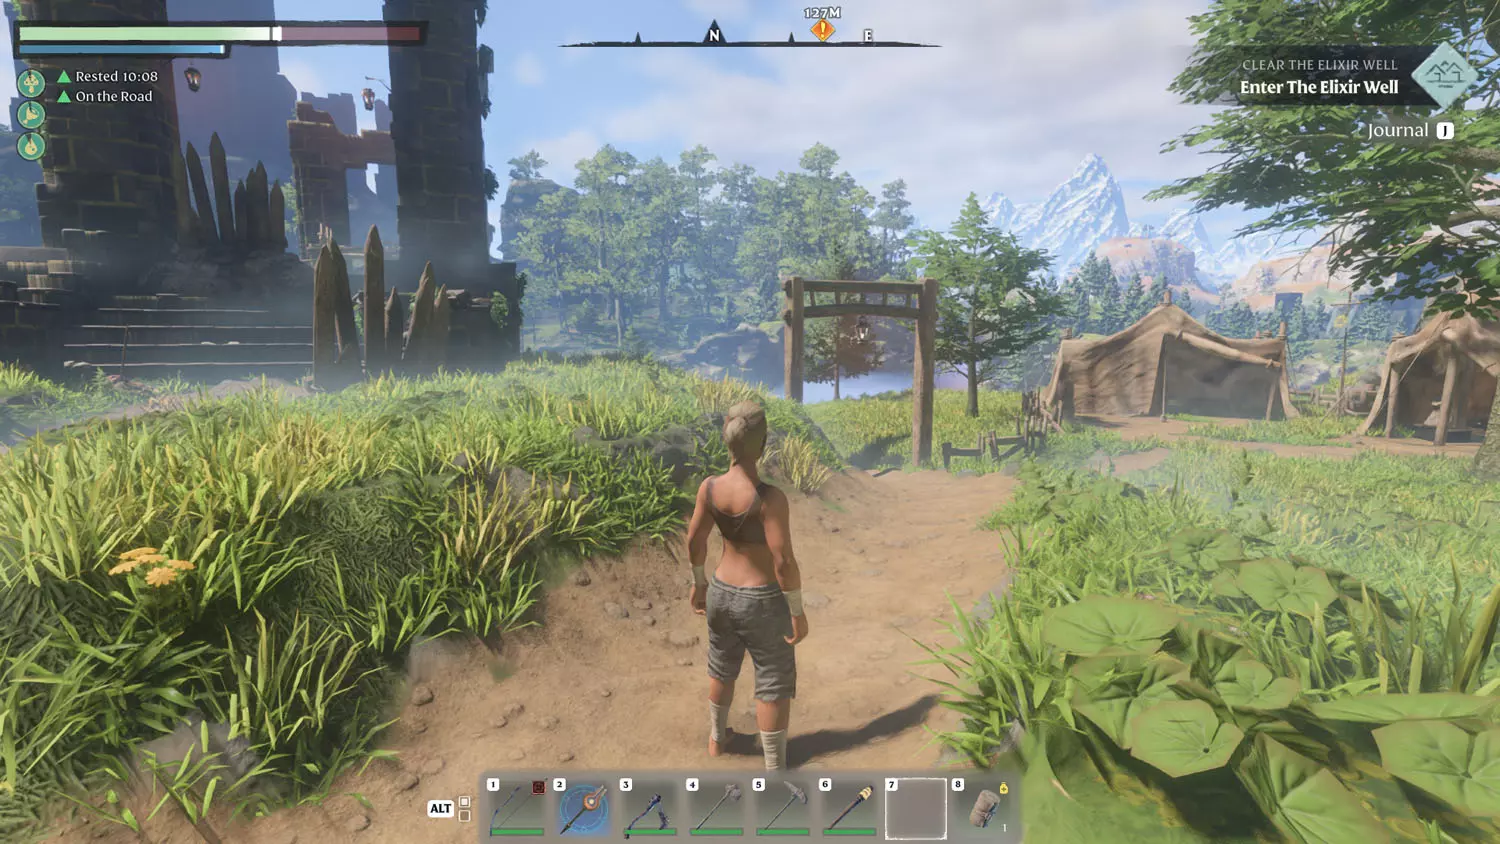
When you reach the first split in the road beside a tent, head right.
The path will split again, keep left.
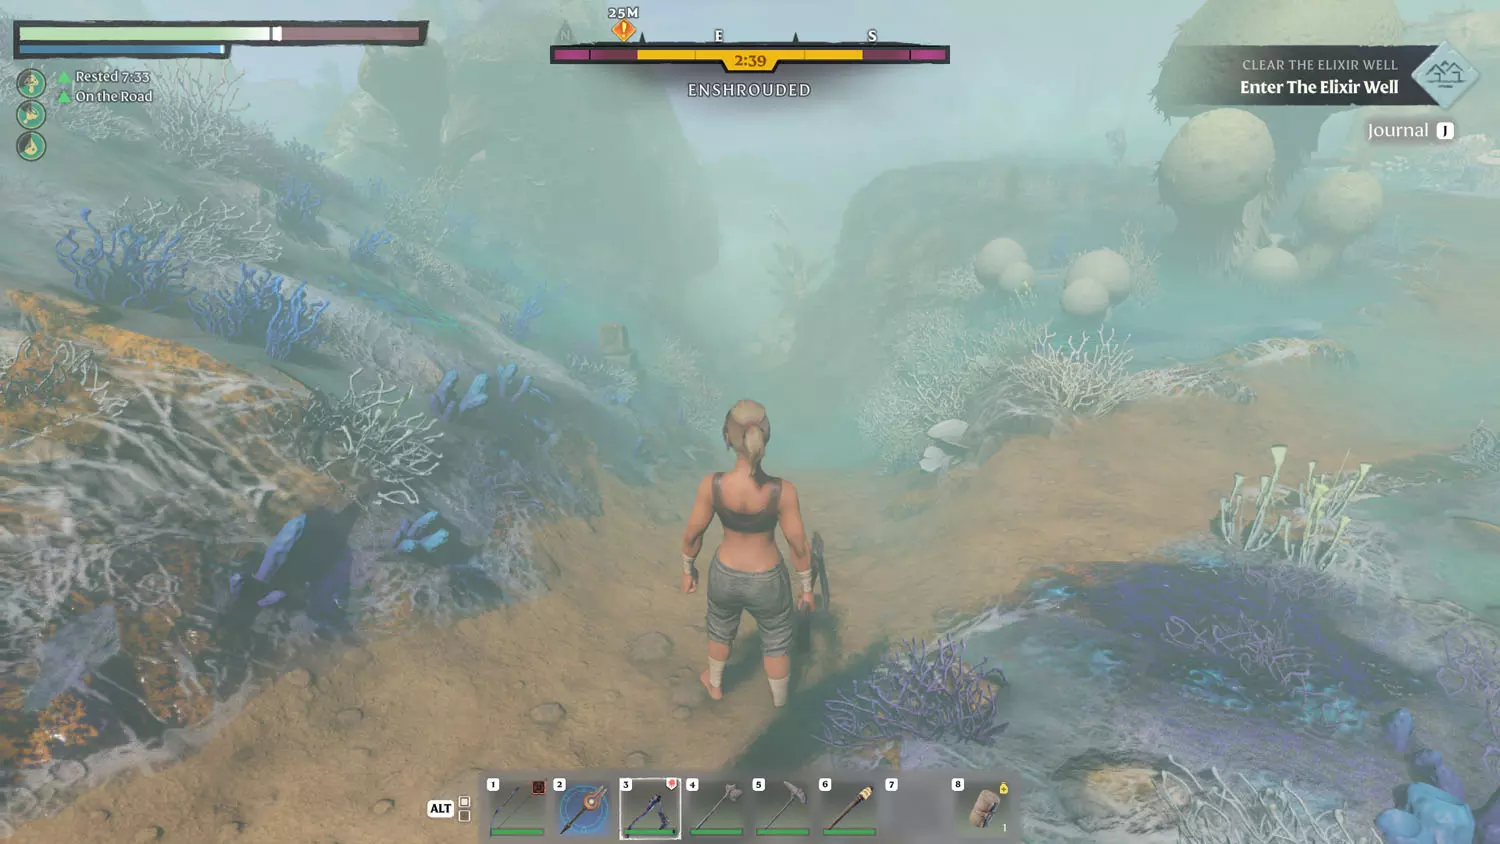
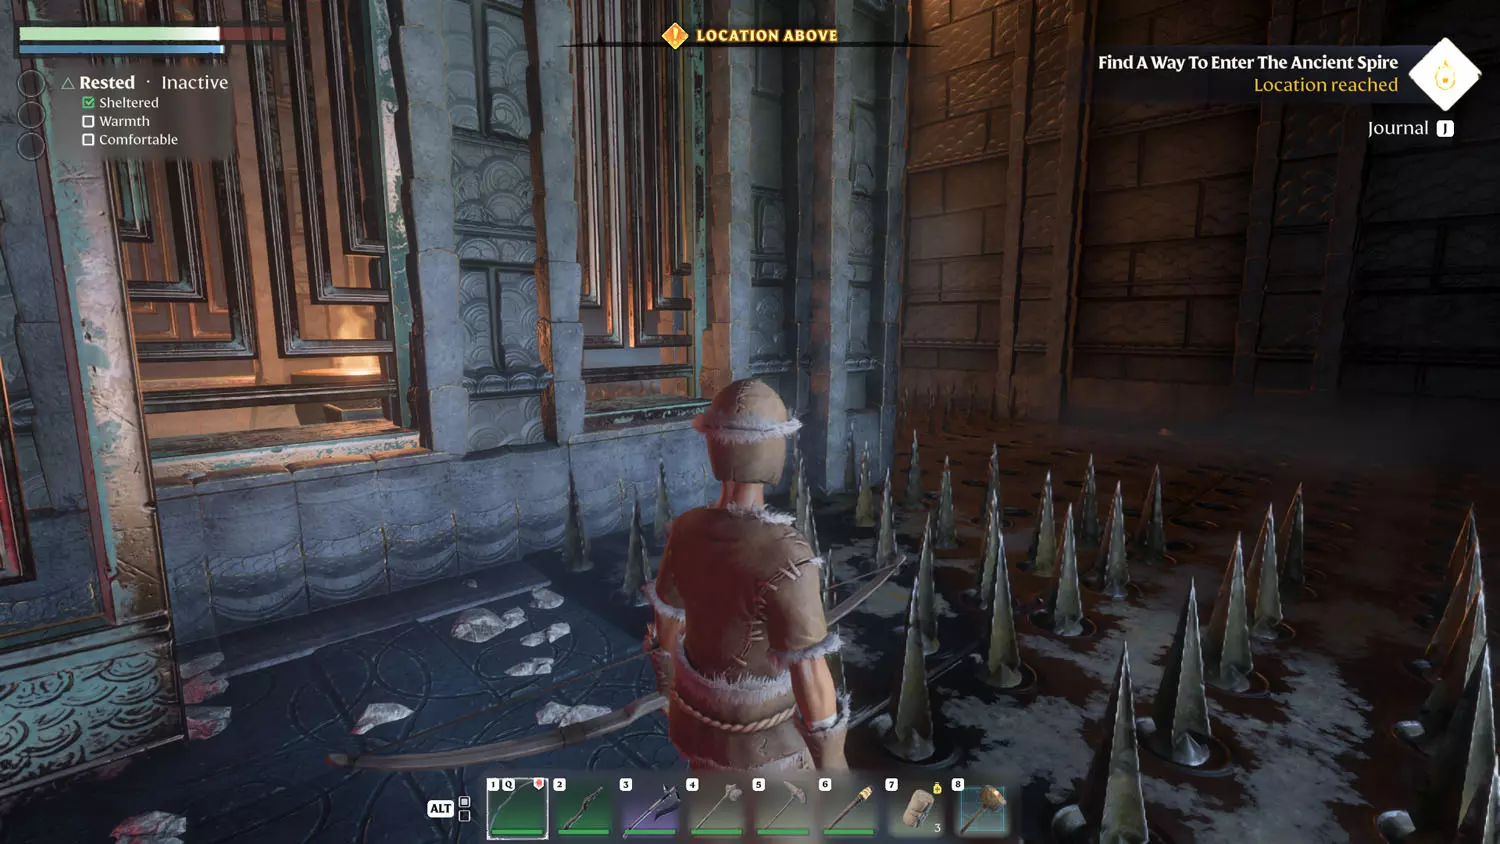
The path splits again at a tree trunk (screenshot is looking backwards so you can see both paths at once), head left toward the Elixir Well located at the top of the hill.
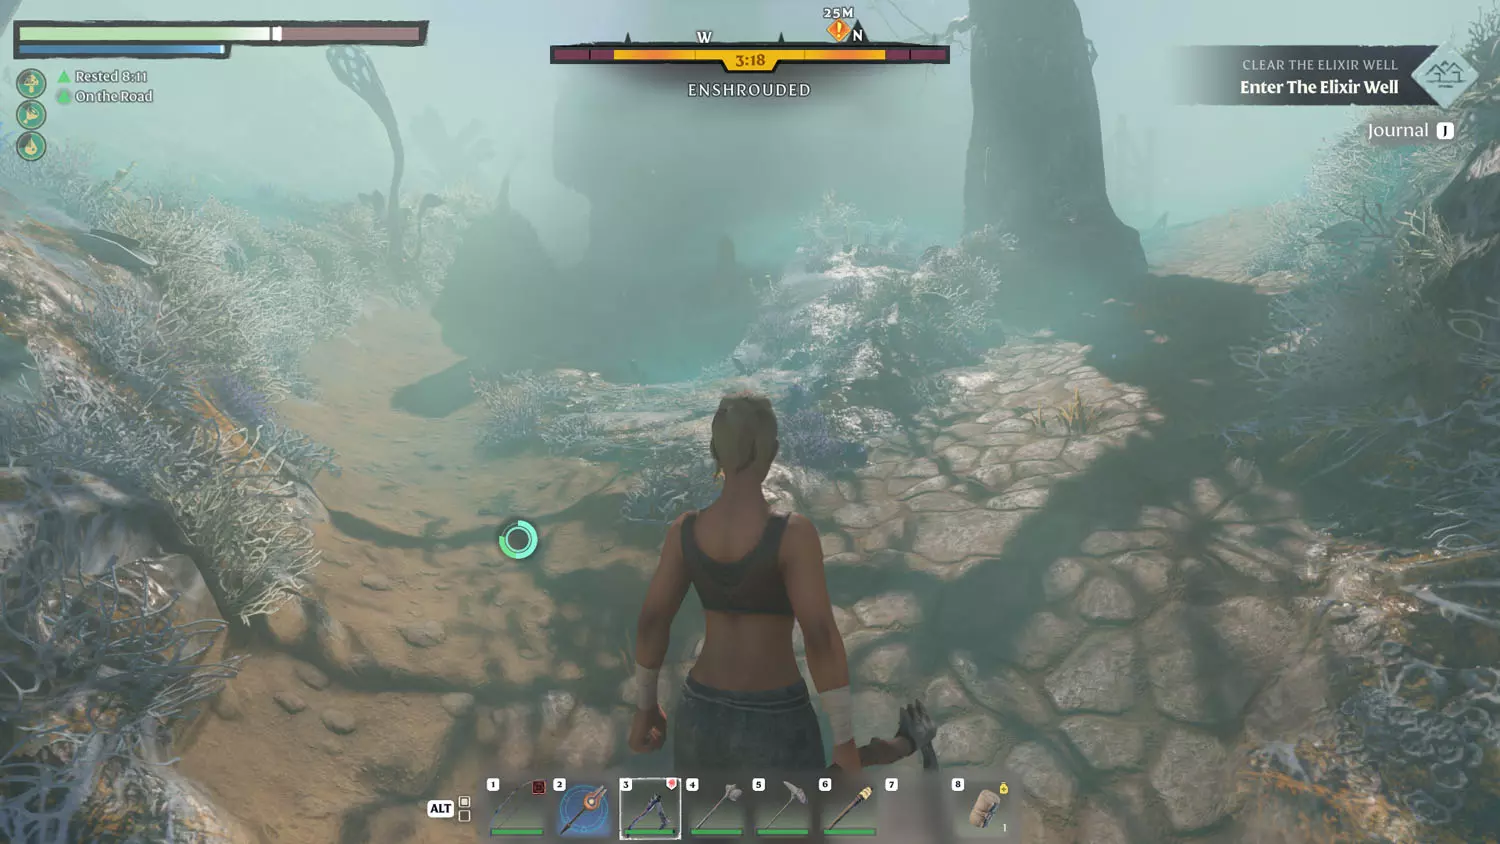

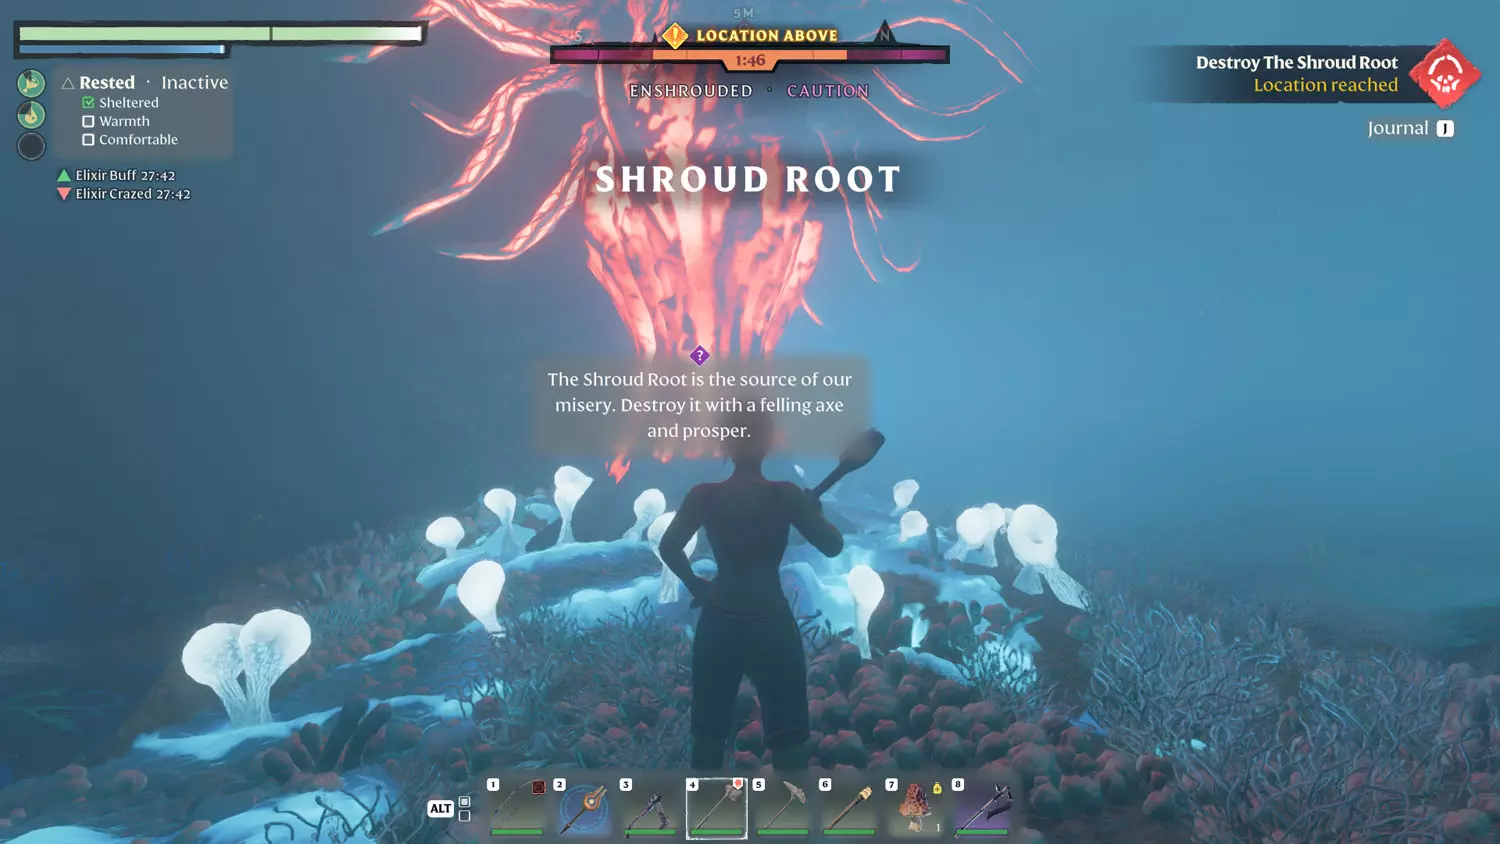
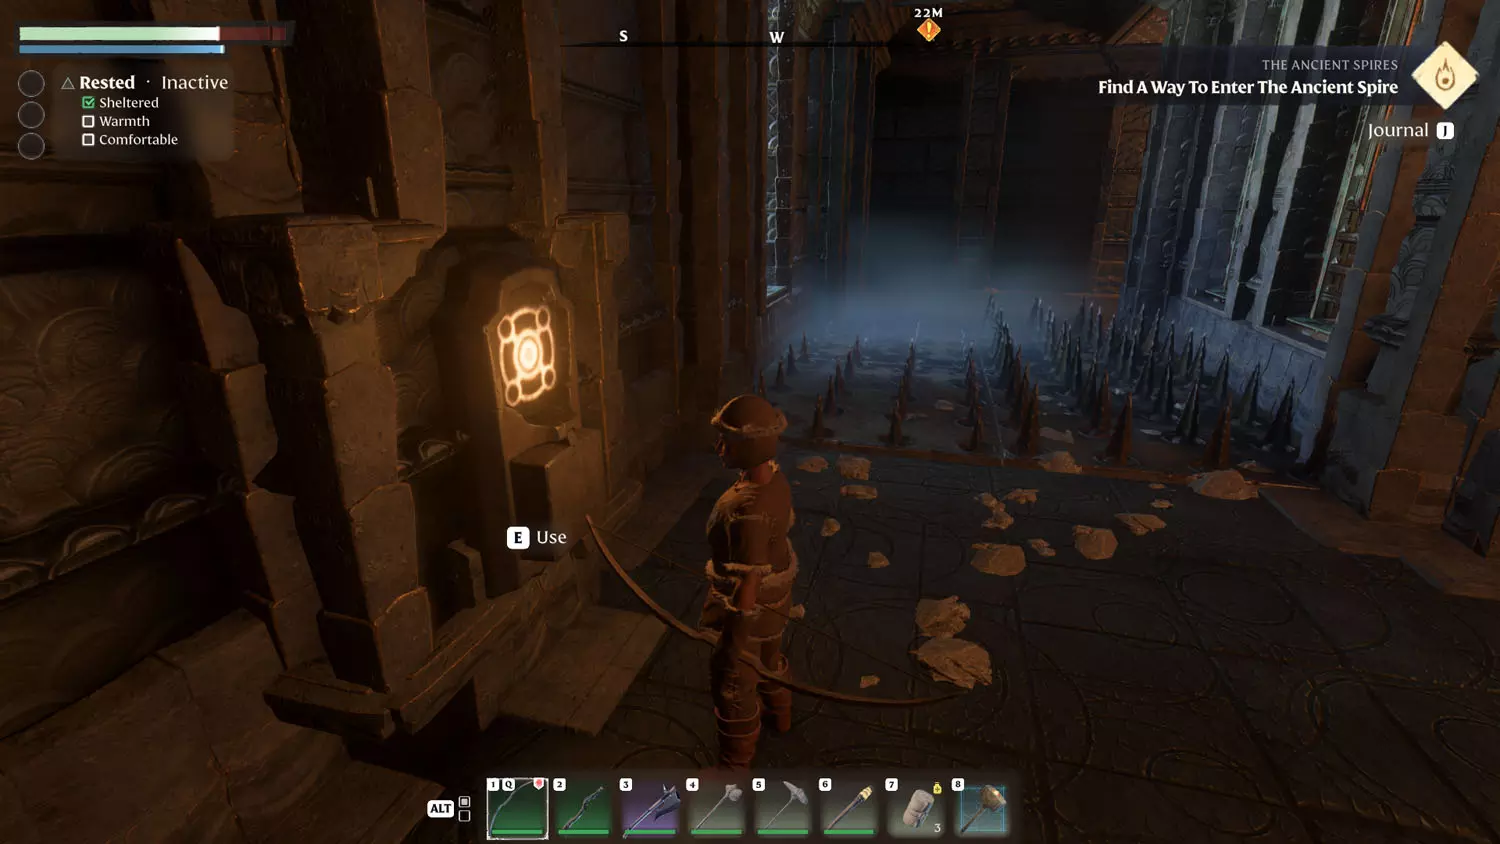
Before you die, be sure to activate the respawn point. Then, head down into the Elixir Well (behind it in my screenshot). The map may try telling you - “Location Above” or something. Ignore it. The location is the Shroud Root below you. Reaching the Well also completes the second phase of the quest.
Be careful about jumping down into the Elixir Well. It can be a deadly fall. But, on your way down, you can spot the Shroud Root.
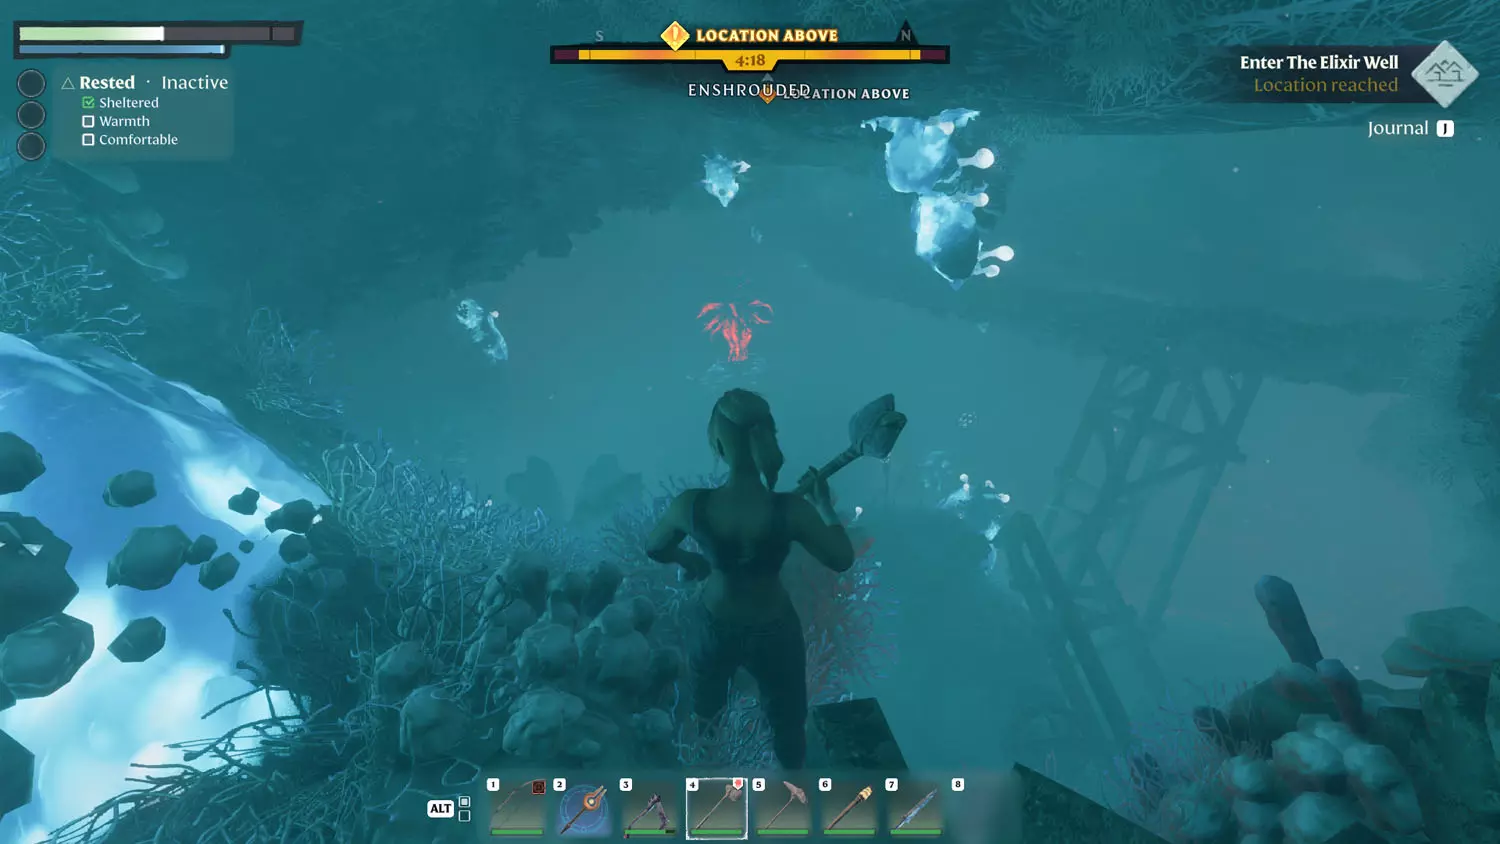
There is a Fell Thunderbrute guarding the Shroud Root, so come prepared for a boss battle! Maybe armor up first? I didn't, but I’m crazy, and I don’t mind dying and using up arrows.
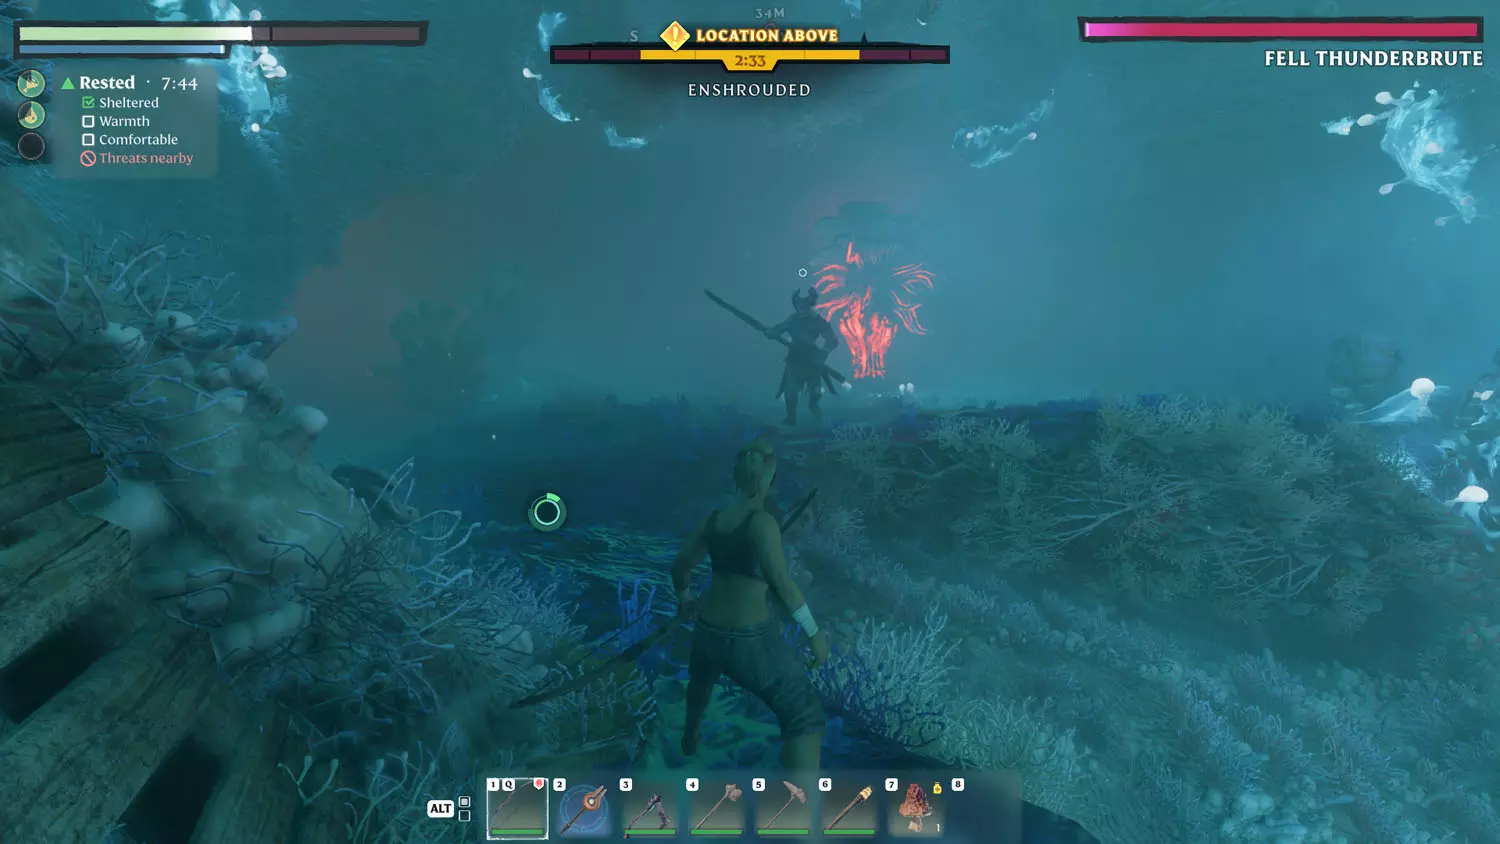

Anyway, don’t forget to loot the fallen before heading toward the Shroud Root. An Axe works best in felling the overgrown shrub. Doing so clears the immediate air, allowing you to fast travel back to safety. Mission completed!
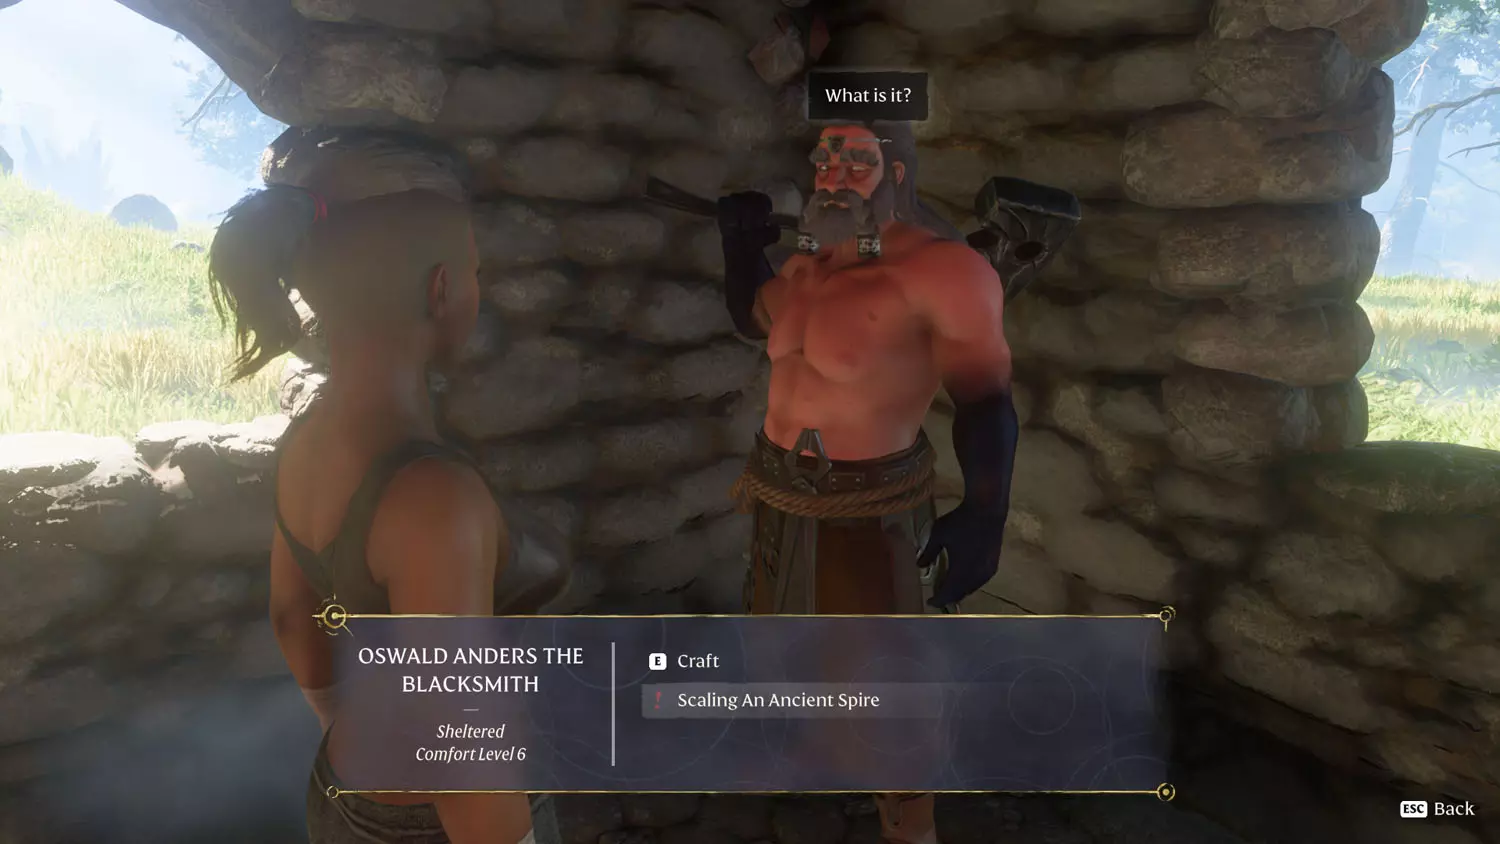
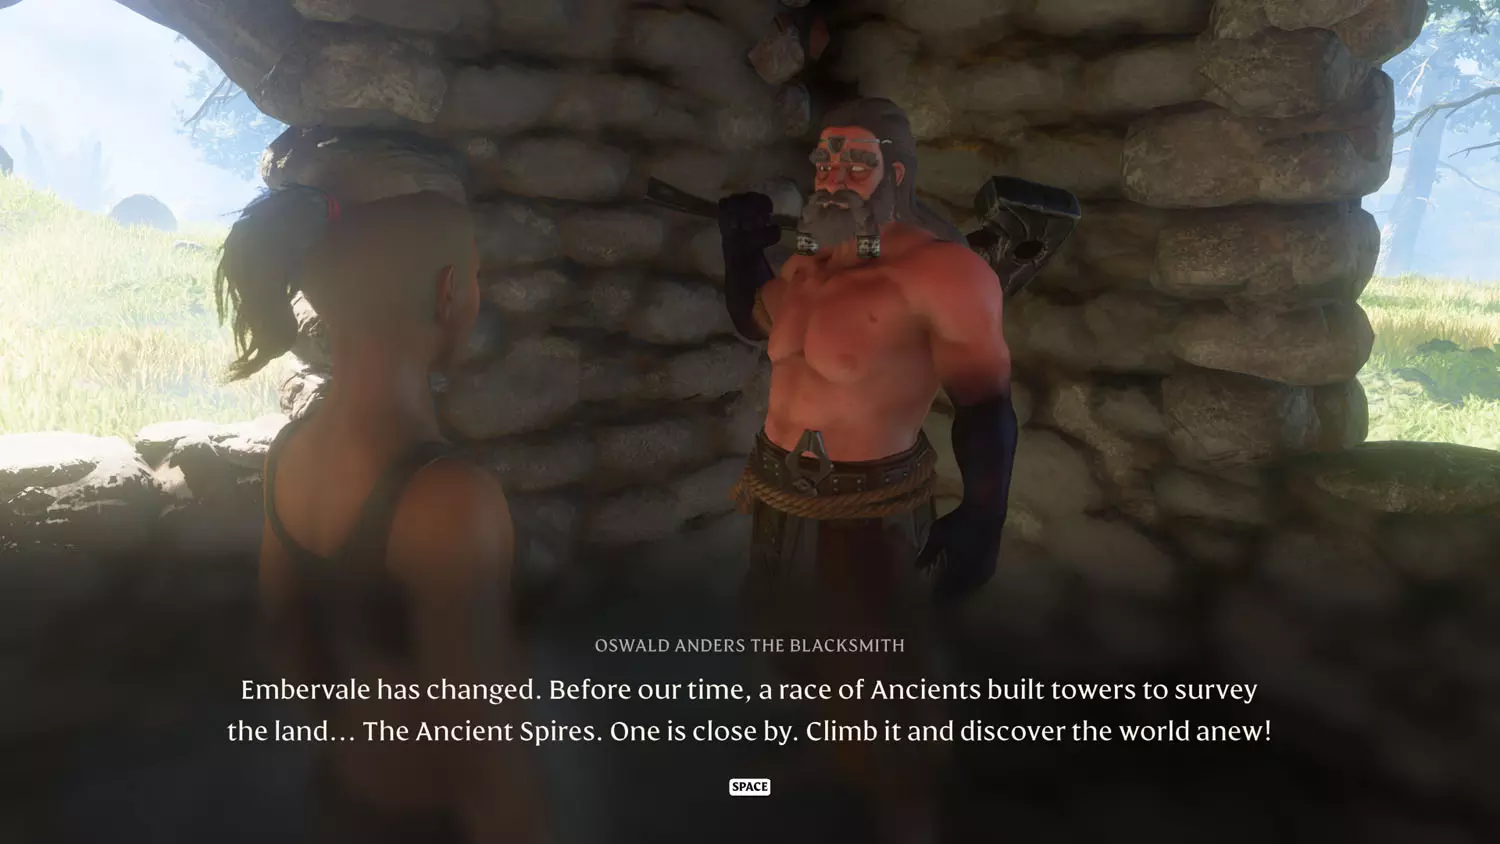
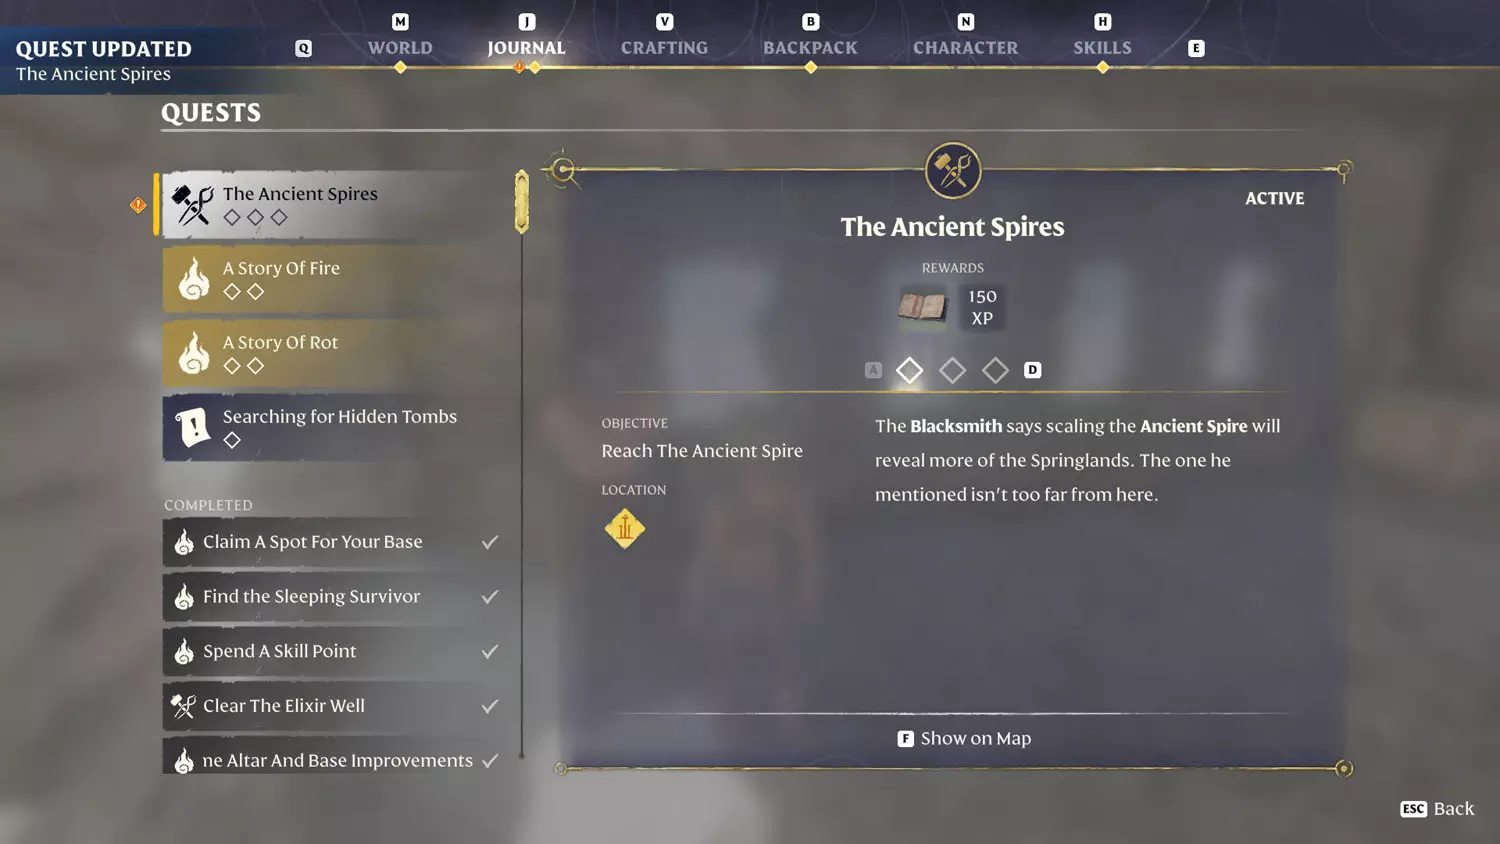
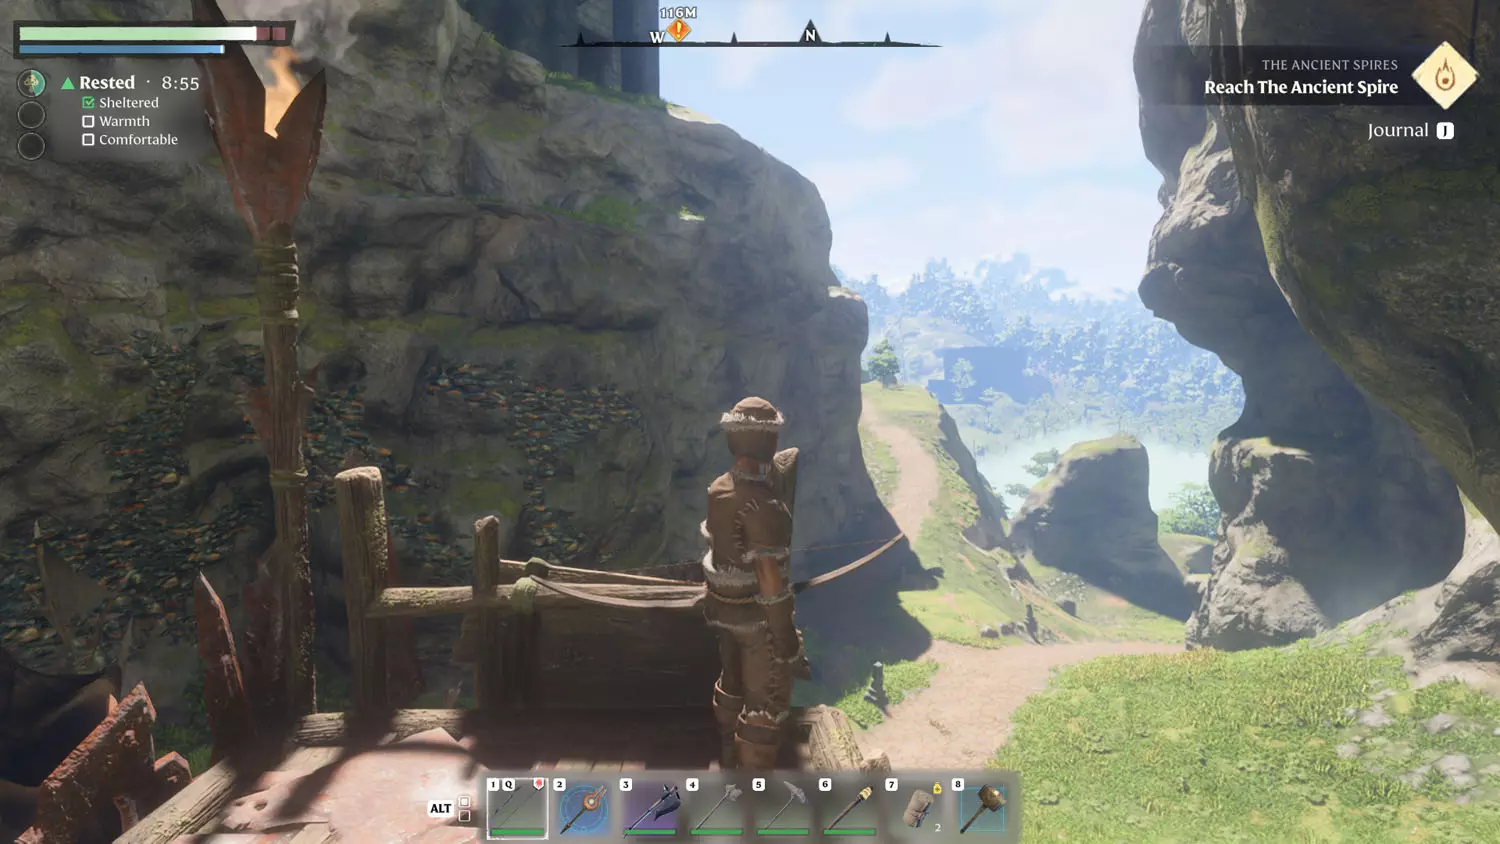
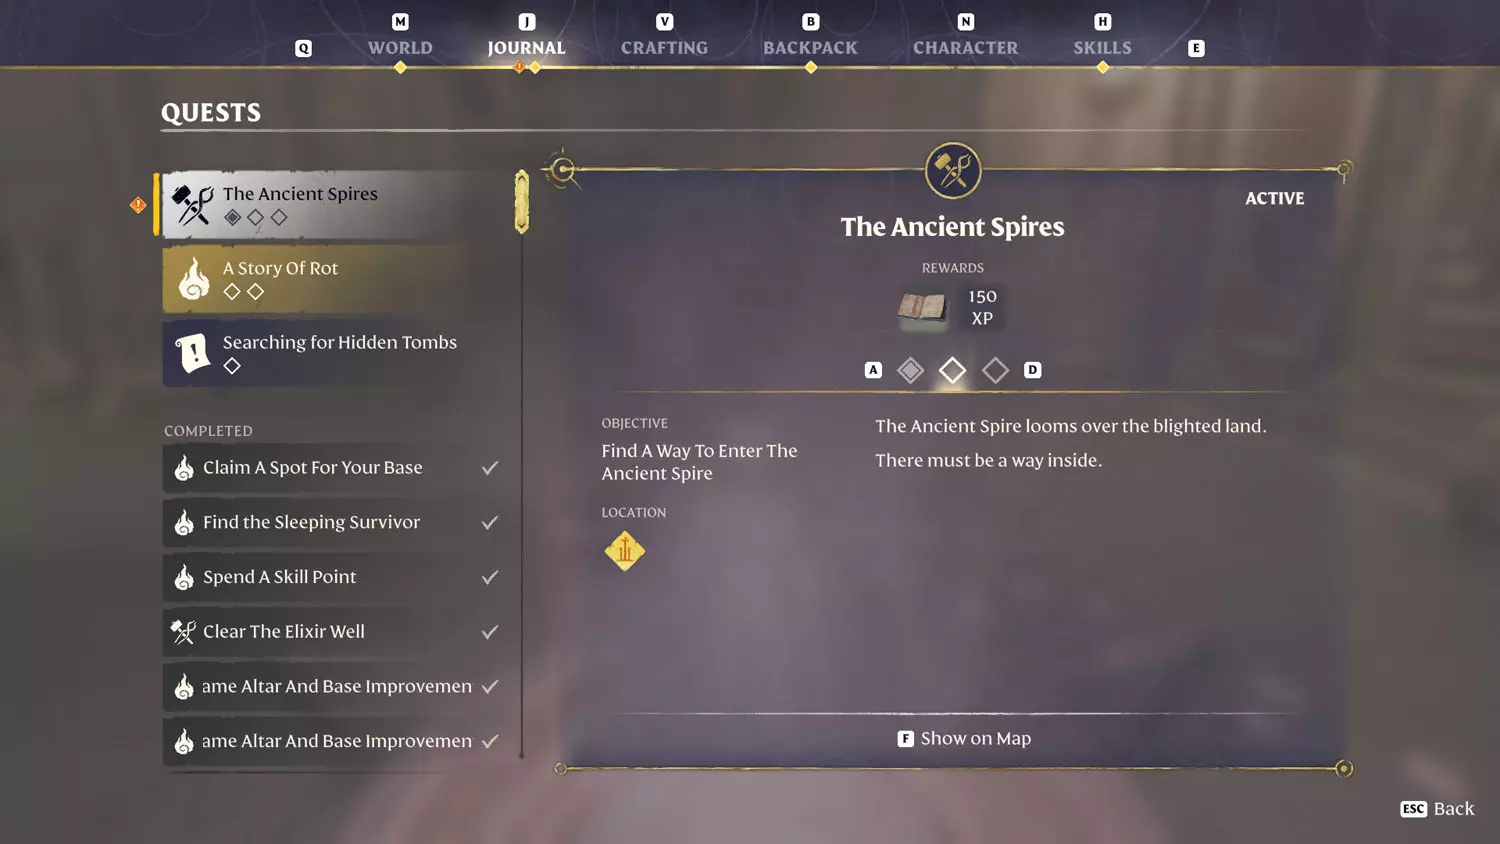
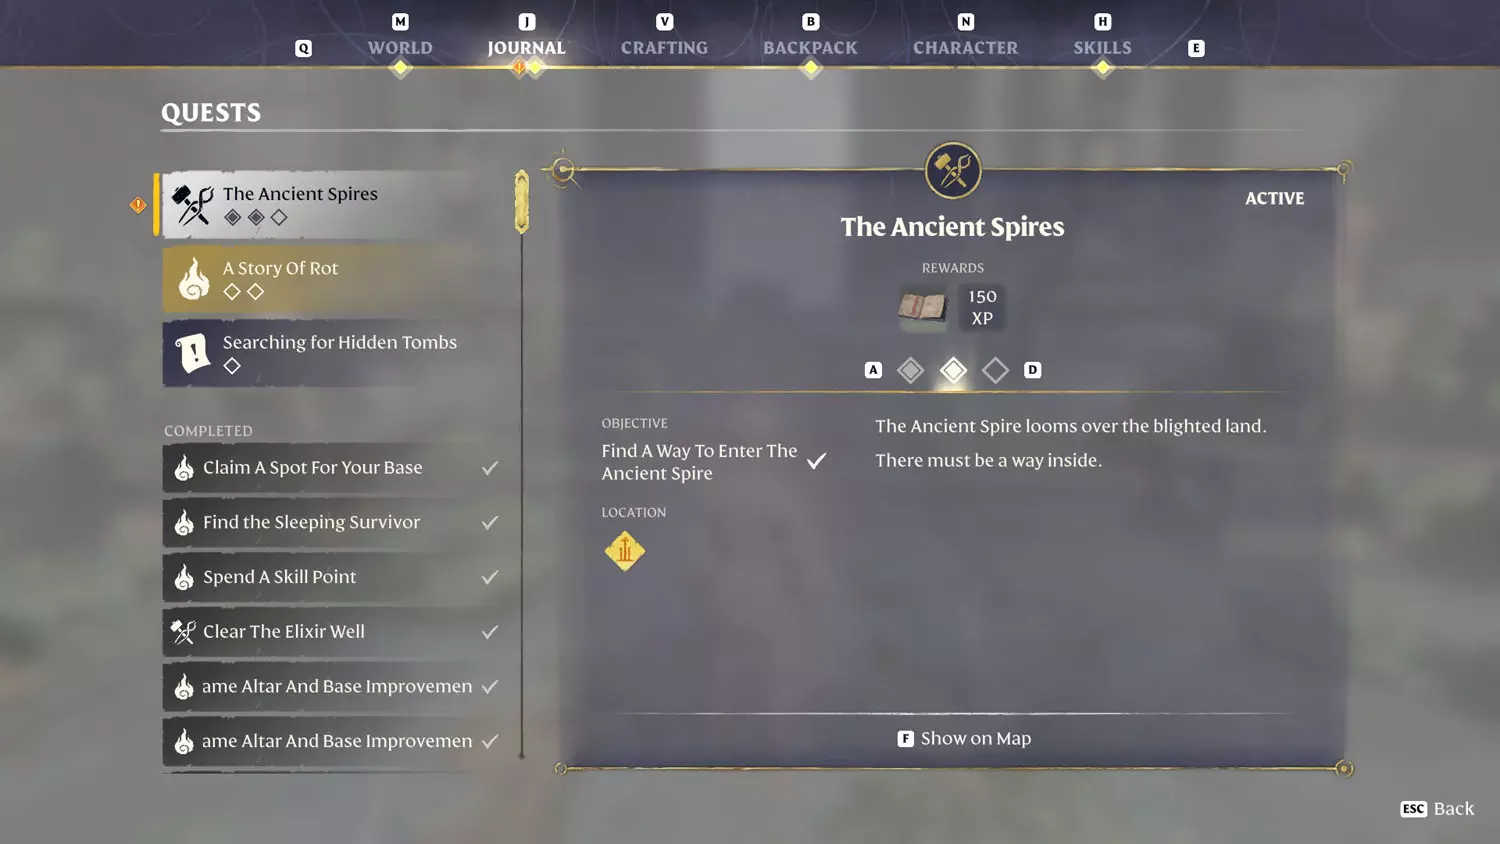
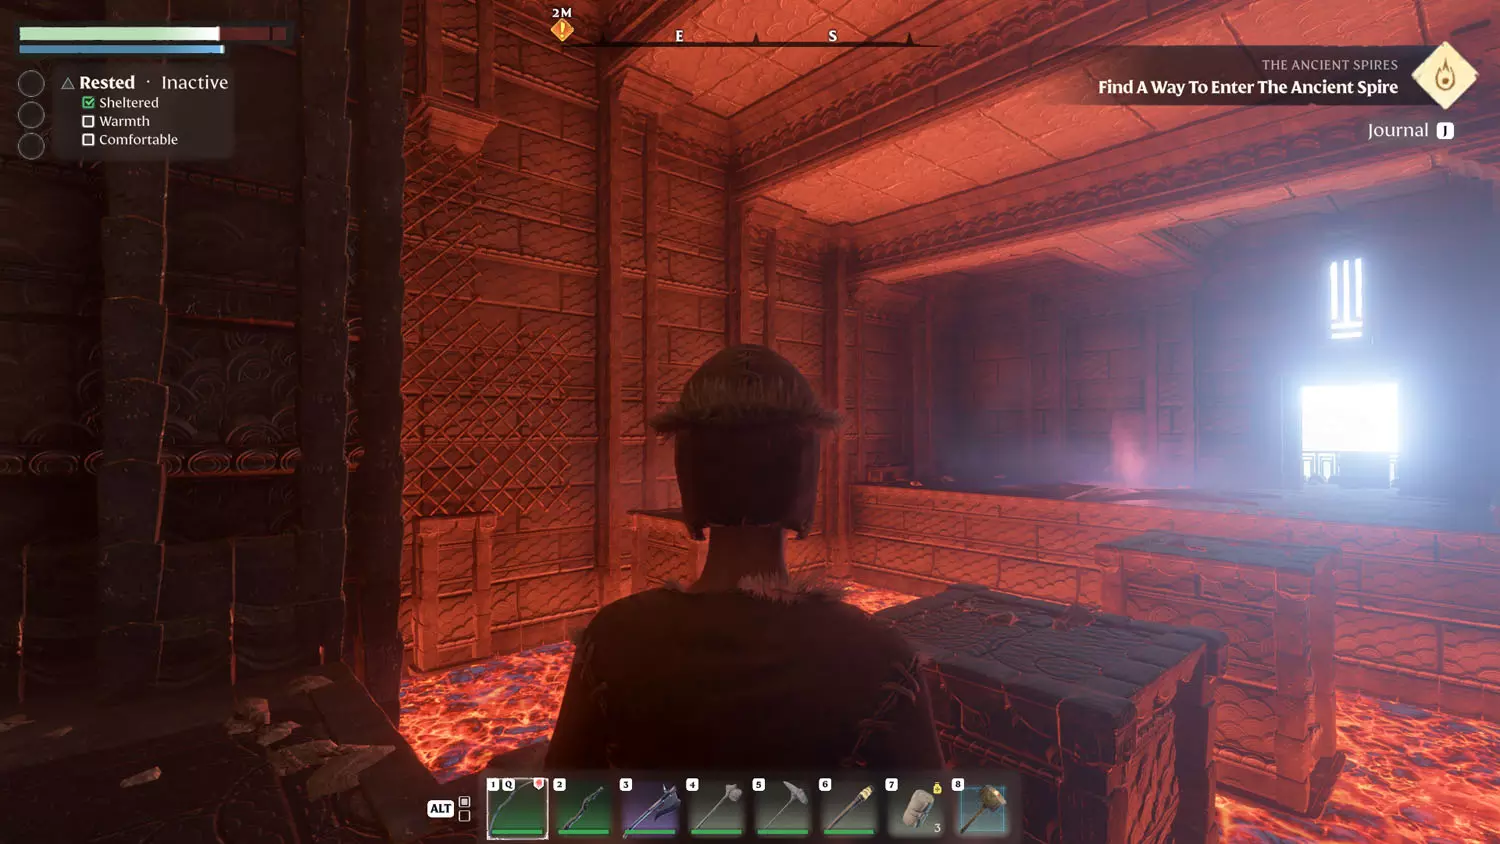
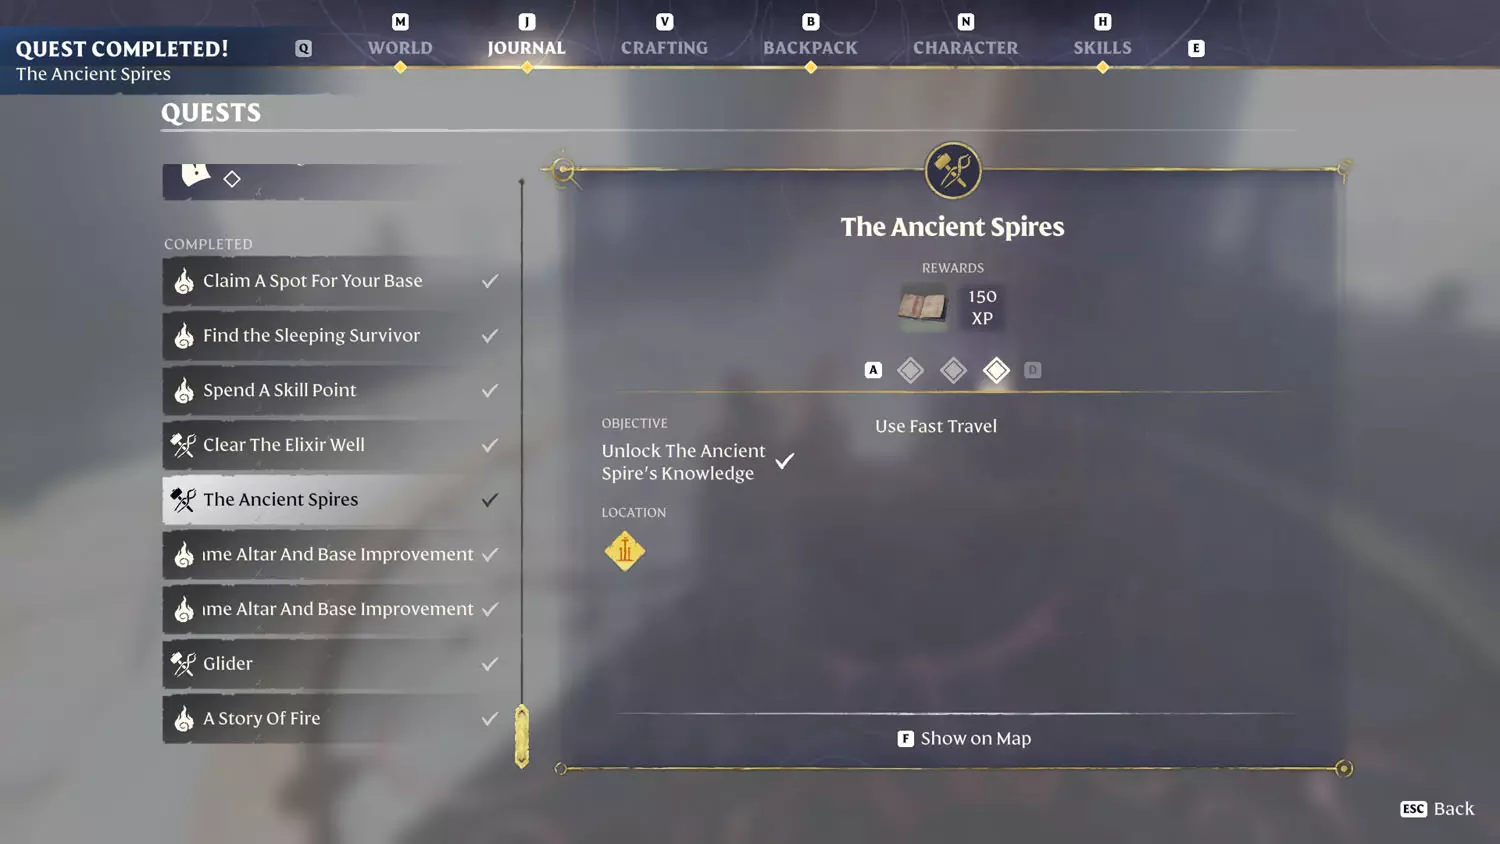
The Ancient Spires
The dialogue option - Scaling the Ancient Spires - comes from the Blacksmith early on in the game. Having the Glider equipped will make this quest more worth your while.
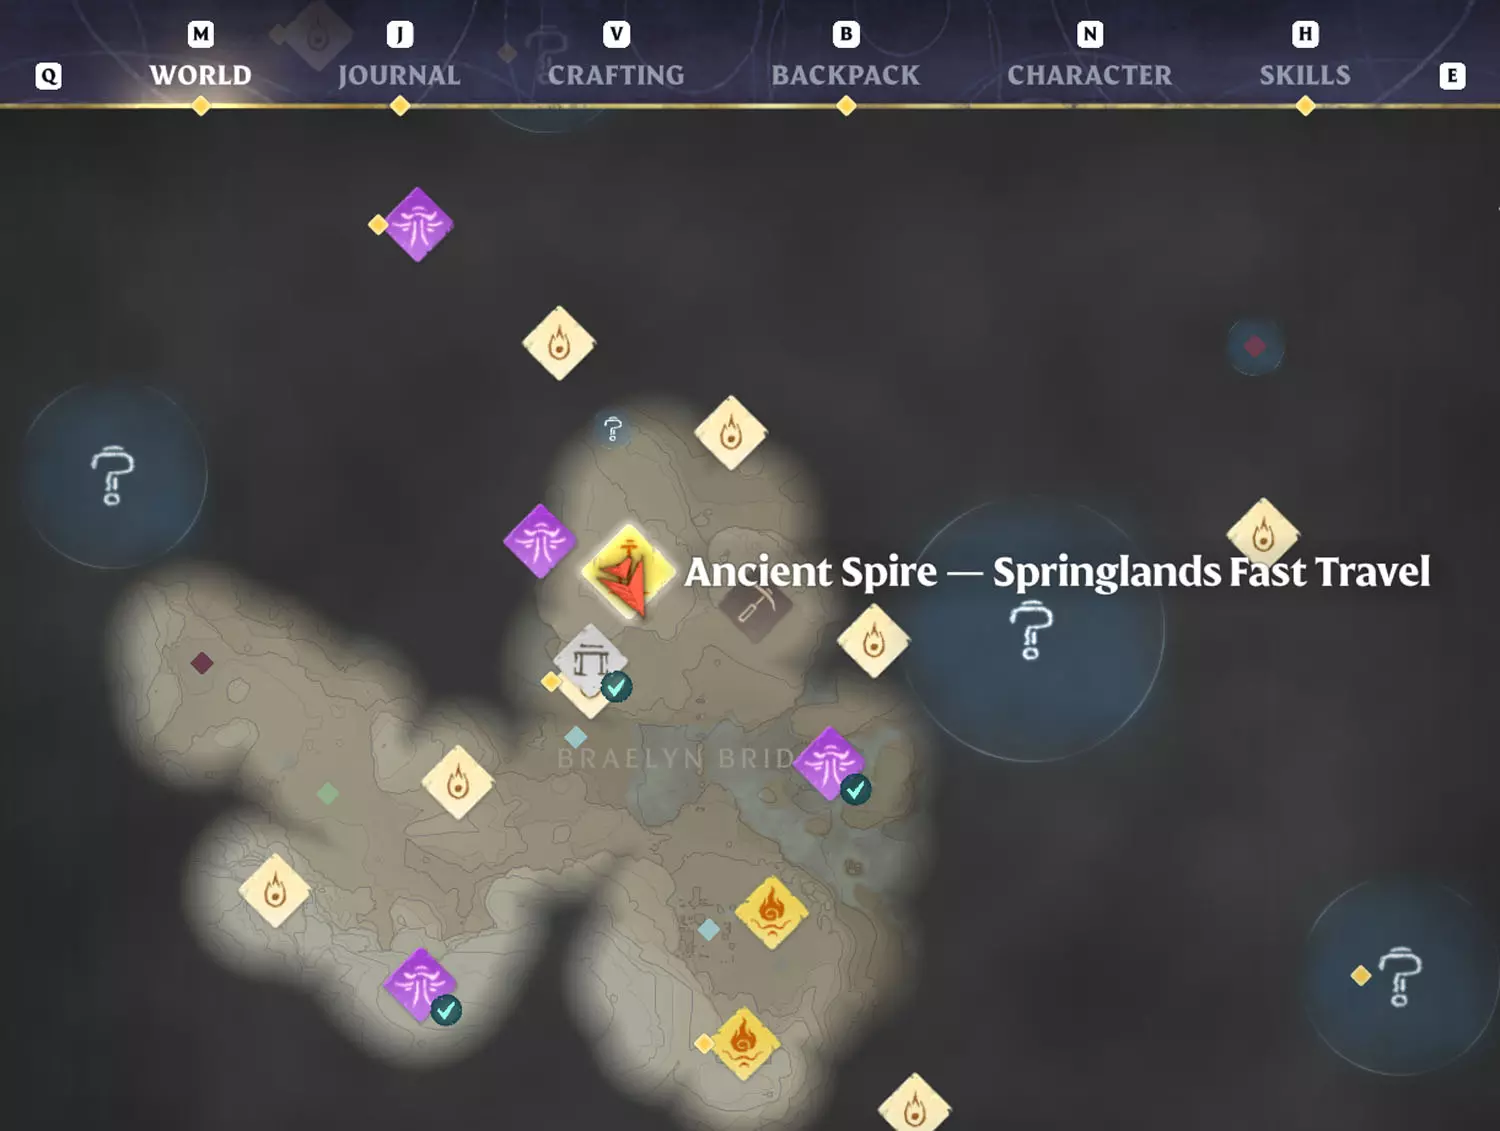
From Braelyn Bridge, head north (even when the paths split).
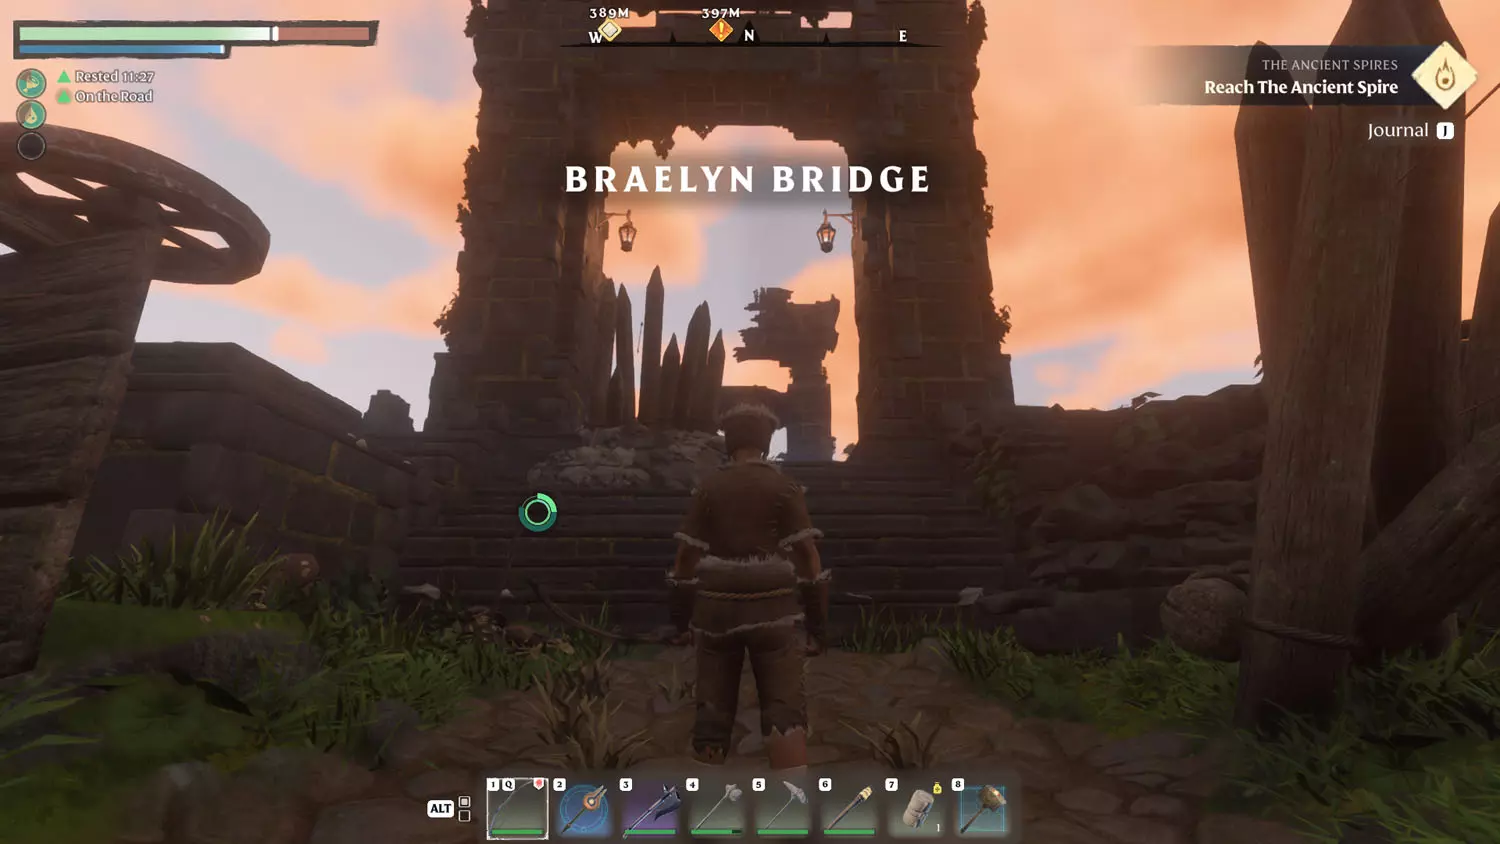
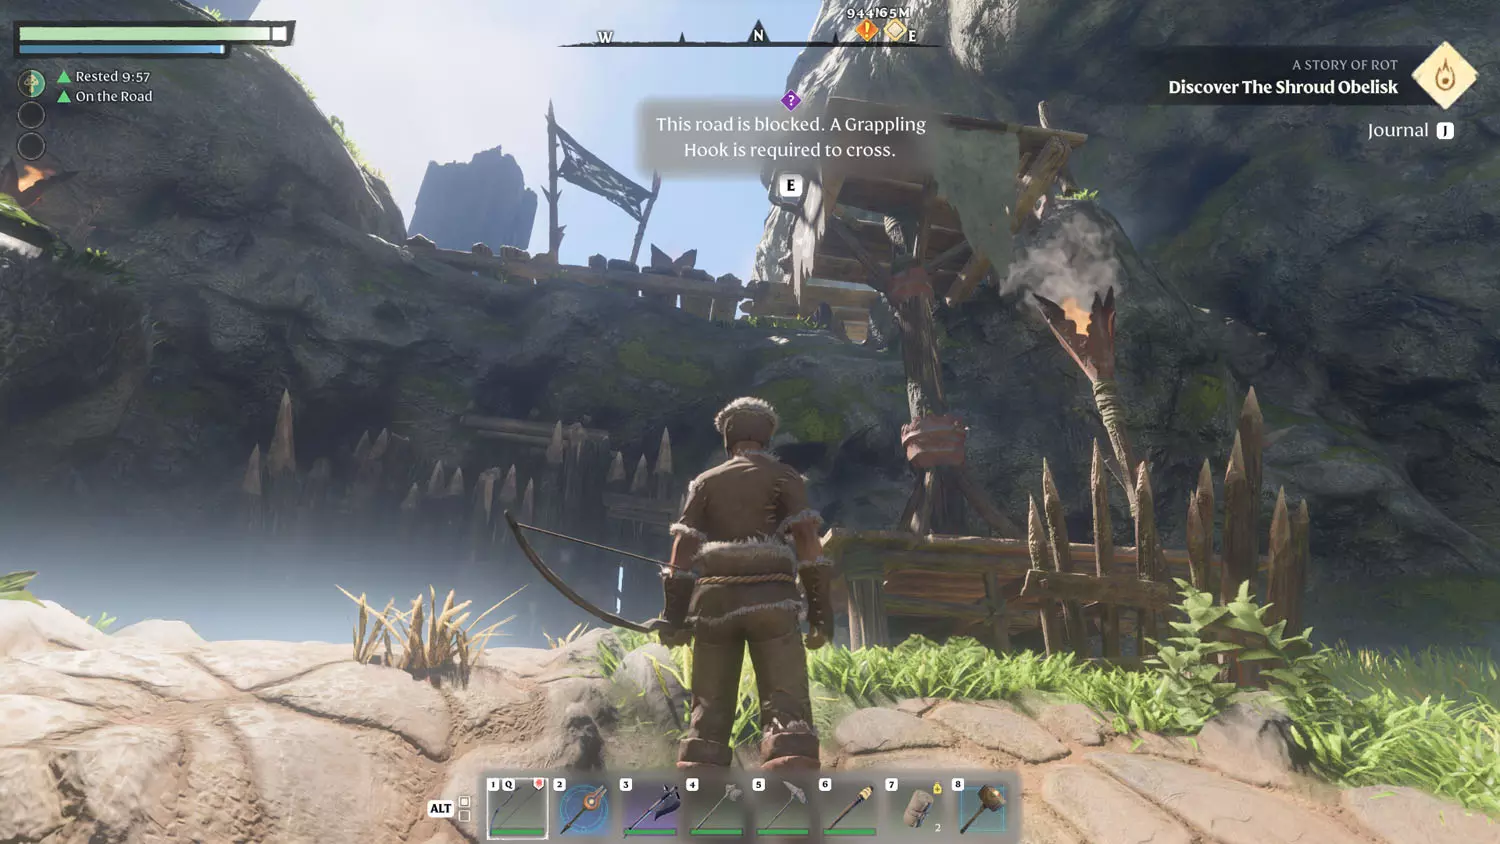
You’ll come across a place that “requires” you to have the Grappling Hook. You can technically smash down a wall, but you’ll still want the item for the Ancient Spire.
Once past the scavenger wall, take the left path upward around the hill and toward the Ancient Spire.
TIP: At the Scavenger Camp, near the wall, is General Lore: Searching For Hidden Tombs 1/3 Imagine This:. On the way up the hillside, you’ll pass by the General Lore: Searching For Hidden Tombs 2/3 Misfortune Strikes Like Lightning.
TIP: On the way up the steps, you’ll pass by the General Lore: The Alchemist’s Theories I 3/5 The Ancient Spire, Beacons Of Light.
Reaching the Ancient Spire completes the first part of the Quest.
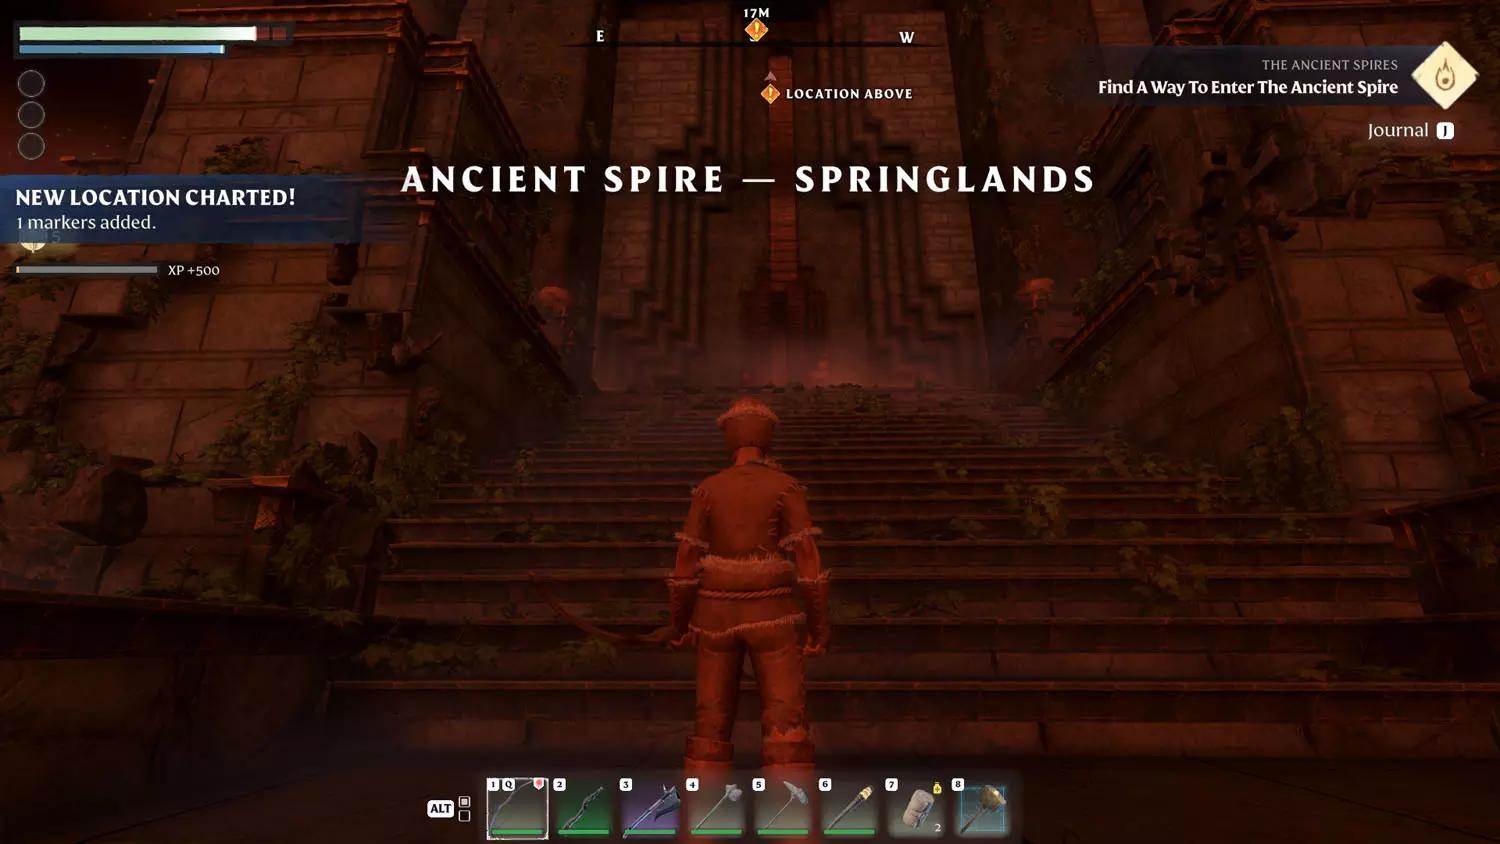
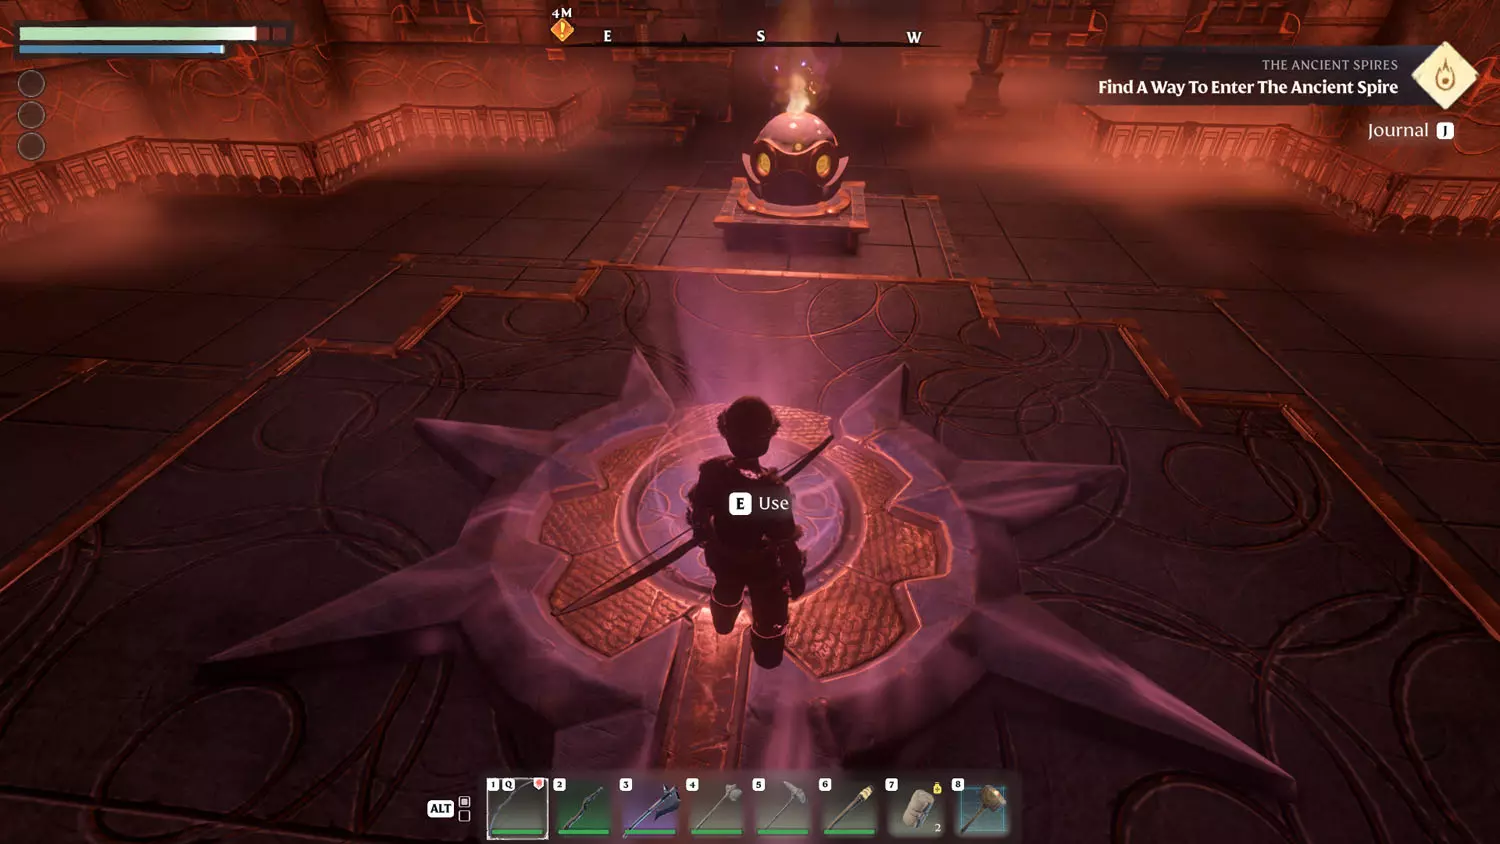
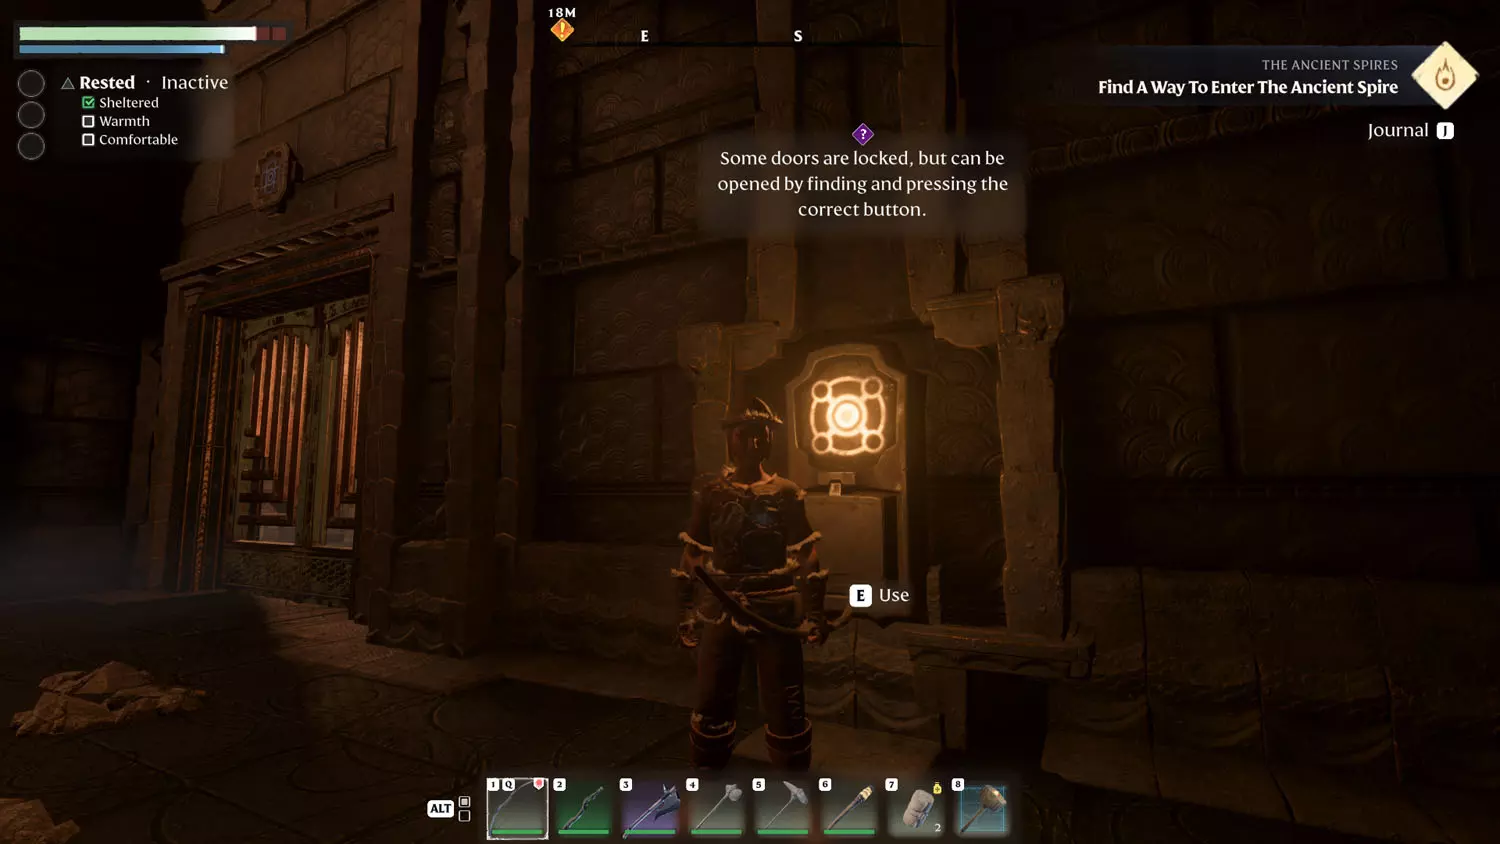
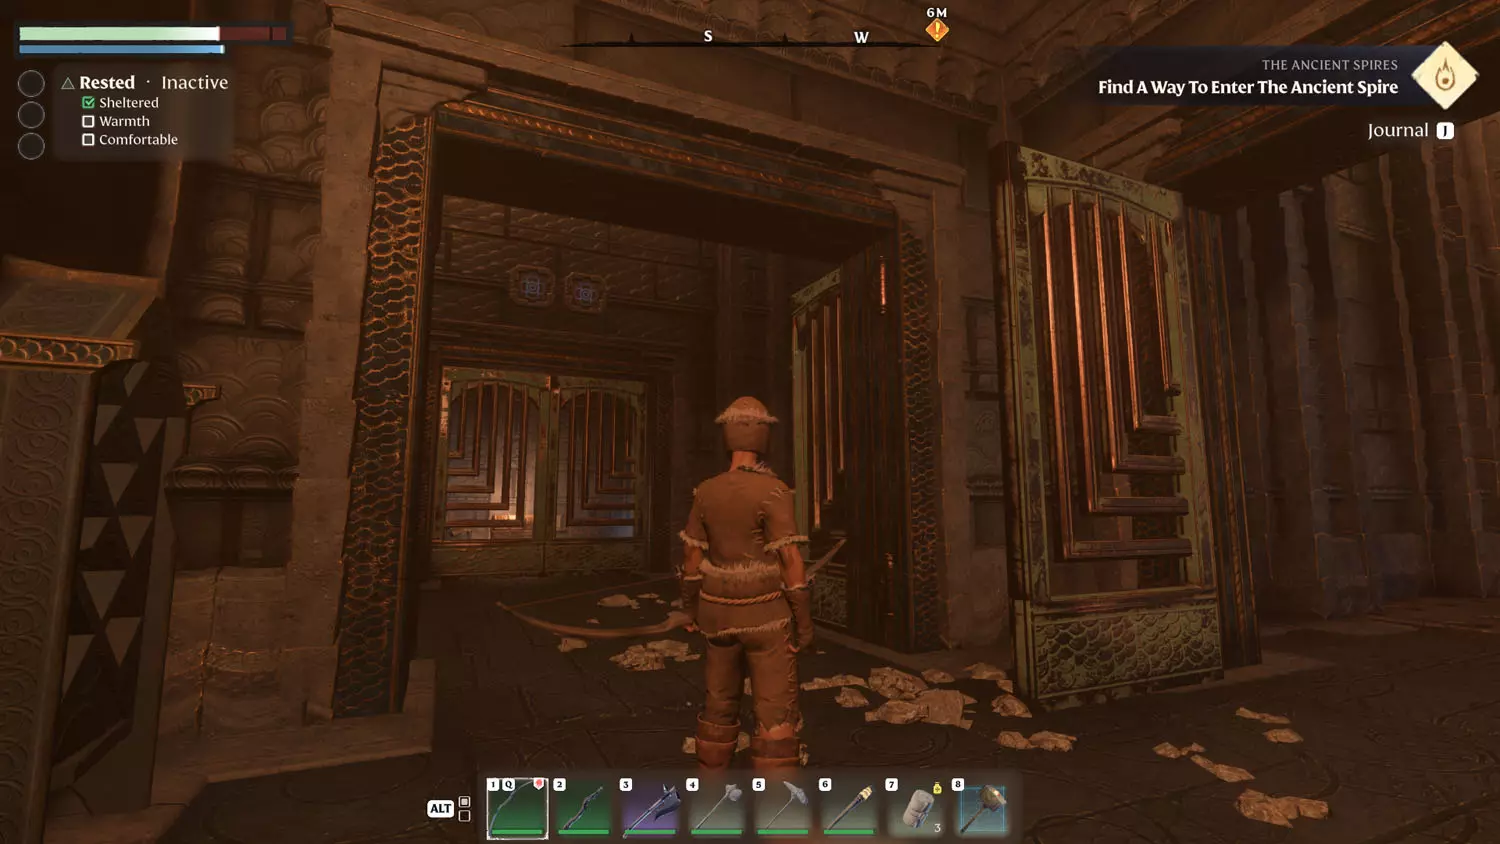
Once you reach the Ancient Spire, head inside and interact (E) with the ornate metal plate on the floor. You’ll be warped inside the tower and have some “puzzles” to solve. Using the first teleporting plate will complete the second part of this quest.
The first puzzle has an explanation. Basically, there are blue glyph symbols over locked doors or gates. To open them, you have to either press a yellow button or shoot / blast it. There is a Silver Chest in the next room.
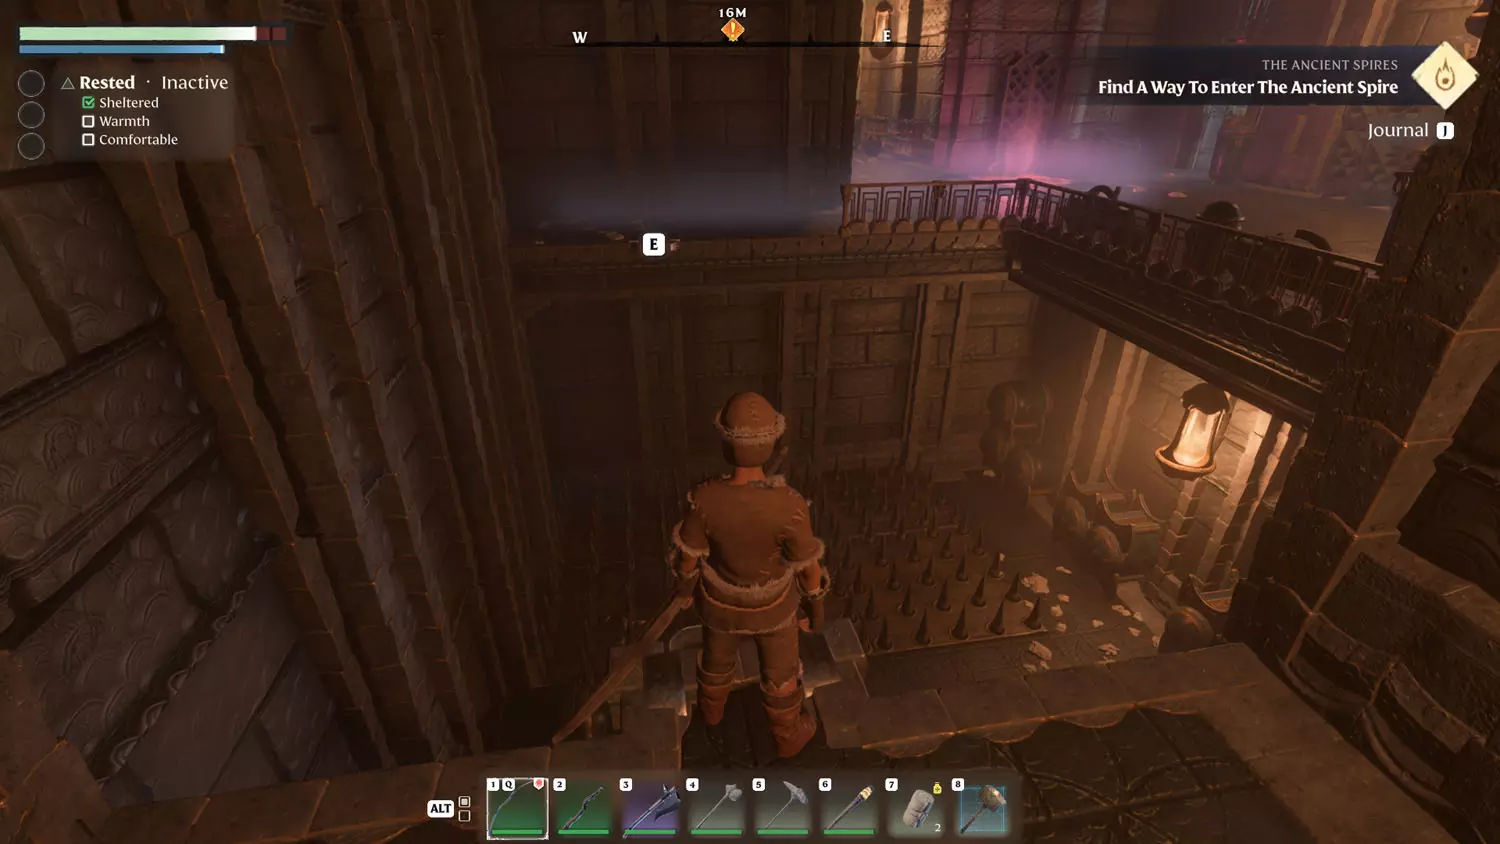
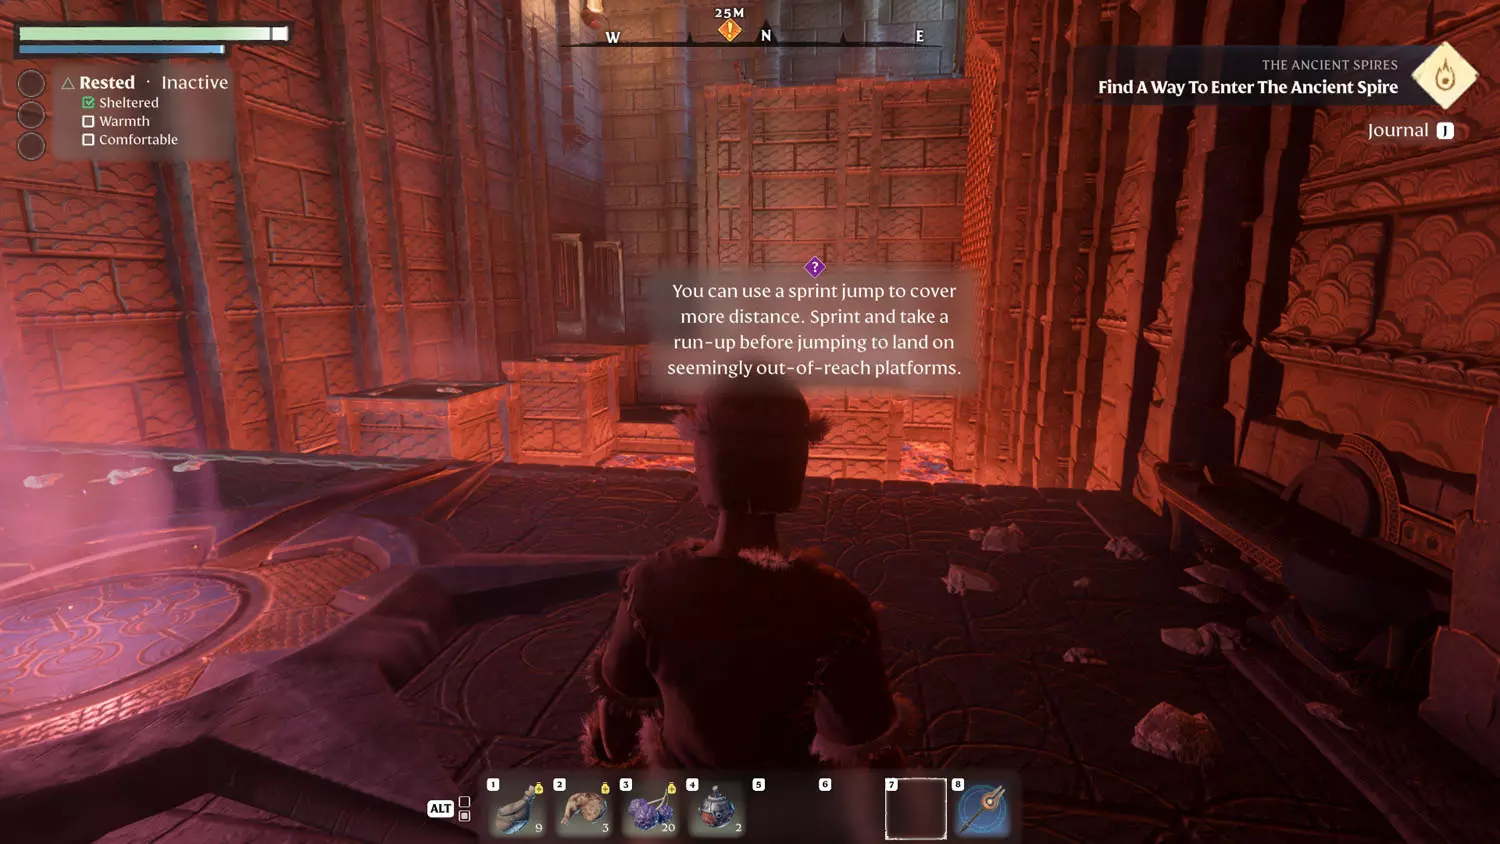
To progress, head back to the start of this floor and keep right. There are stairs leading up to a grappling spot. Swing across and proceed with some caution.

The next room has a spike floor (it comes and goes). You’ll want to grapple across and proceed to the glowing platform (or loot).
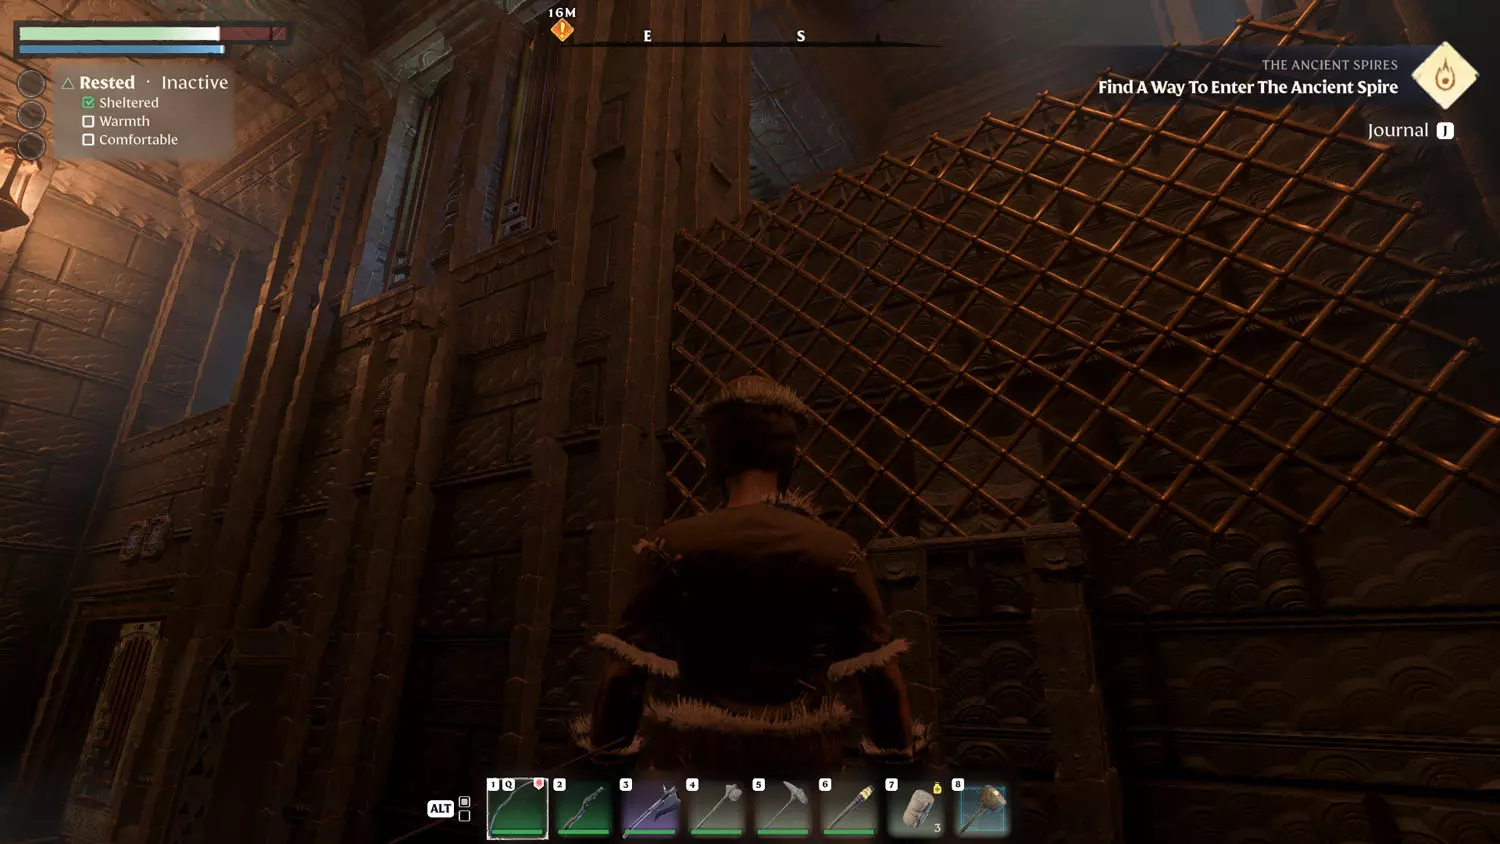
On the next floor, there is a grate on the wall. You can climb that to reach the platform on the right, just make sure you have plenty of stamina. From there, hop to the next platform. If you miss, there is lava below and some dry land with stairs leading back up. There is also a door that requires a “hidden” switch to open it.
TIP: If you are playing multiplayer, you can knock people off and kill them (in the lava below). So, play cautiously, or ruthlessly. UPDATE: The developers changed this so now you can't off your friends, lol.

From there, you can exit to the next floor. OR, you can instead climb upward and to the left using the grated wall. This will lead to a treasure chest and a button (which requires distance weapons to trigger - a wand or bow).
On the next floor, you’ll need to time your jumps to avoid the alternating floor spike traps.
Open the gate and you’ll find yourself in a hallway with two more closed gates. You can open them. The furthest one takes you onward (you can skip the rest of the floor this way). The closest one will reveal a door with two blue switch buttons above it, indicating that it needs two buttons pushed or slapped with an arrow or magic.
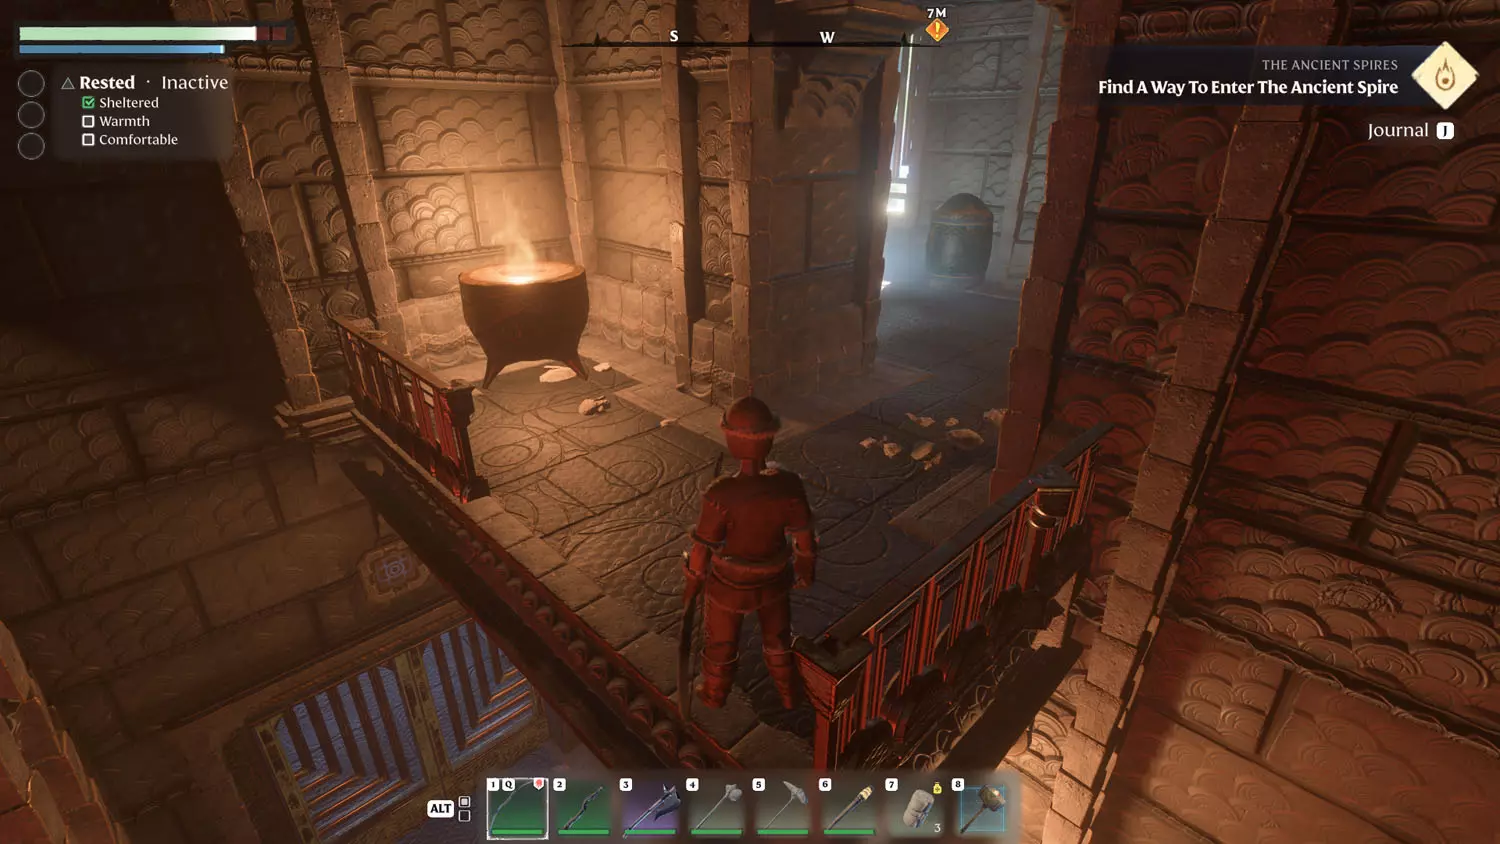
To the right of this door, head up the metal trellis, avoid the spikes at the top, and activate the switch before heading down. Then open the gate at the end of the hallway and head into a lava room. In this room, you can cross to the other side and exit to the next floor, or you can go after the remaining switch.
For the second switch, head left in the lava room and cross the pillars to the other side. From there, follow the prompt. Then, climb the metal trellis wall up and to the left for an easy button. This will open the door leading to a Gold Chest. When done, head to the final floor by using the portal in the lava room.
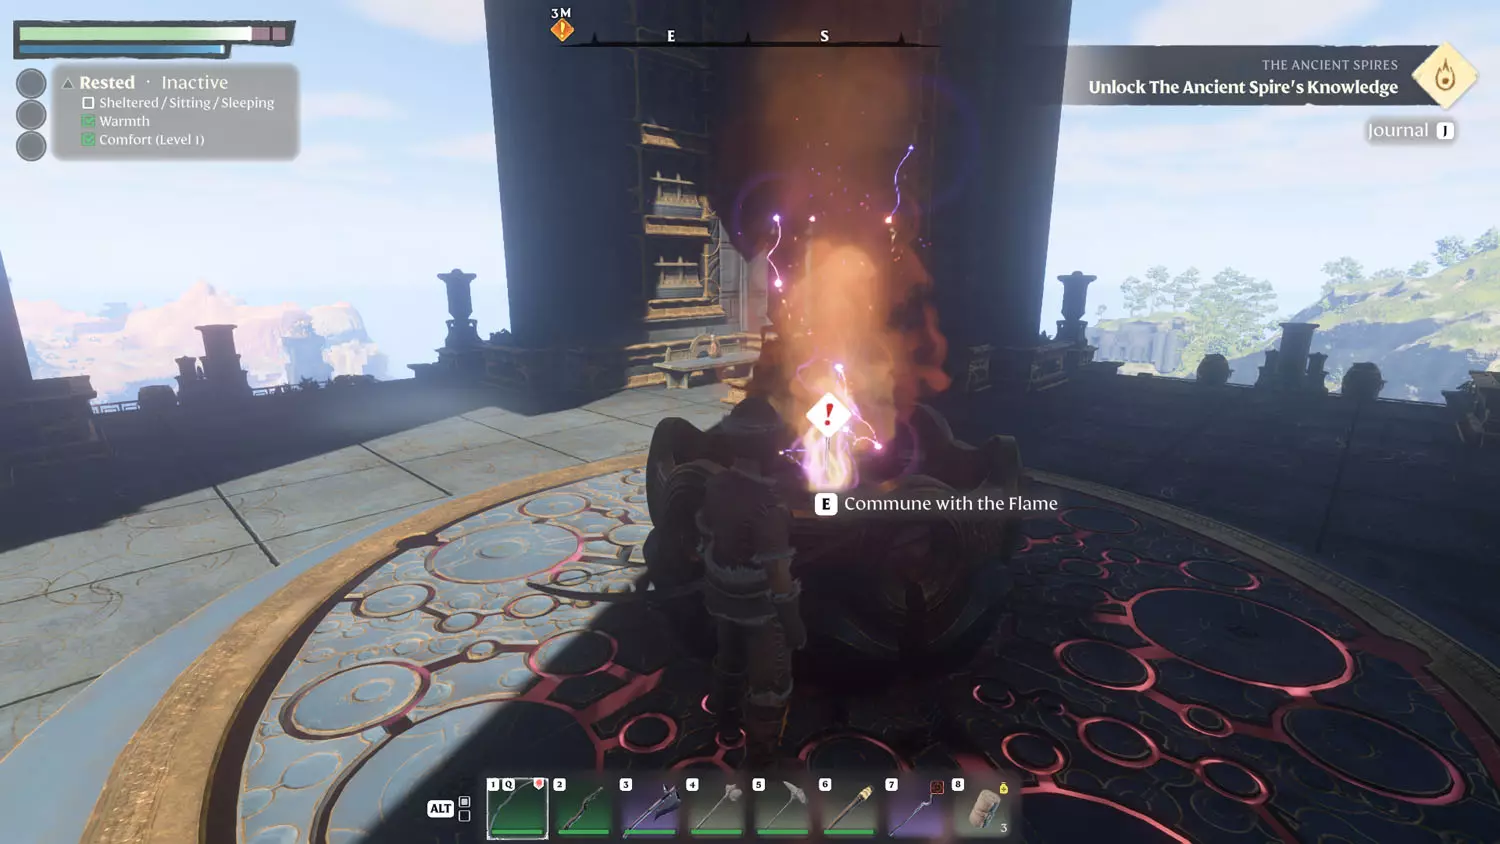
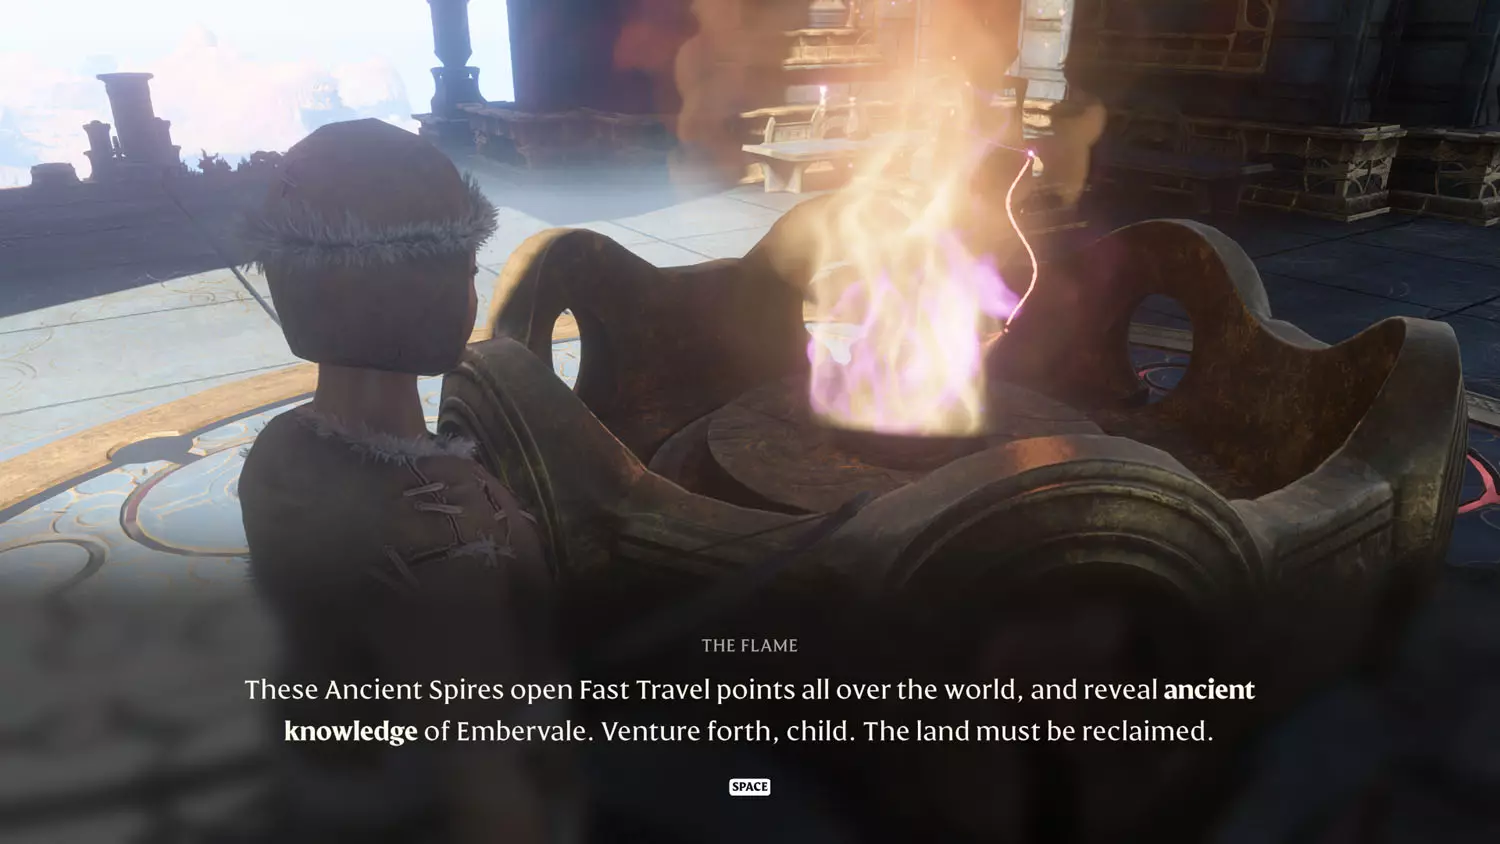
At the top, make sure to talk to the Flame here as it will unlock the Fast Travel. Also, it will complete your quest and unlock some question marks on your map.
Grappling Hook
This quest is one that can be skipped, particularly if you rush ahead and craft the Grappling Hook earlier than the game expected. When the Blacksmith Quest The Ancient Spires opens up, you will also have the dialogue "Grappling Hook." Again, this dialogue wont' show up if you already have the hook.
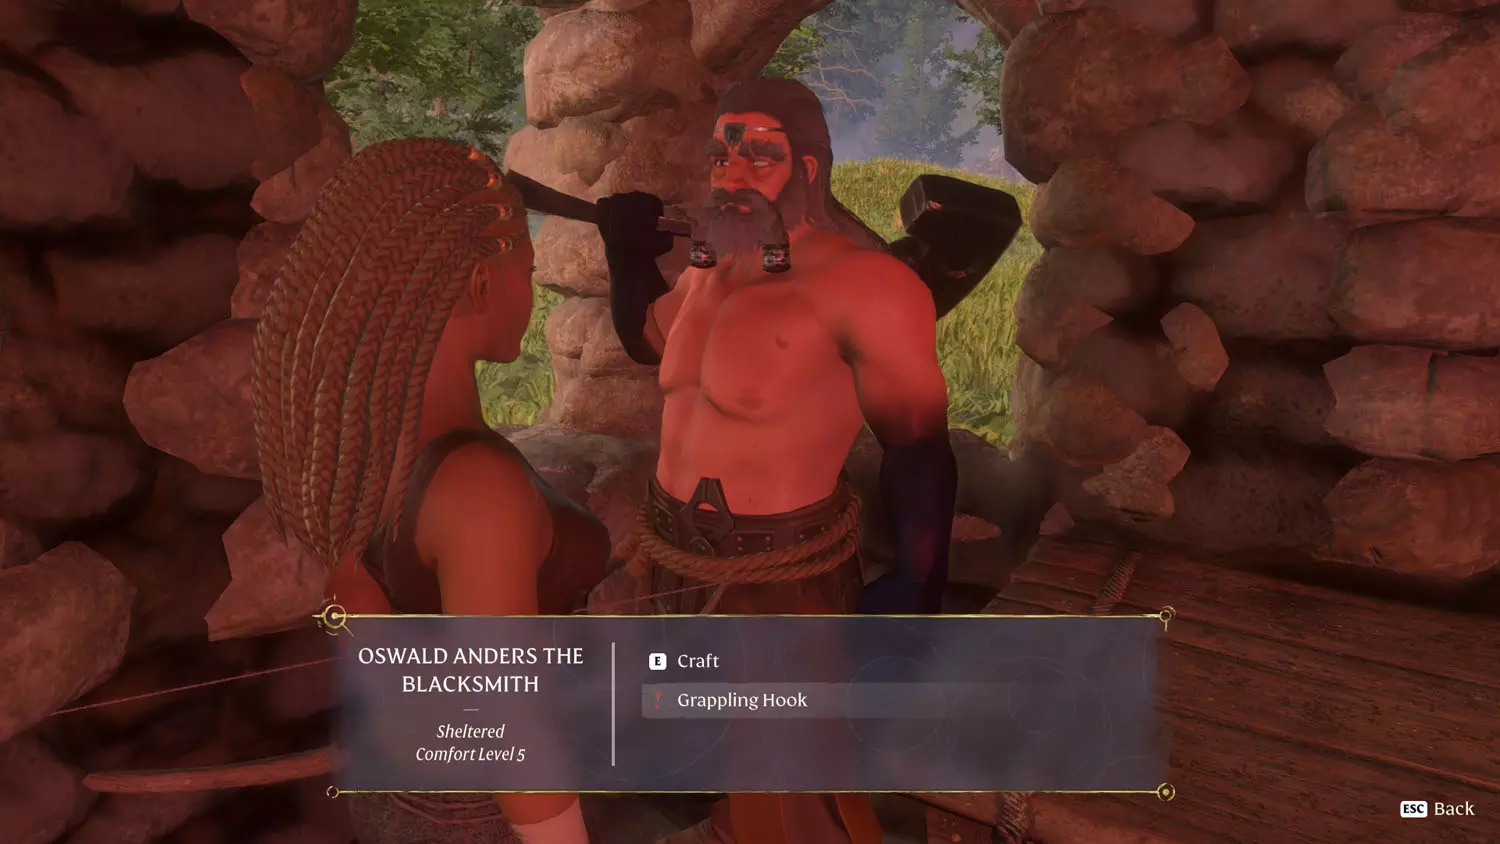
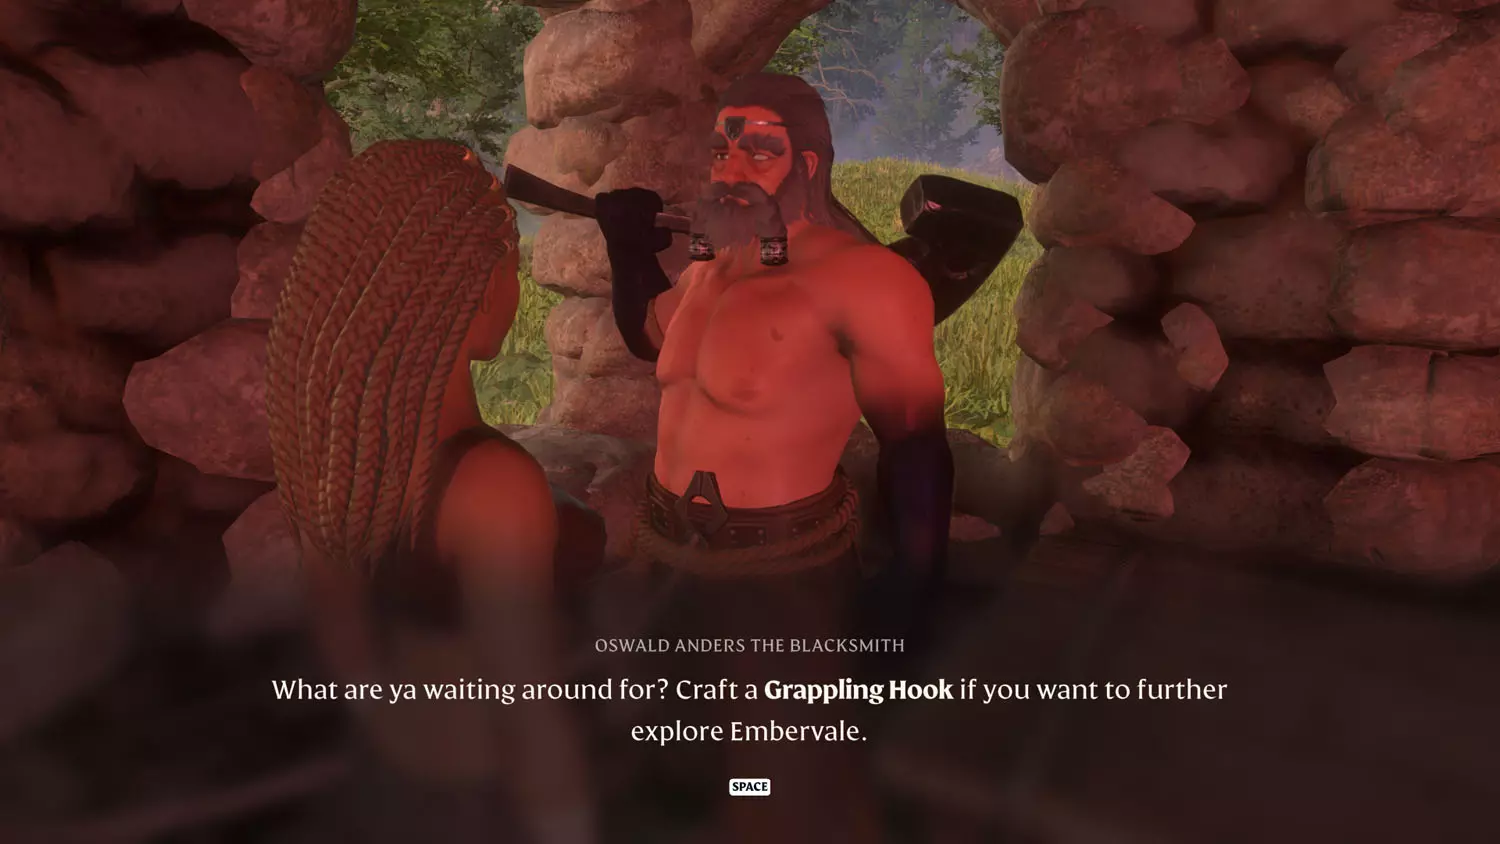
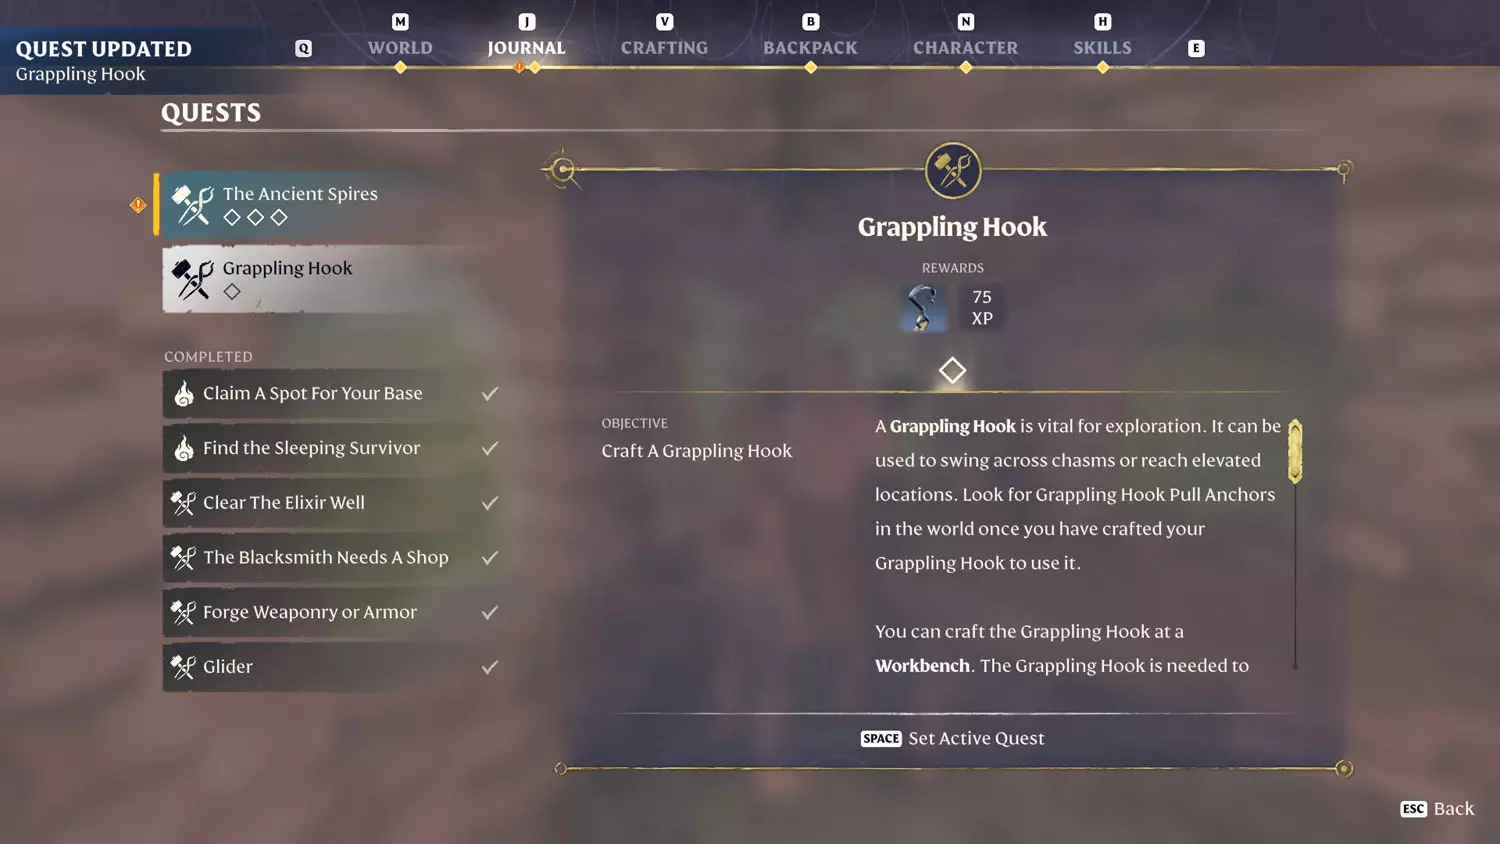
From there, gather the ingredients needed and craft the Grappling Hook at the Workbench to complete the quest.
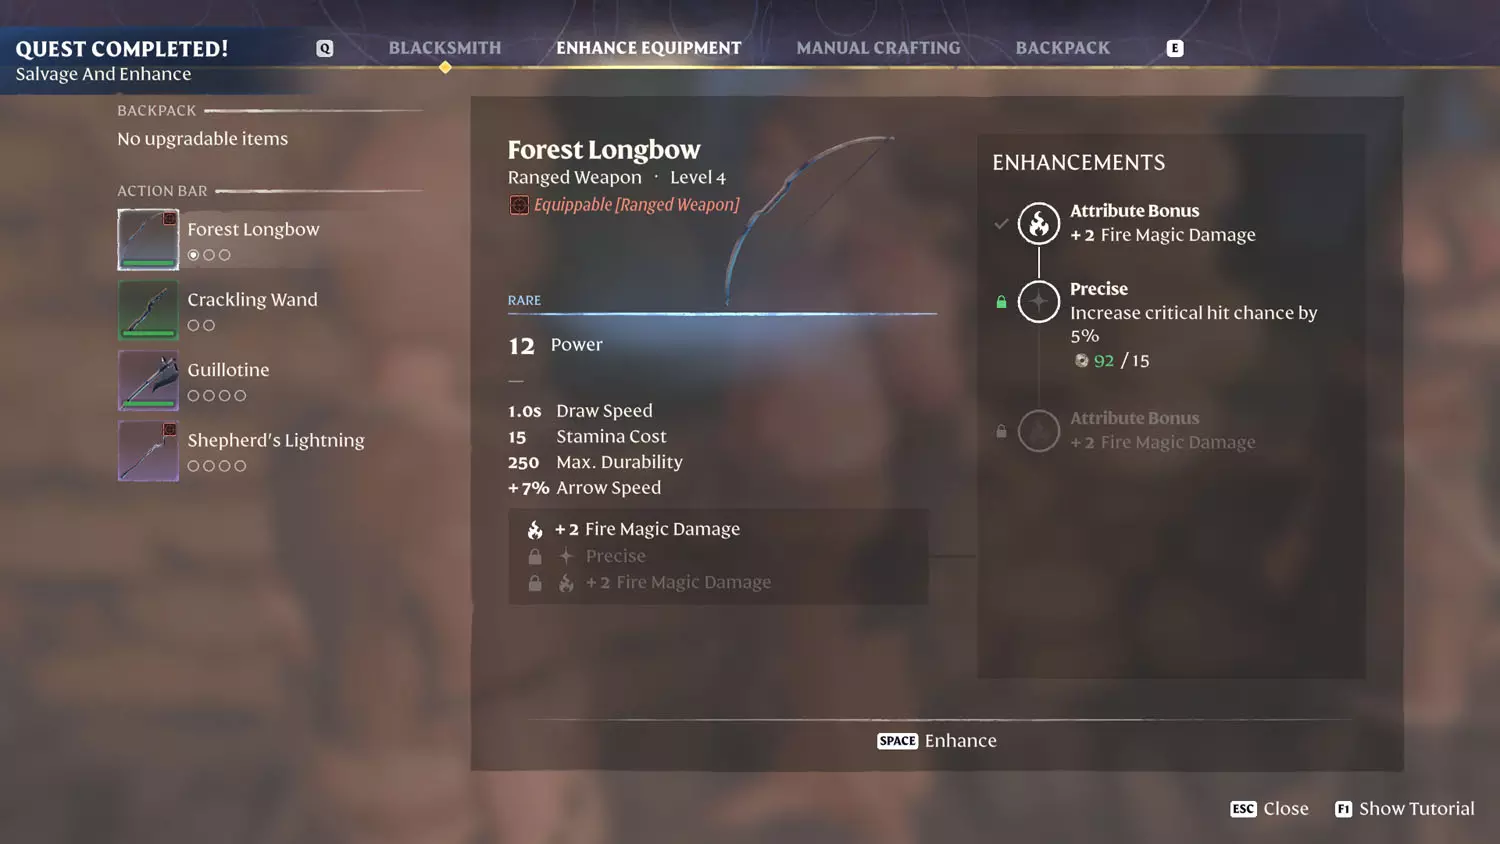
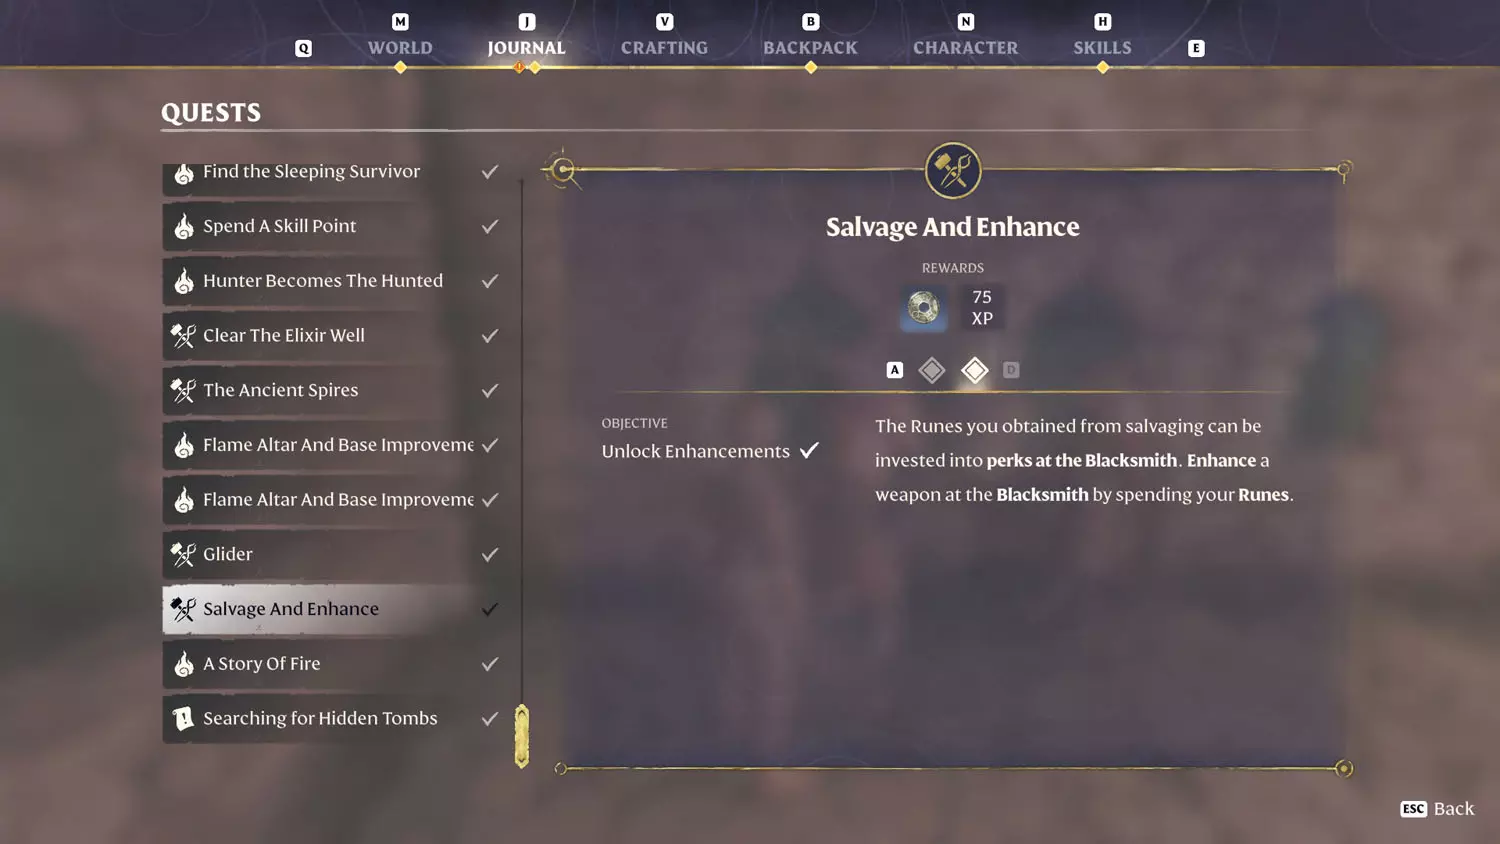
Salvage And Enhance
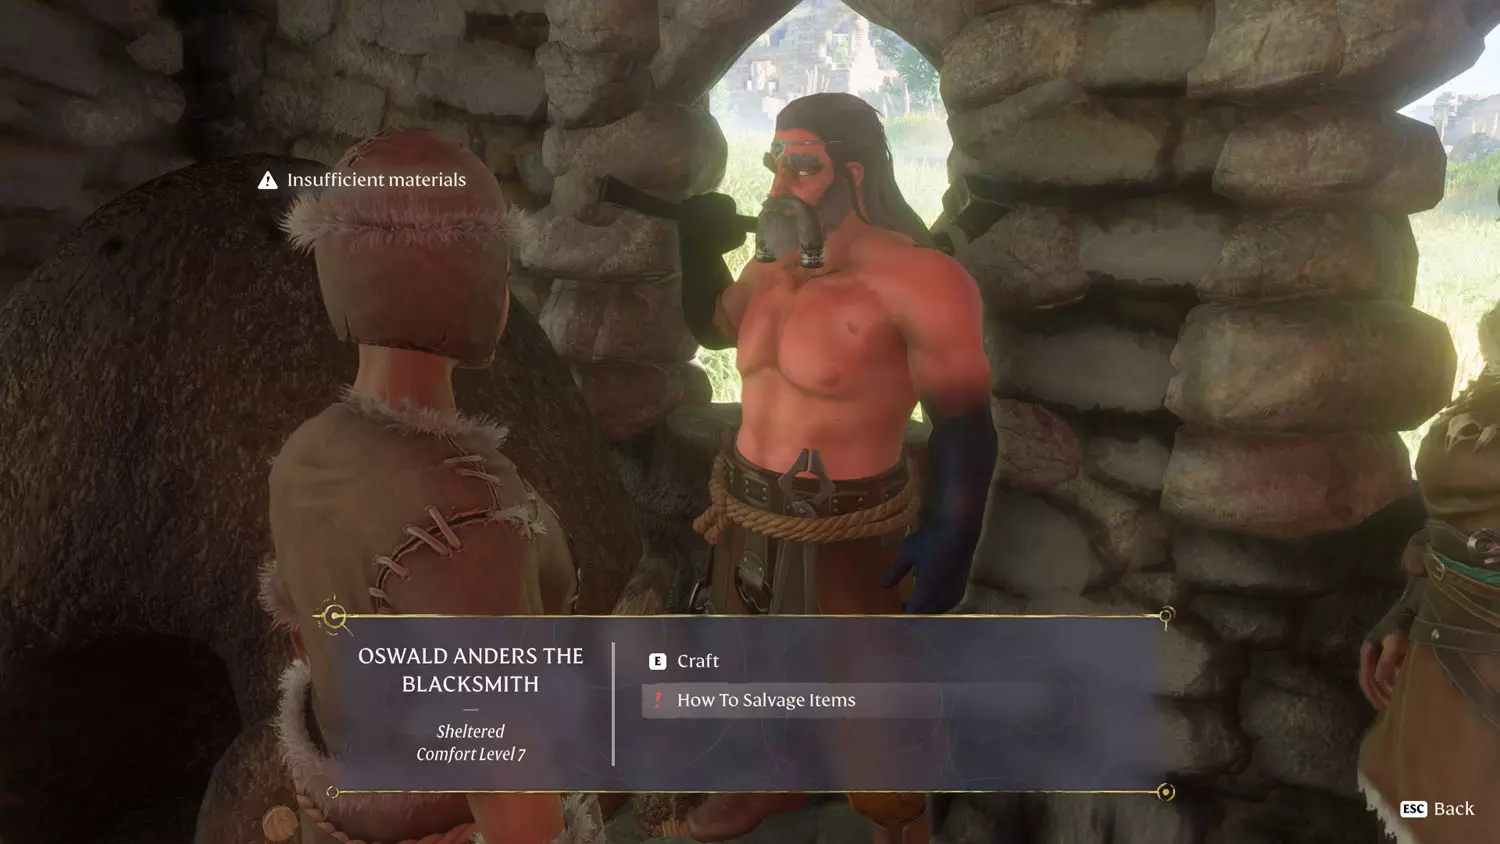
After completing the Flame Altar Quest: Hunter Becomes The Hunted, you will be able to talk to the Blacksmith to initiate this quest. You just need to select “How To Salvage Items.” If you have already Salvaged an item, then the first half of the quest is done. If you haven’t, then open up your inventory or loot hoard and search for a weapon you do NOT care about to Salvage. Doing so will finish this part of the quest.
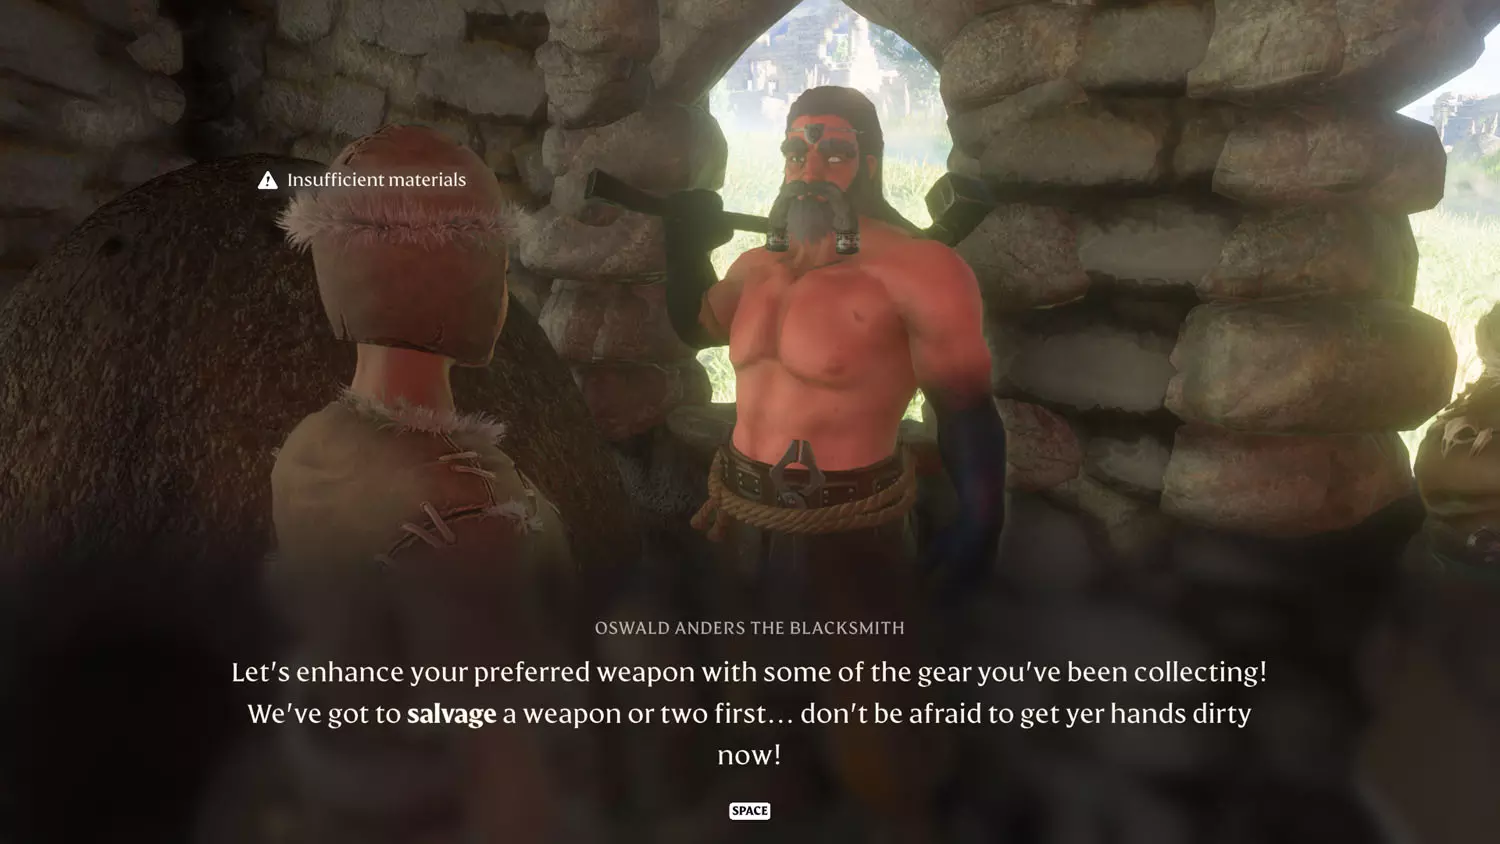
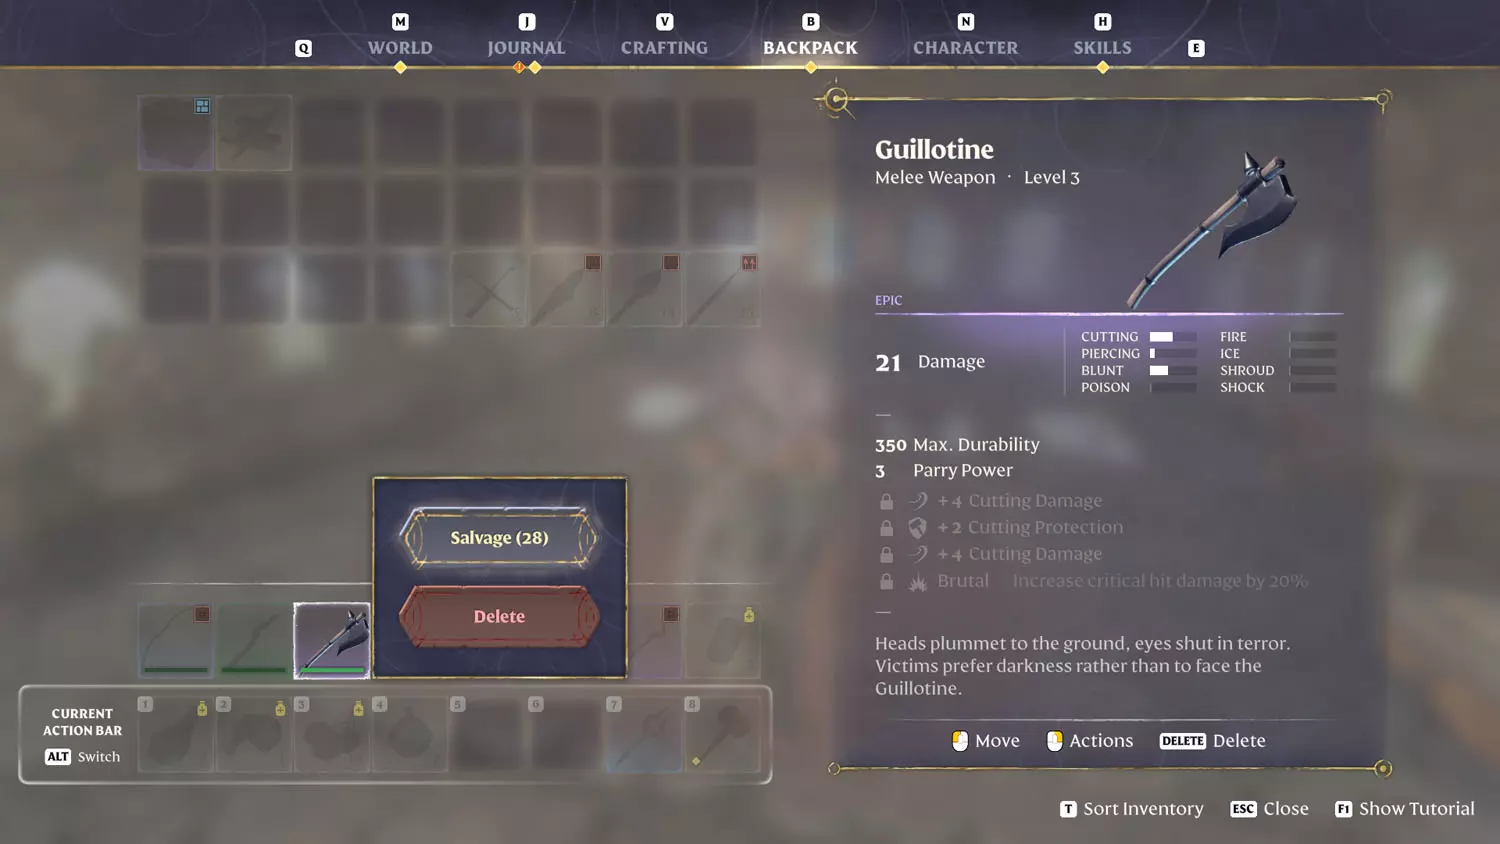
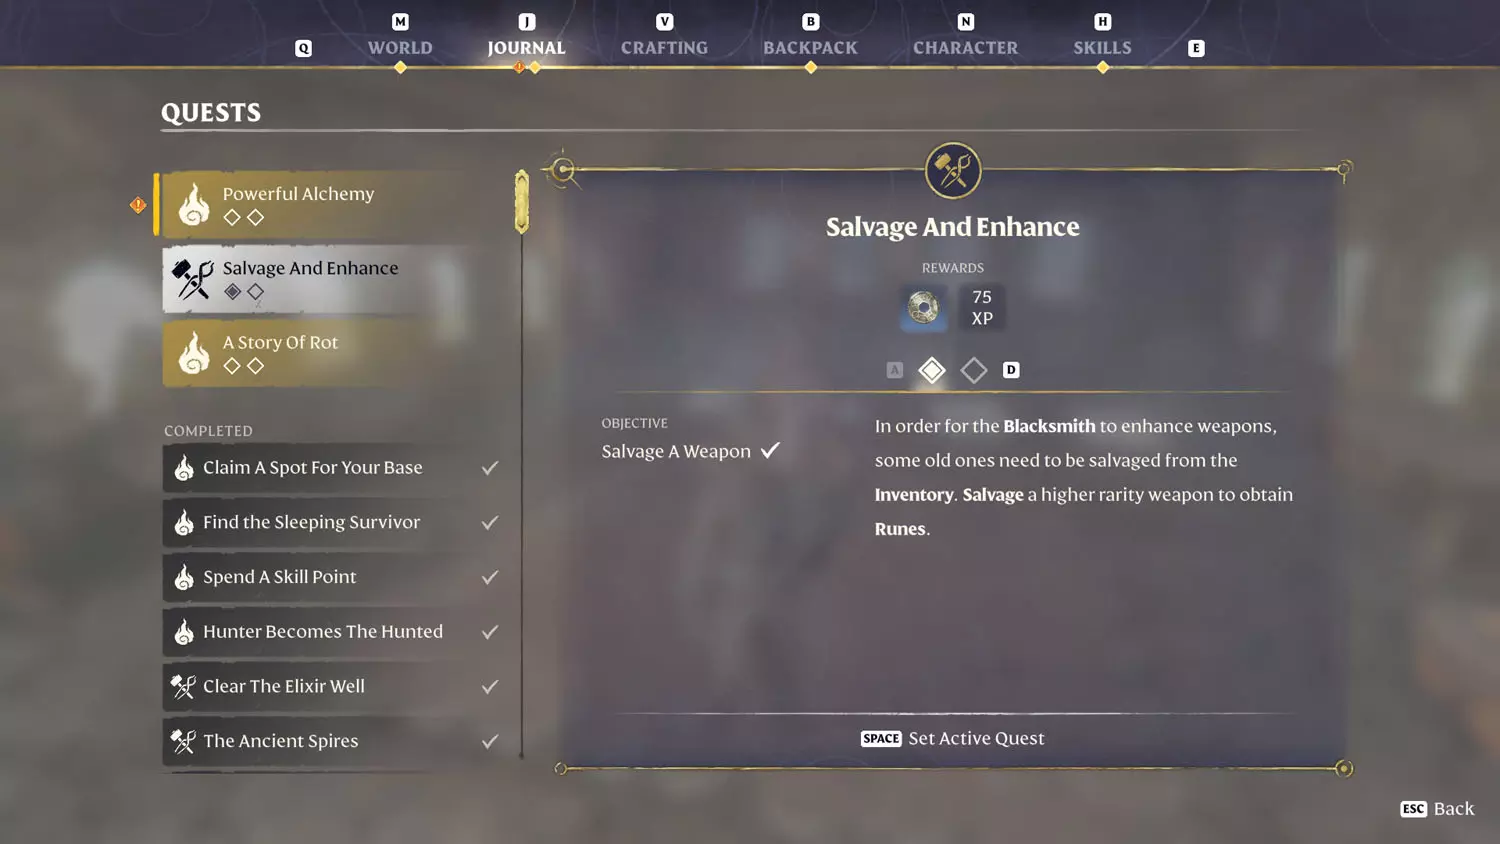
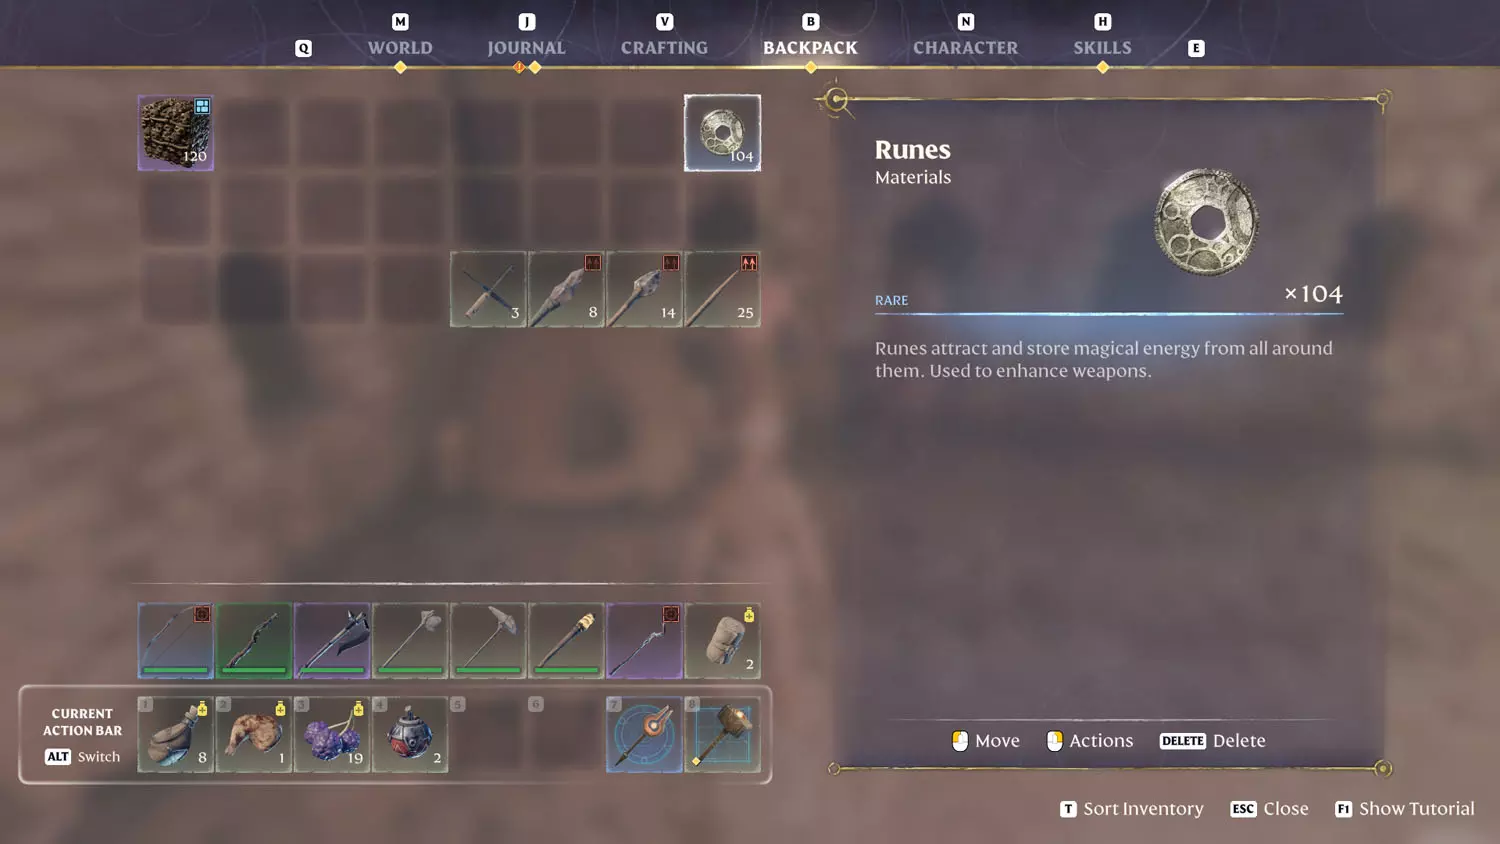
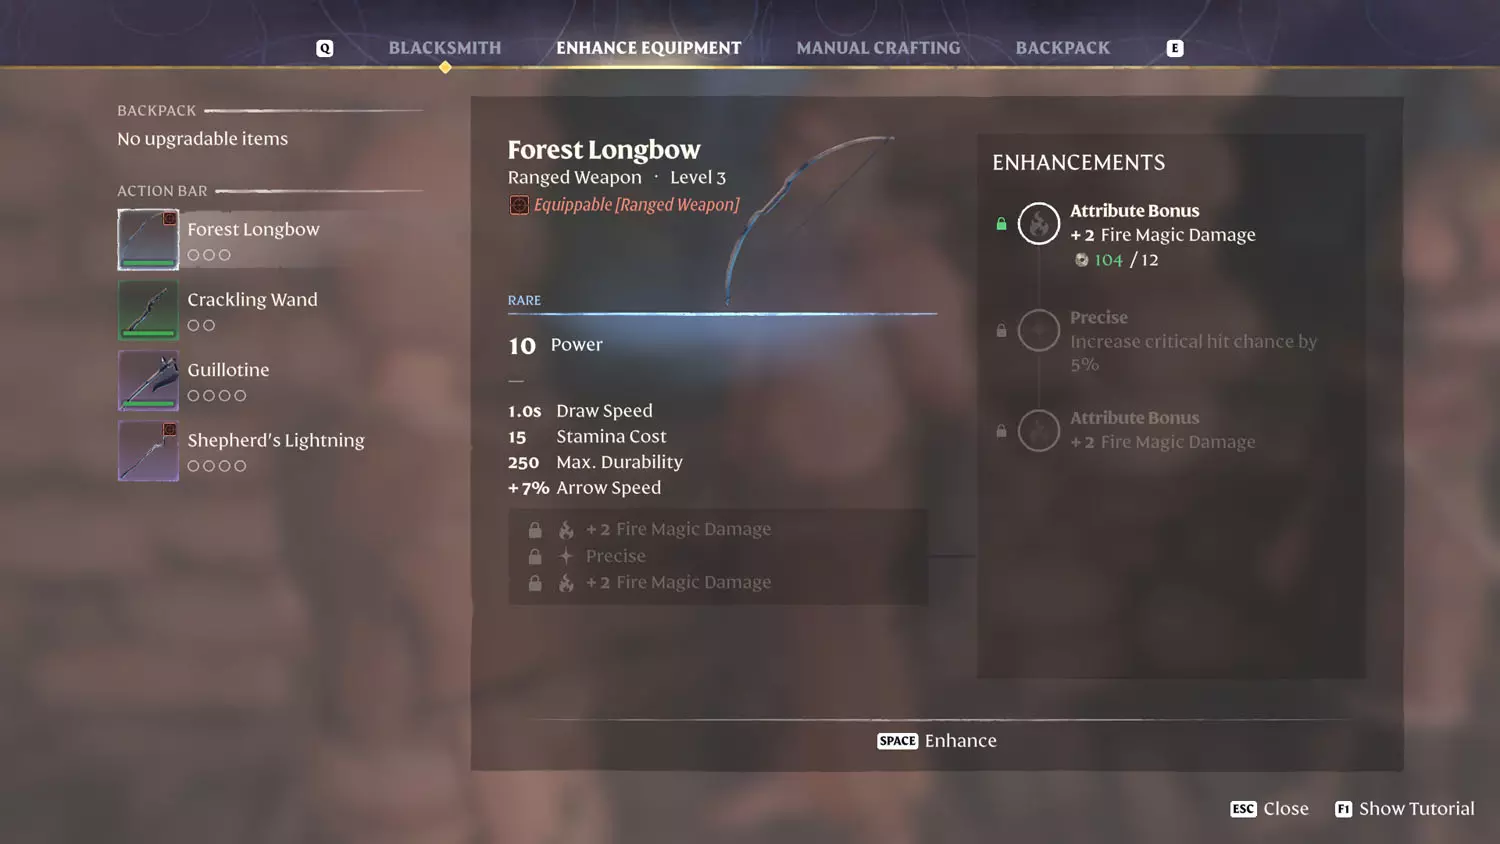
From there, talk to the Blacksmith again to Enhance an item - preferably one you DO care about. You will need plenty of Runes to do this - eared in loot from some Shroud creatures and from Salvaging weapons. Enhancing gear will finish this quest.
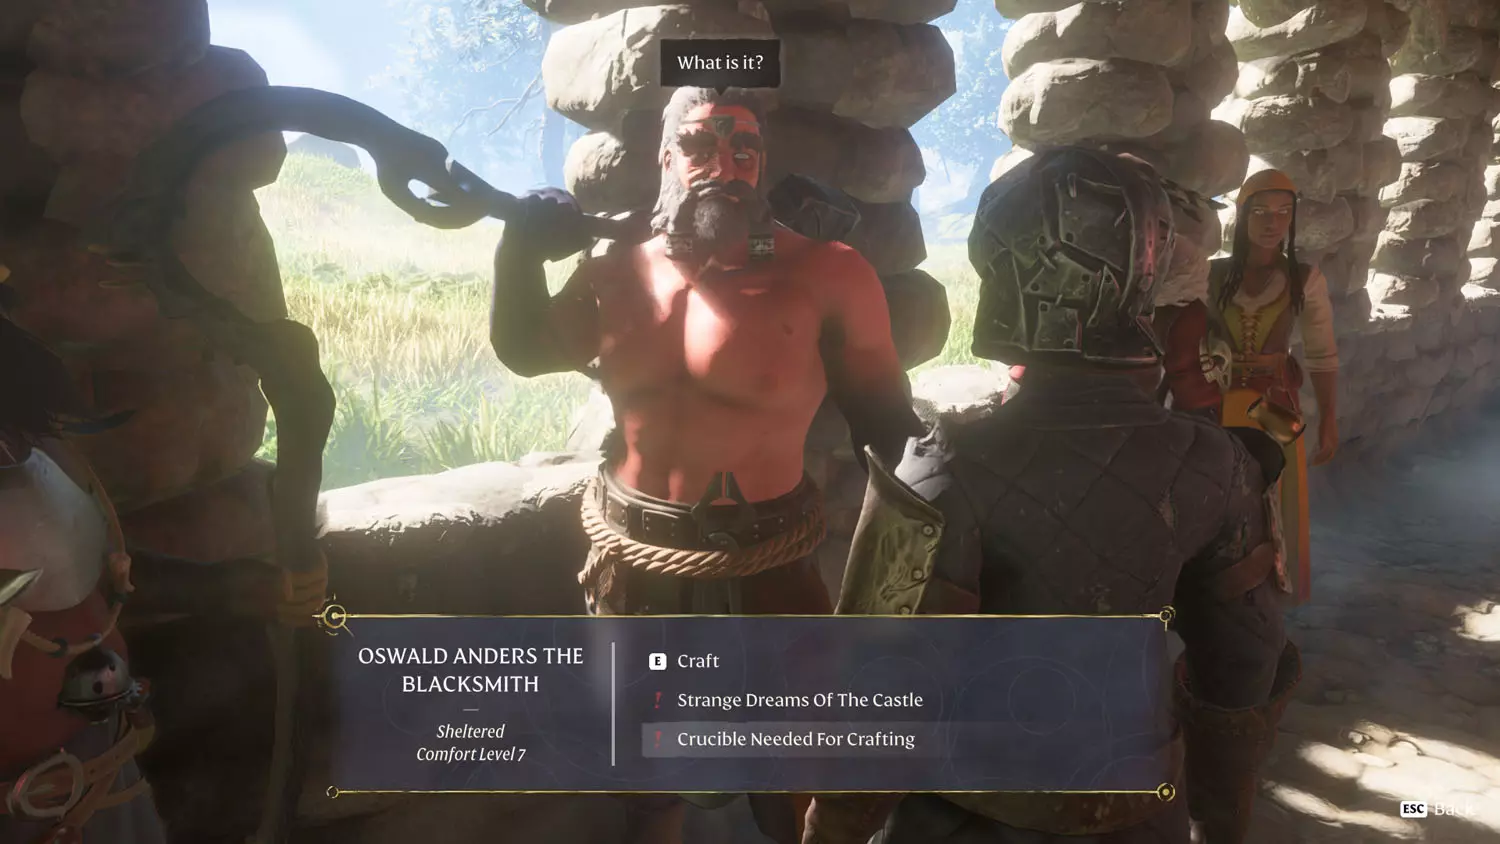
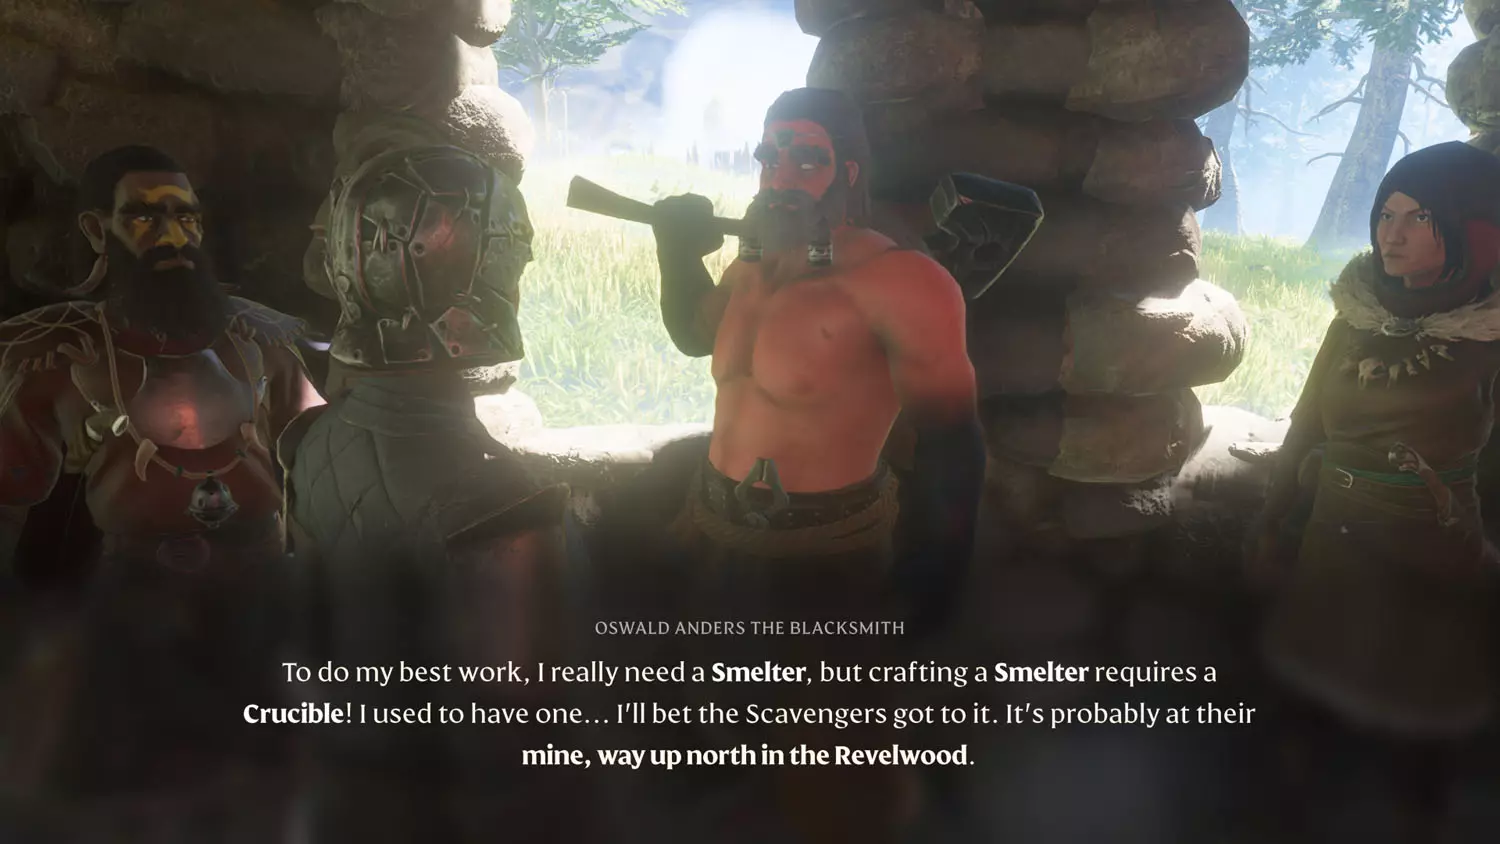
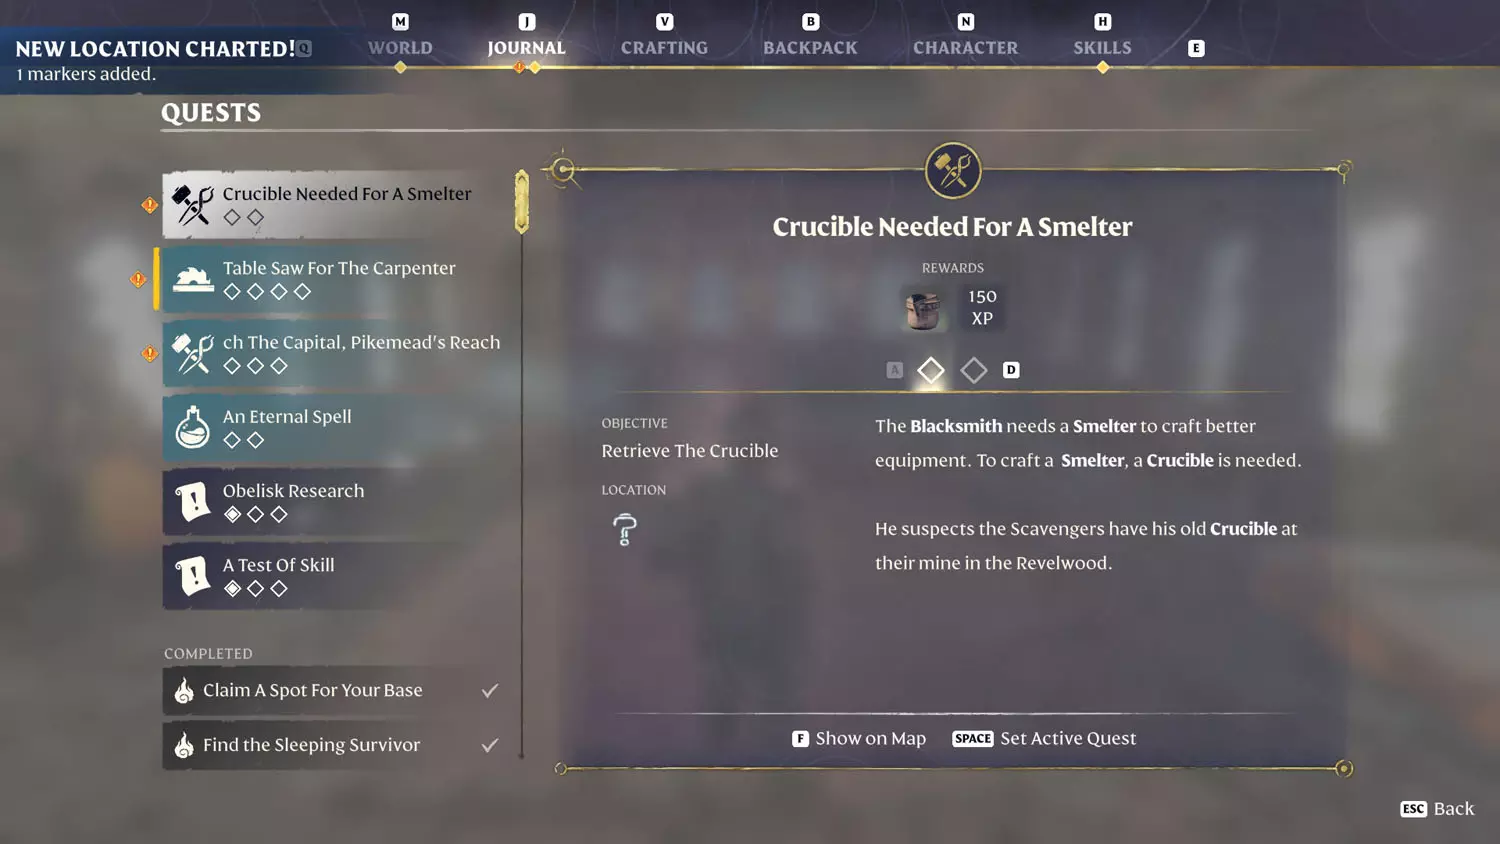
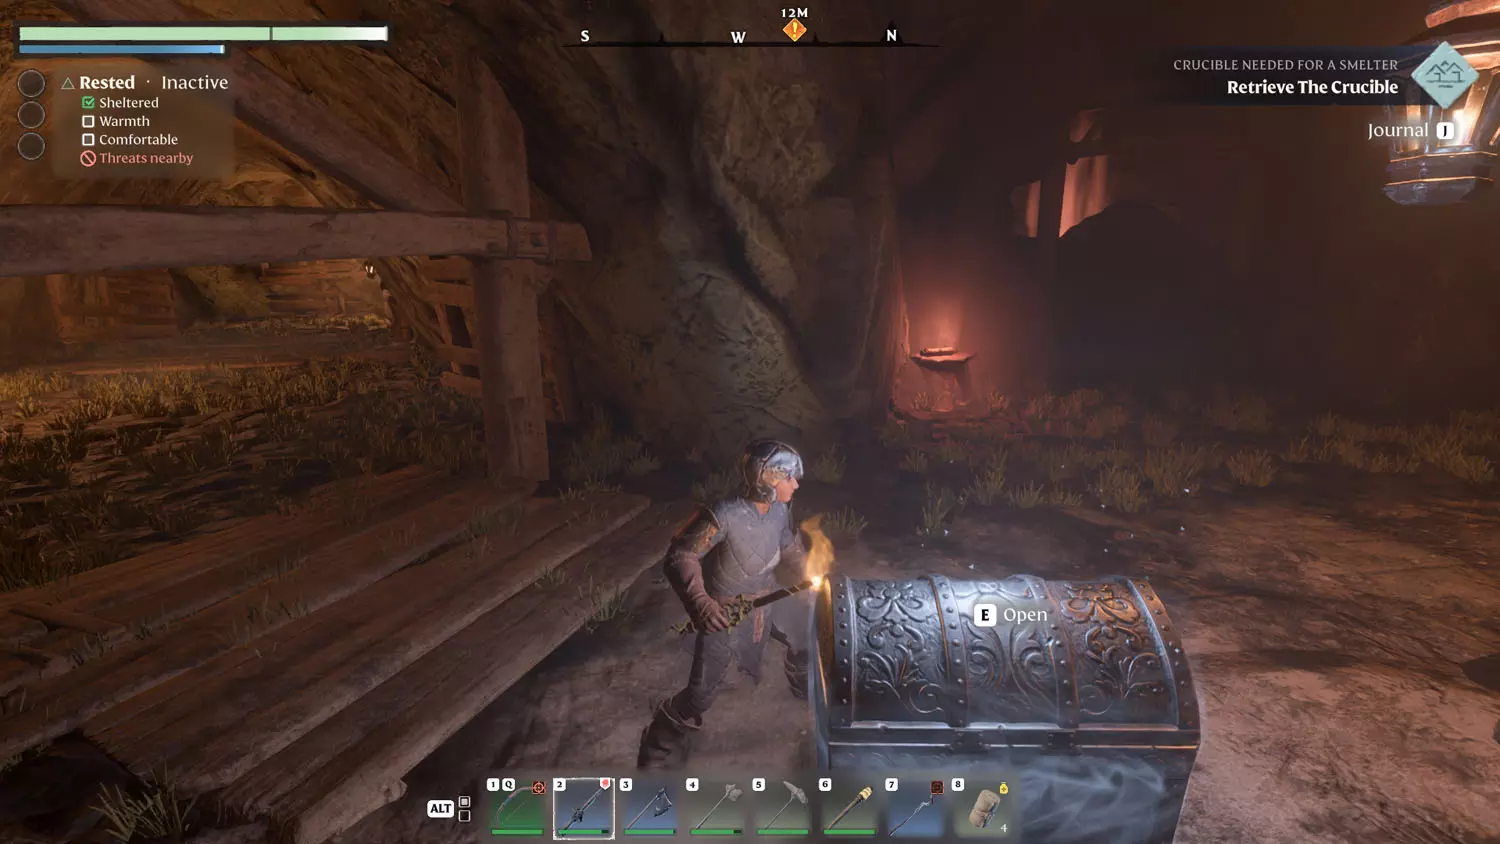
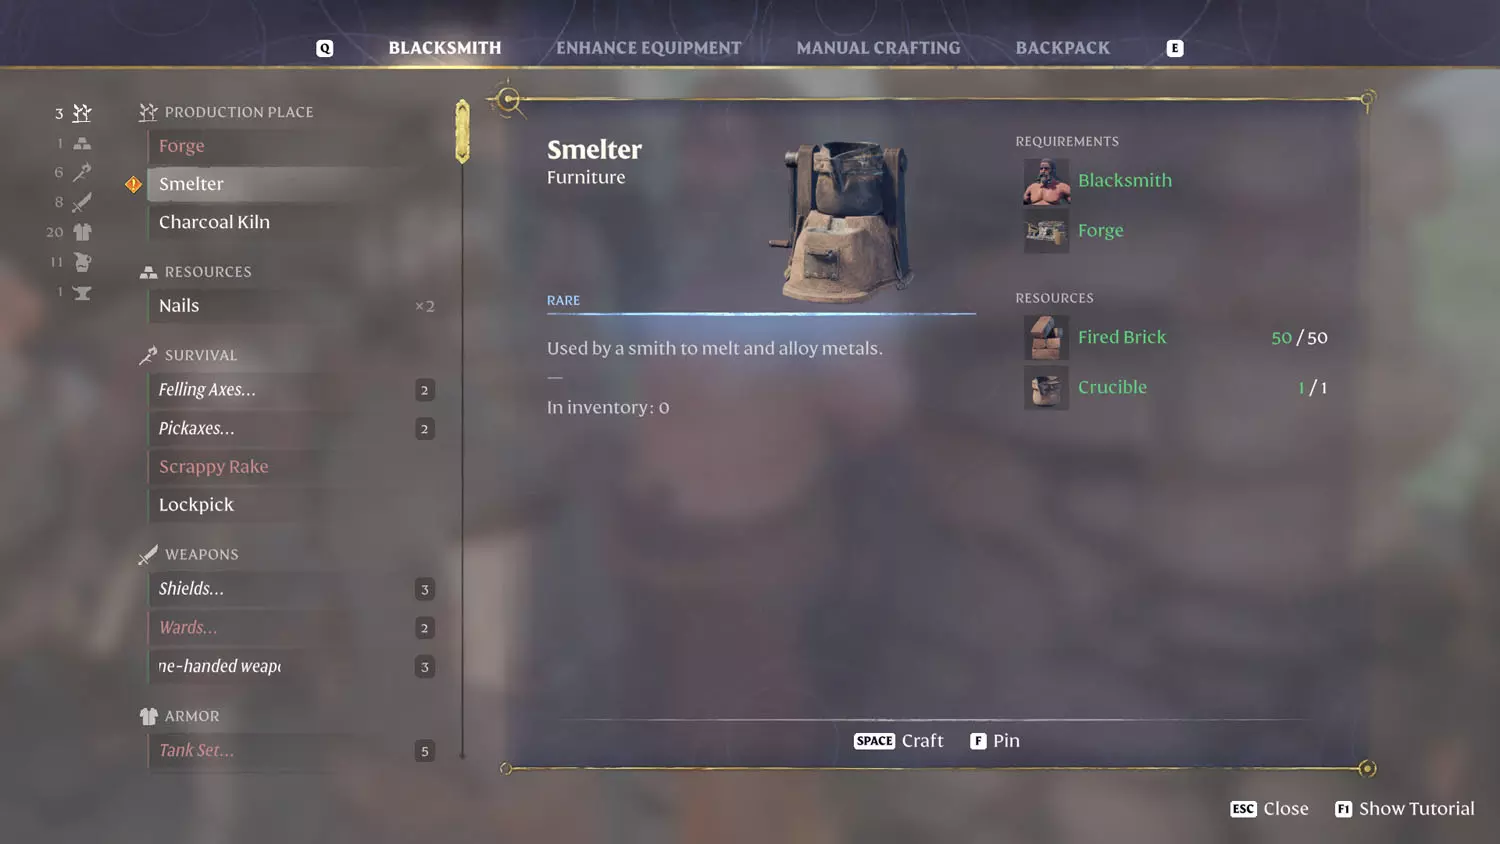
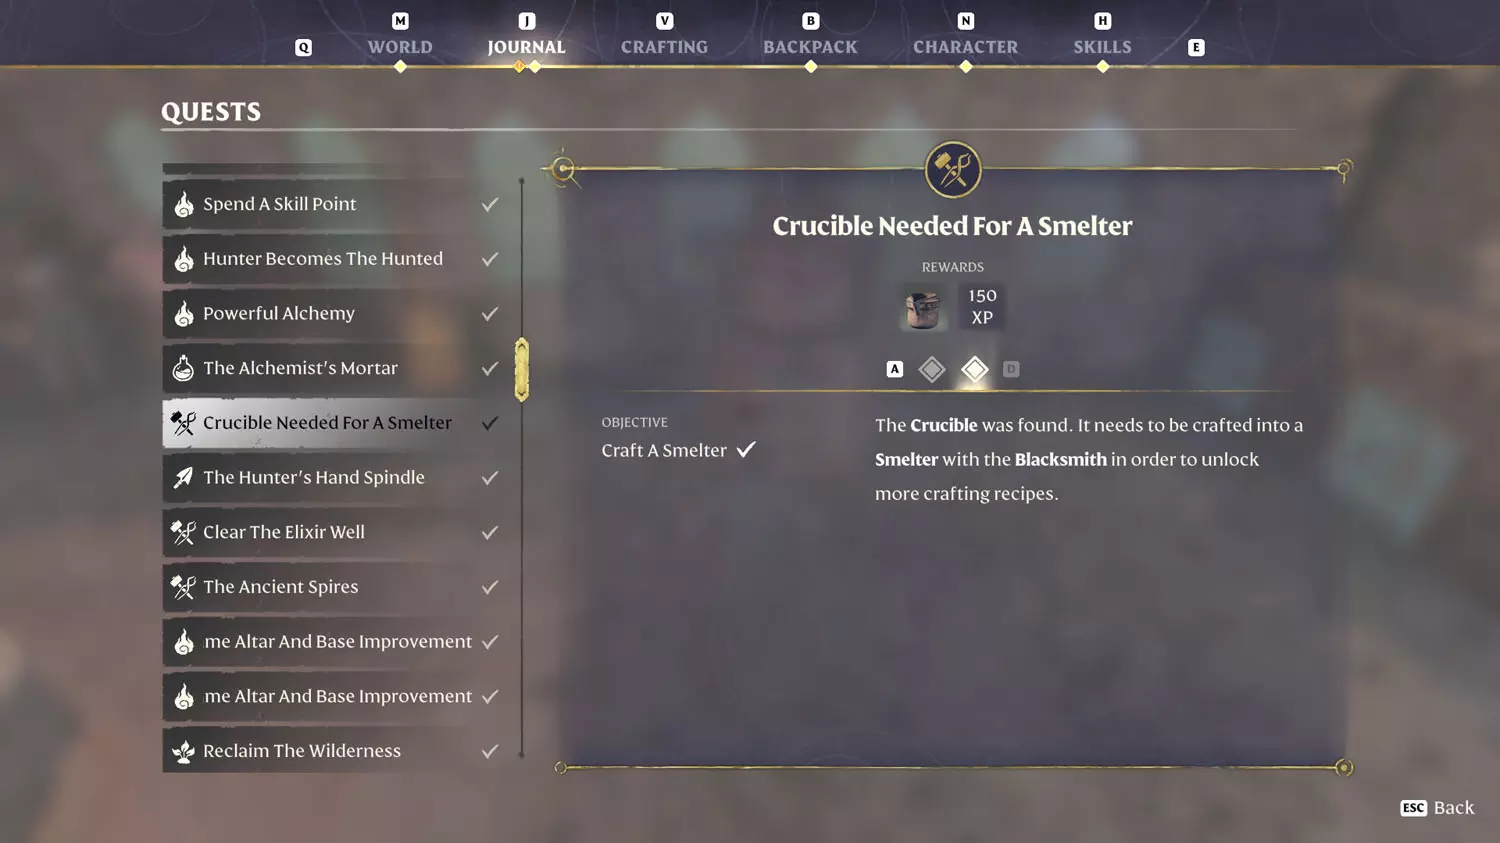
Crucible Needed For A Smelter
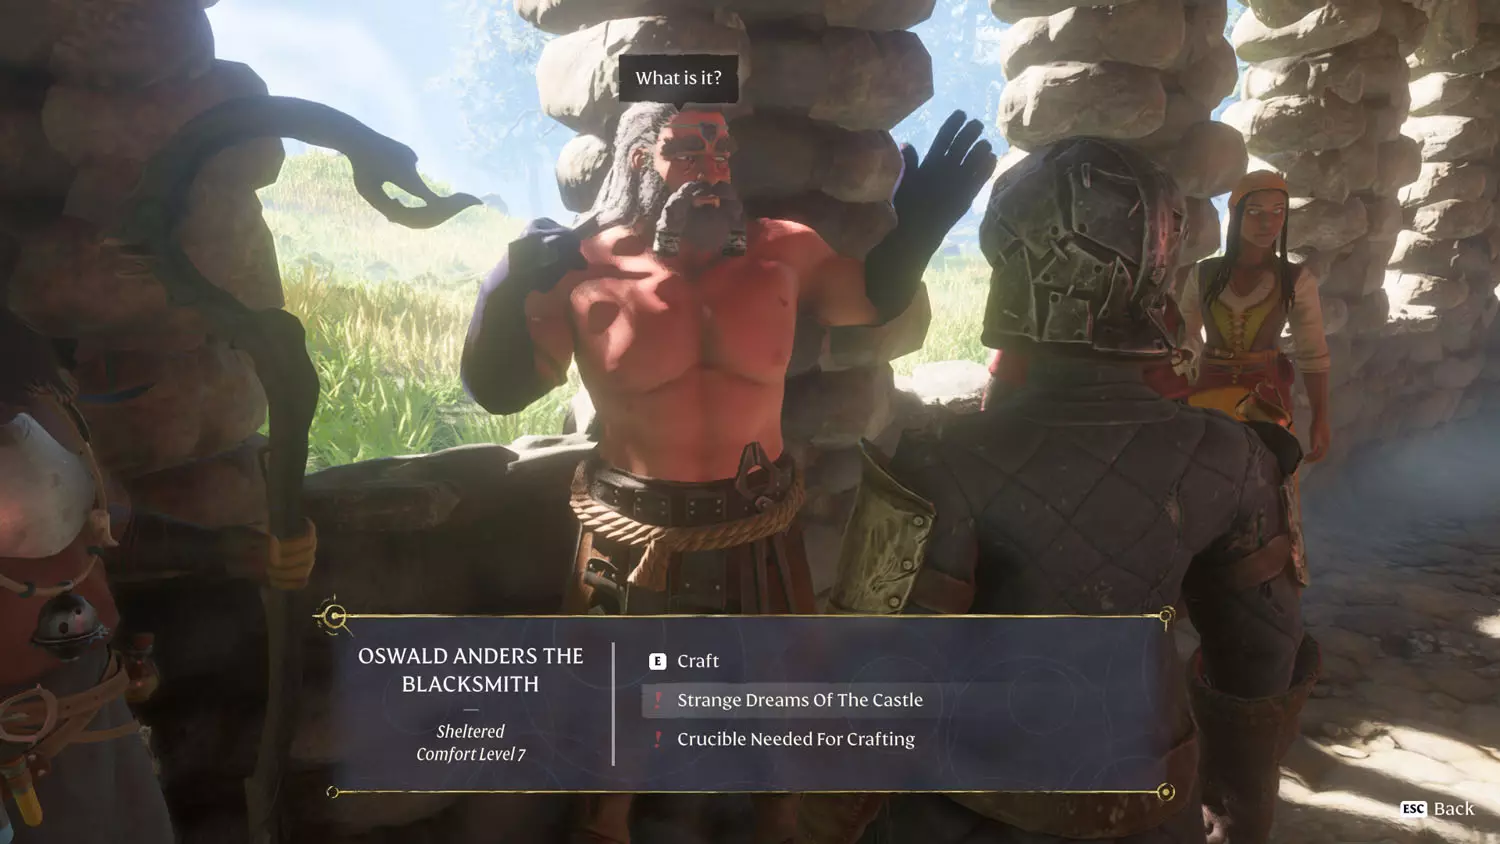
“Crucible Needed For Crafting” appears as a dialogue option at the same time as the “Strange Dreams Of The Castle.” I’m unsure if completing the Items, XP, and Loot Reward Quest: Lost In The Shroud made this option available.
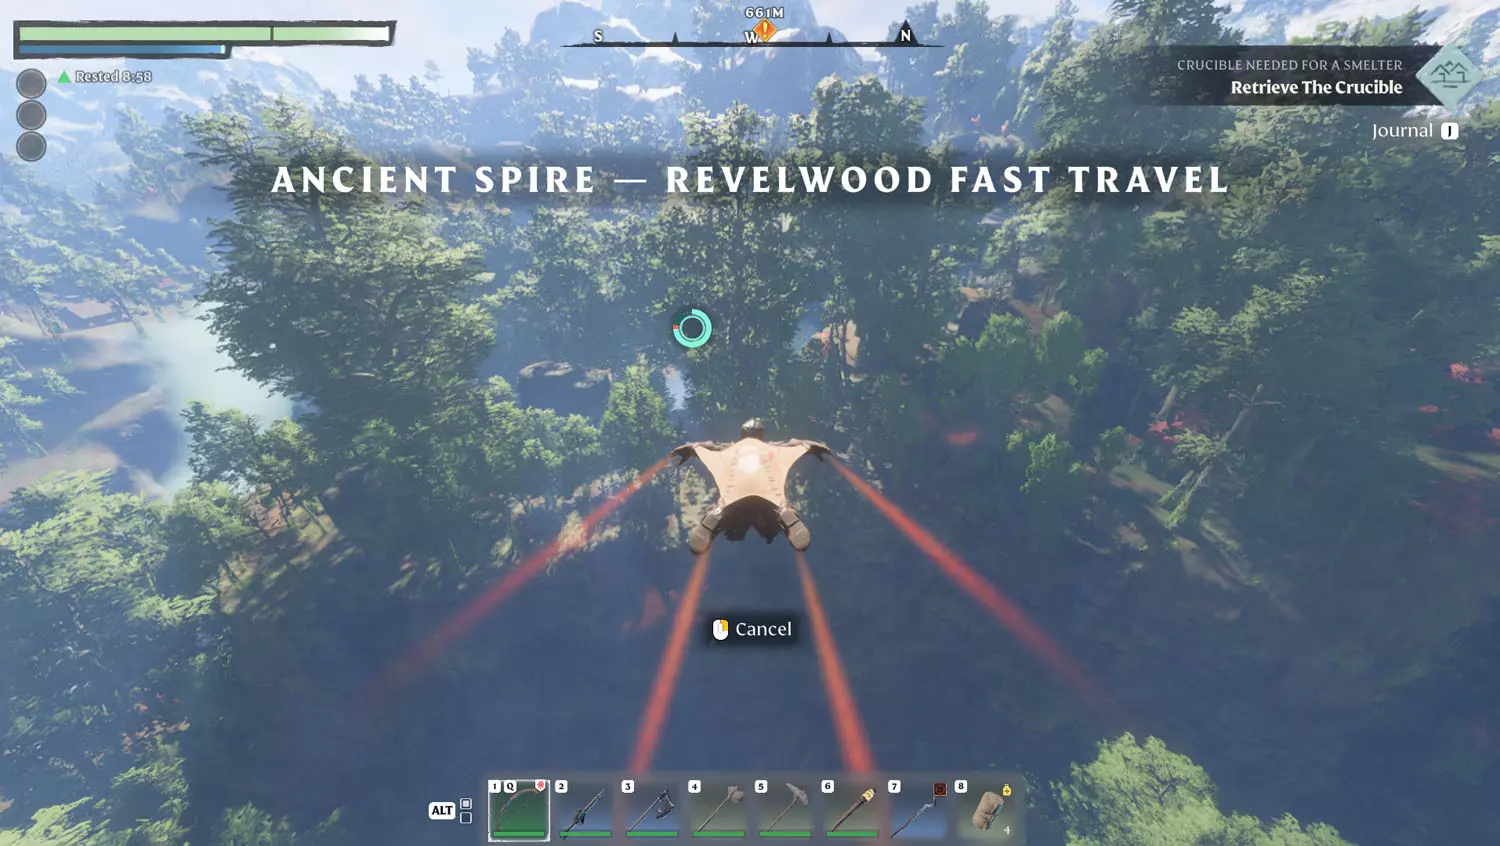
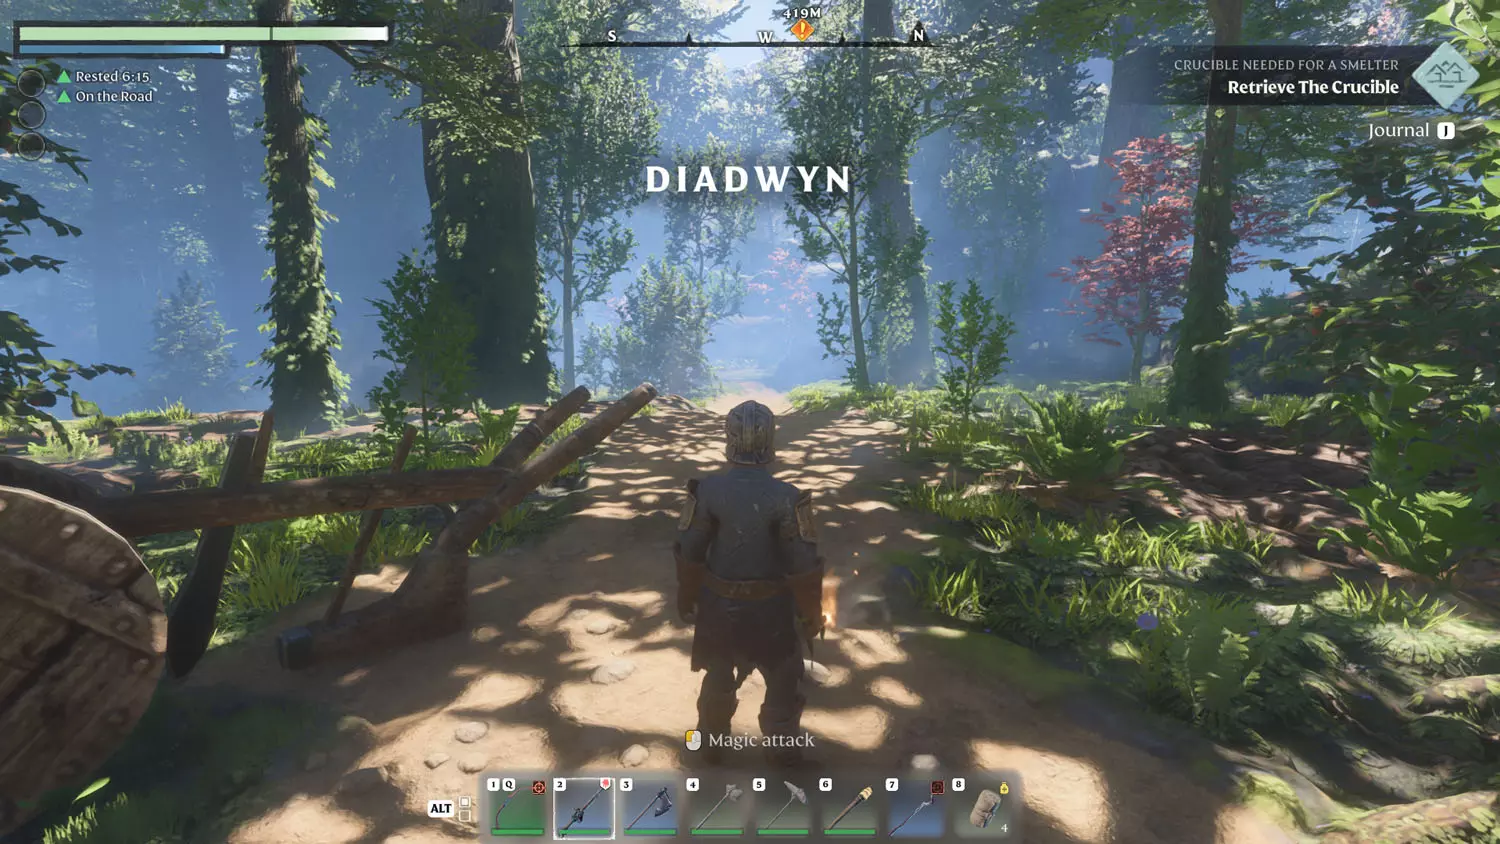
After crafting the first upgrade for the Glider (Carpenter Quest: A Graceful Flight ), I traveled to the Ancient Spire - Revelwood Fast Travel. I only managed to make it to Diadwyn. So, by road I went! You may as well pick up some Half-Timbered Blocks while you’re here (Silver Chest - middle of town). Then head for the west exit and follow the road. You will eventually reach Mark Of Sameth.
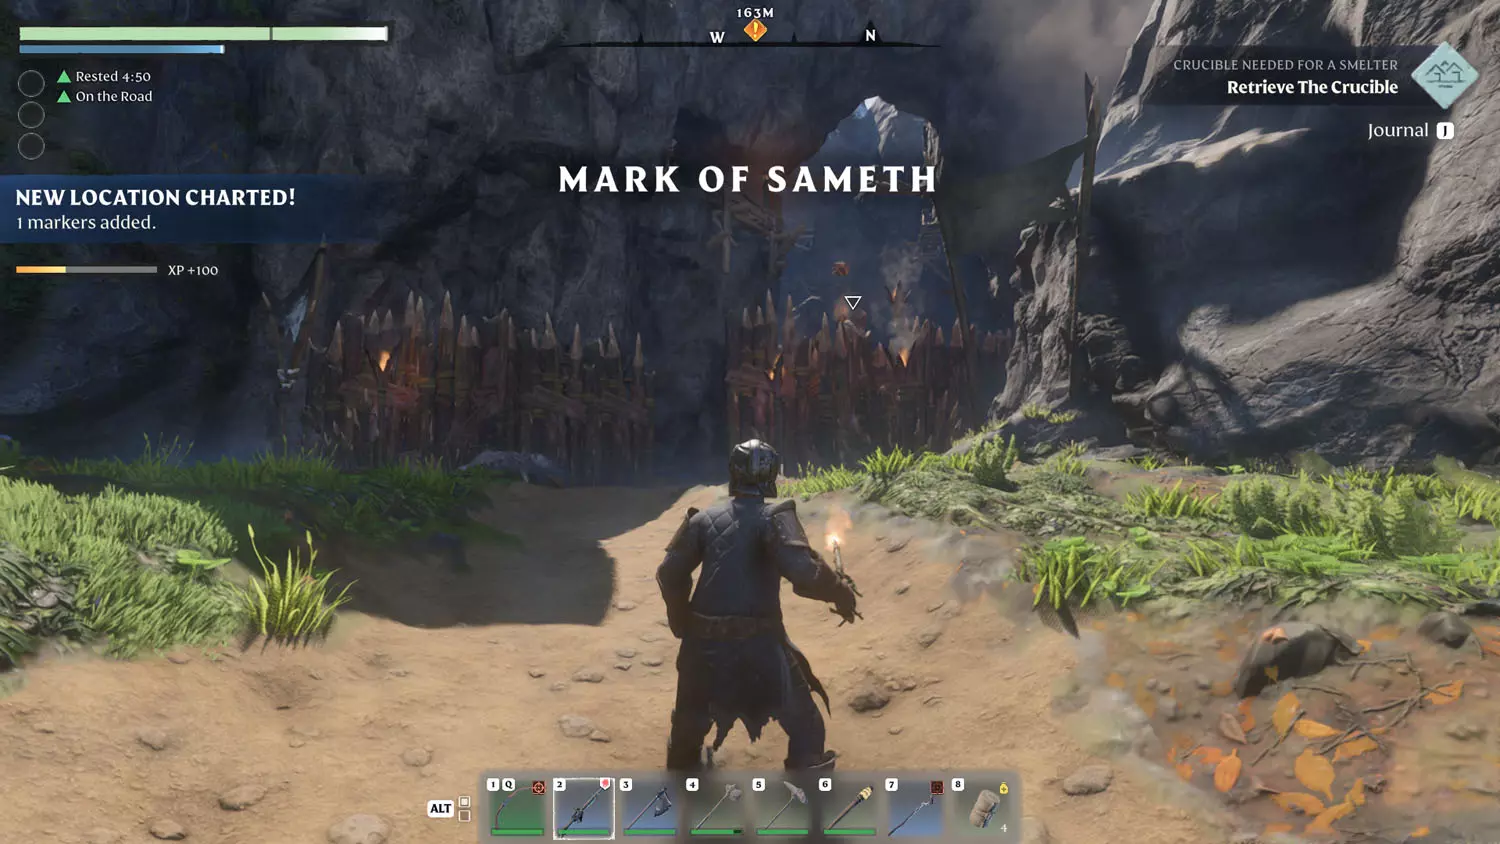
I would suggest following my tips on finding the Scavenger Lore: To Dig One’s Own Grave (all 3), which are all located in the Mark Of Sameth. The second lore, 2/3 We Have Dug Too Far, is NEXT TO a gravel wall. In the screenshot below, it goes Silver Chest - Lore on table - gravel wall - glowing red crucible behind wall. Digging apart the wall or blowing it up will get you to the Crucible on the other side. Obtaining the Crucible will finish the first part of the quest.
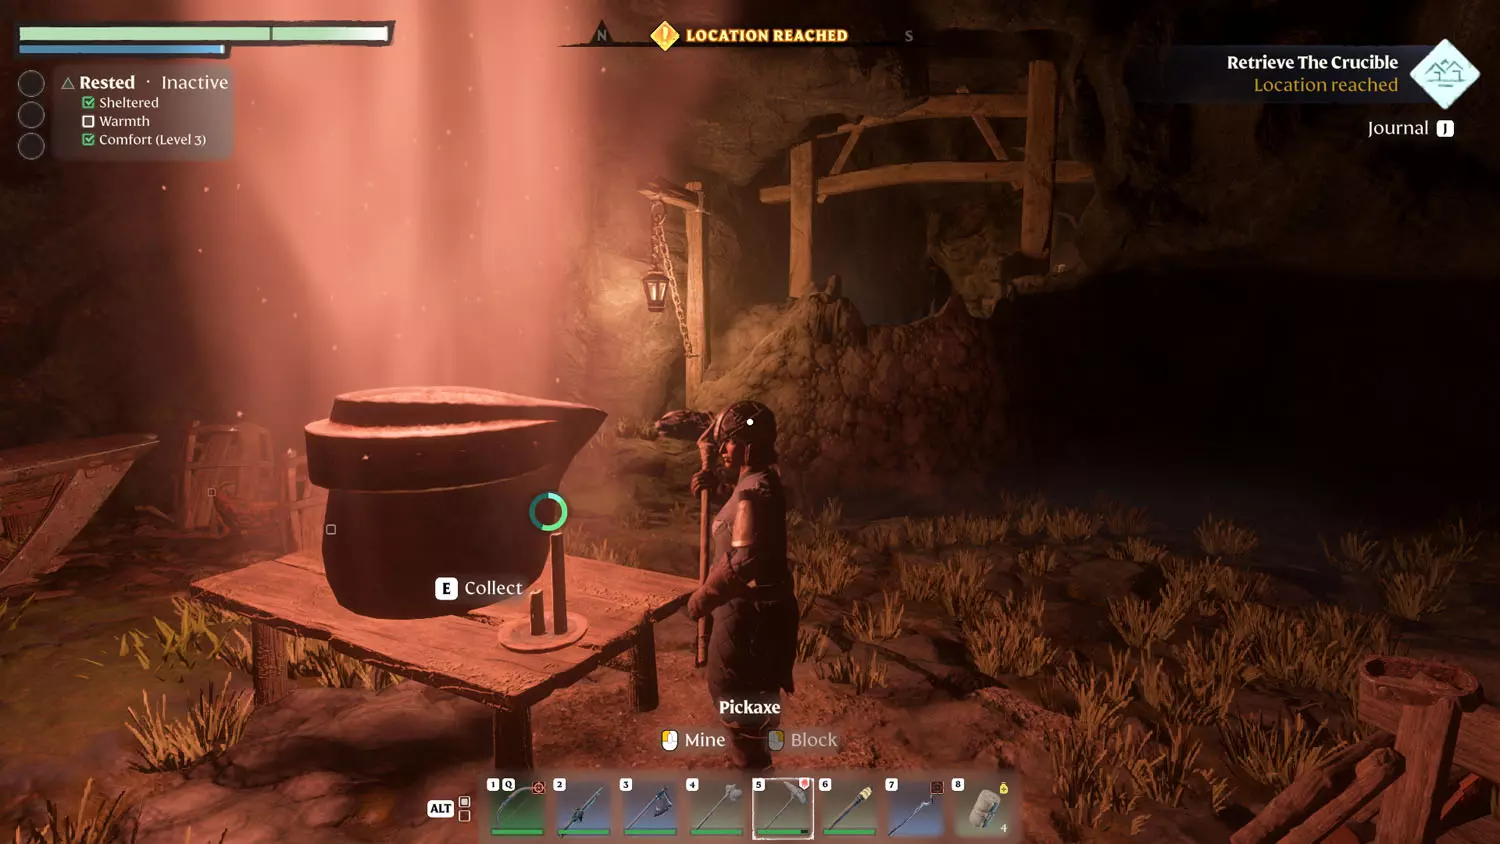
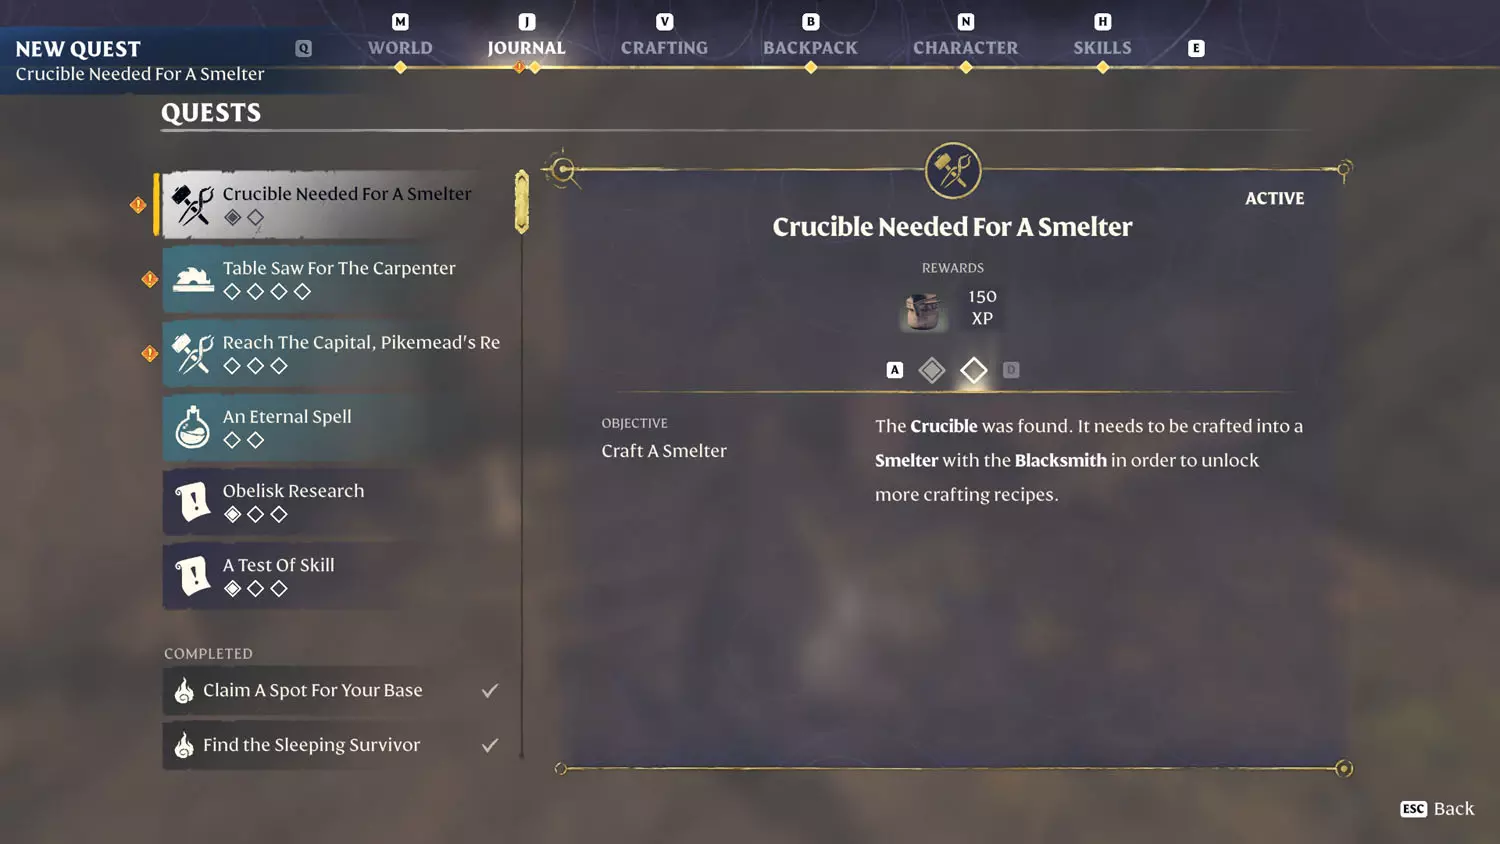
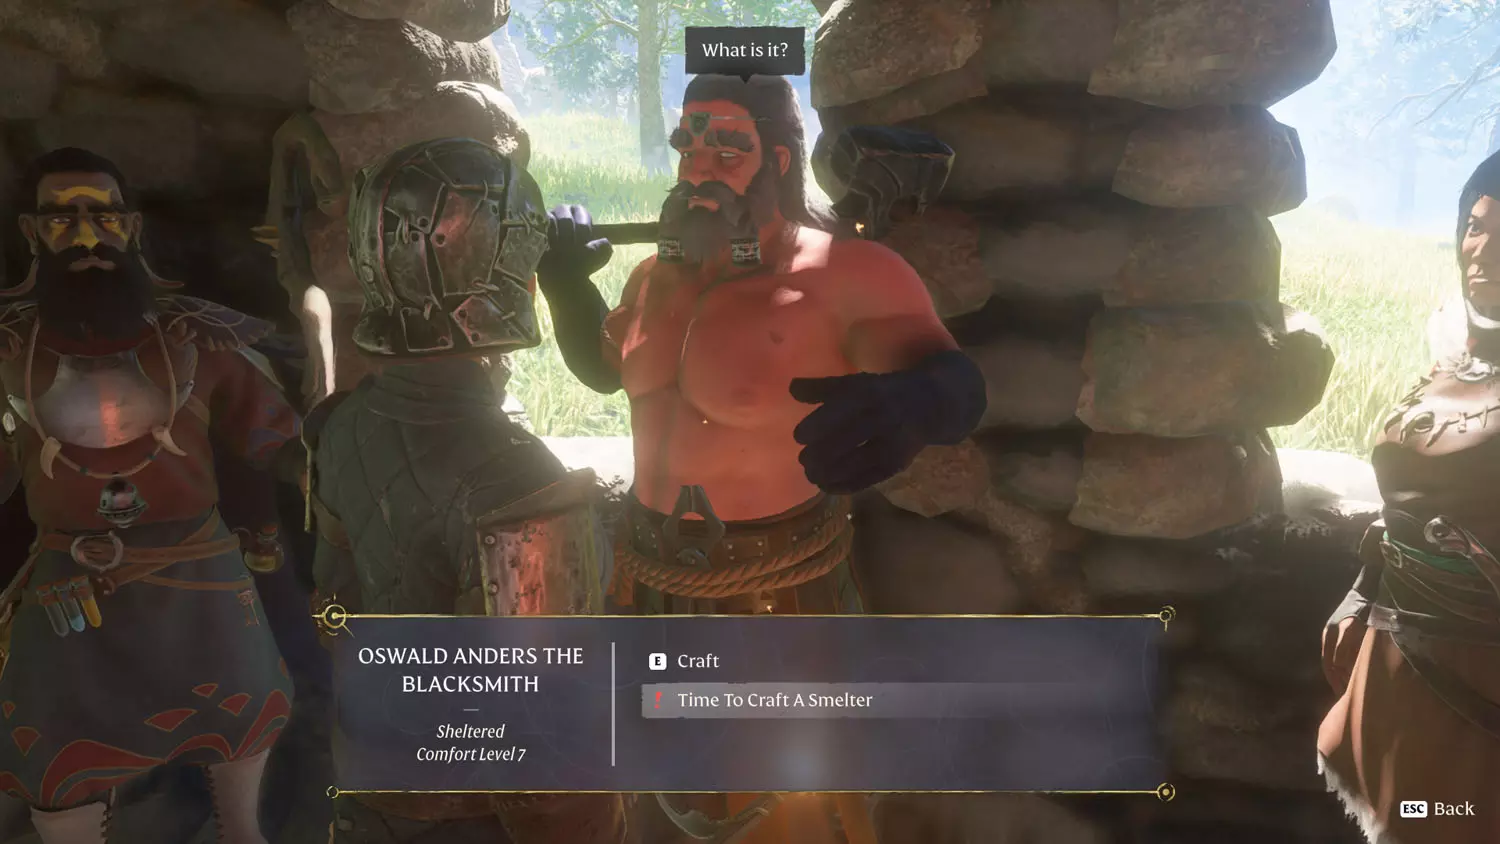
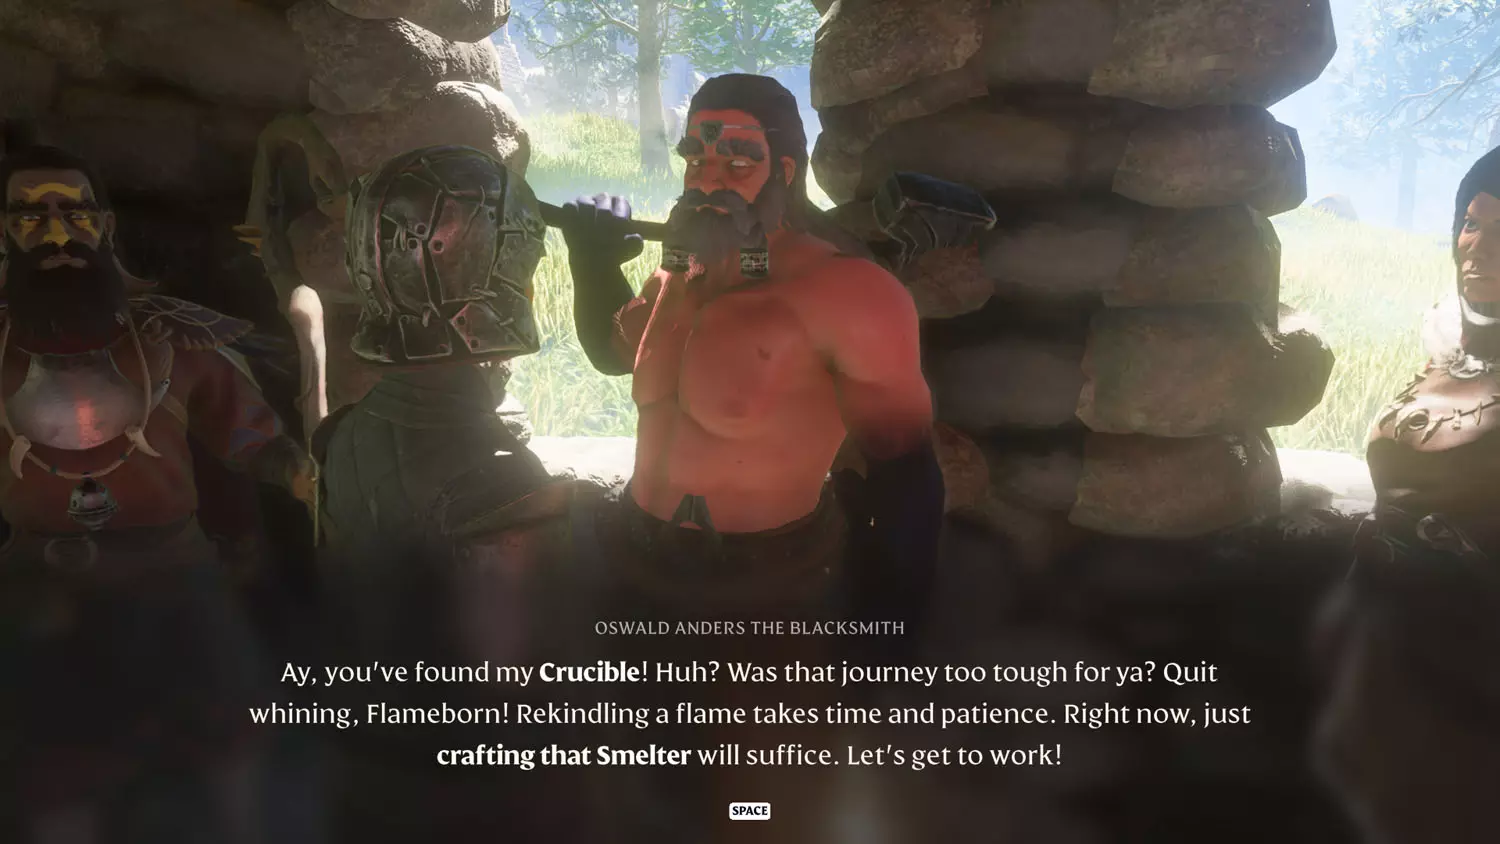
When done, head back to your home base to share the good news with the Blacksmith. Oswald Anders will have the dialogue option “Time To Craft A Smelter” available. Once you place the crafted Smelter, the quest will be completed.
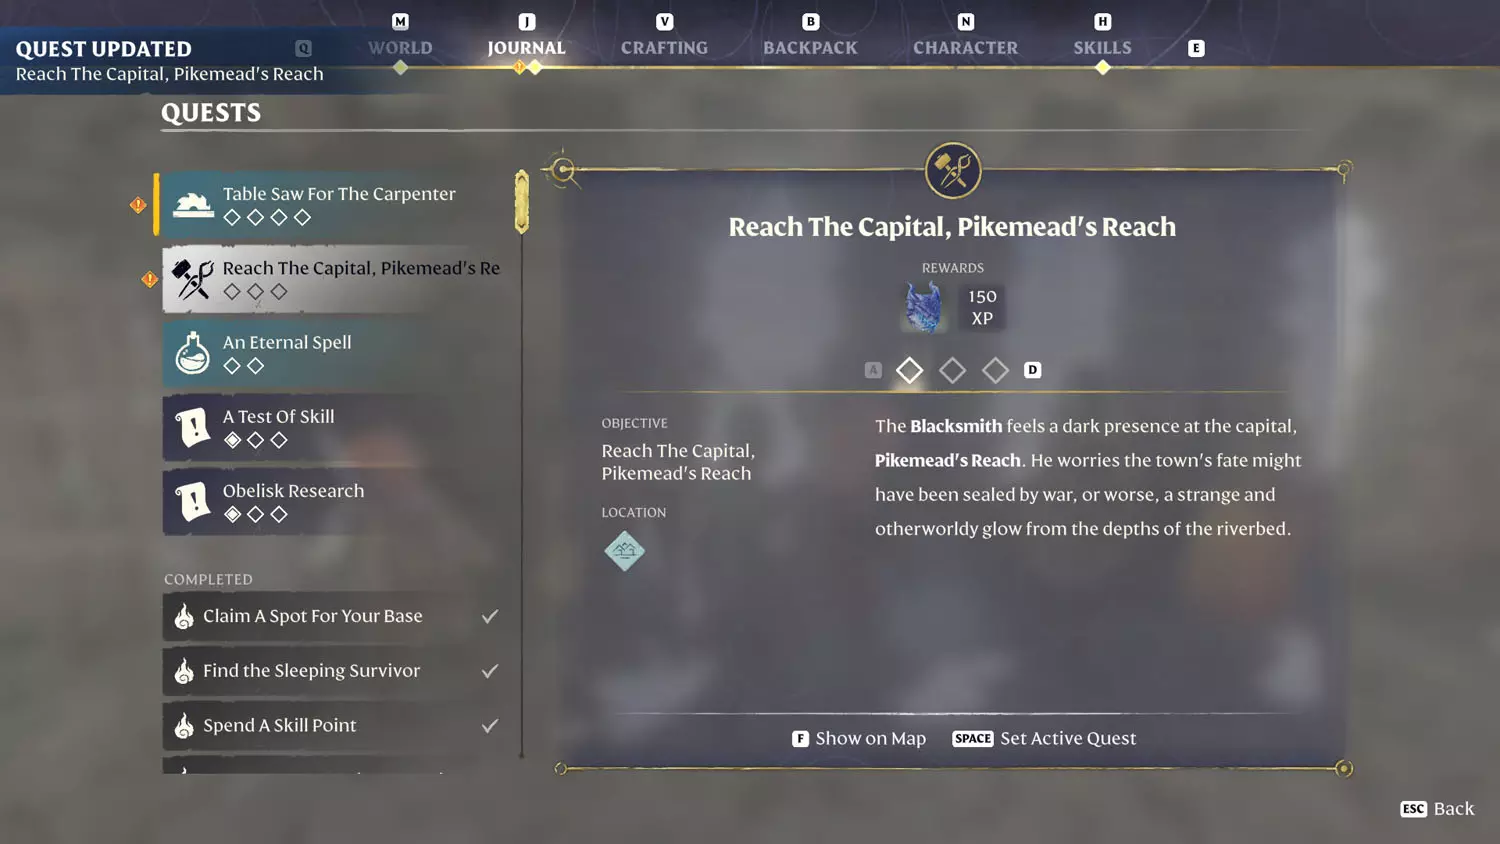
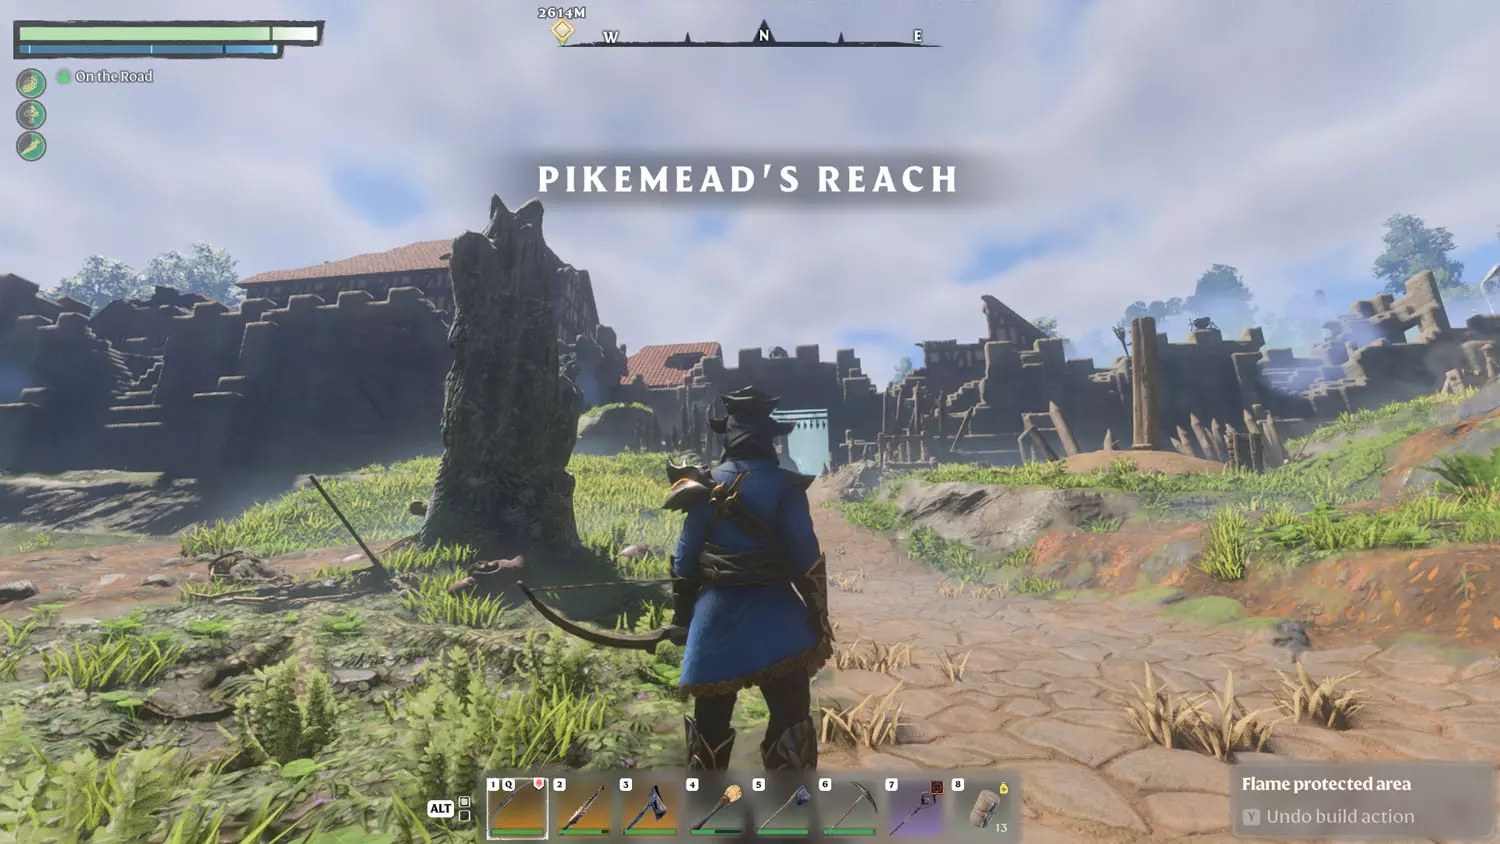
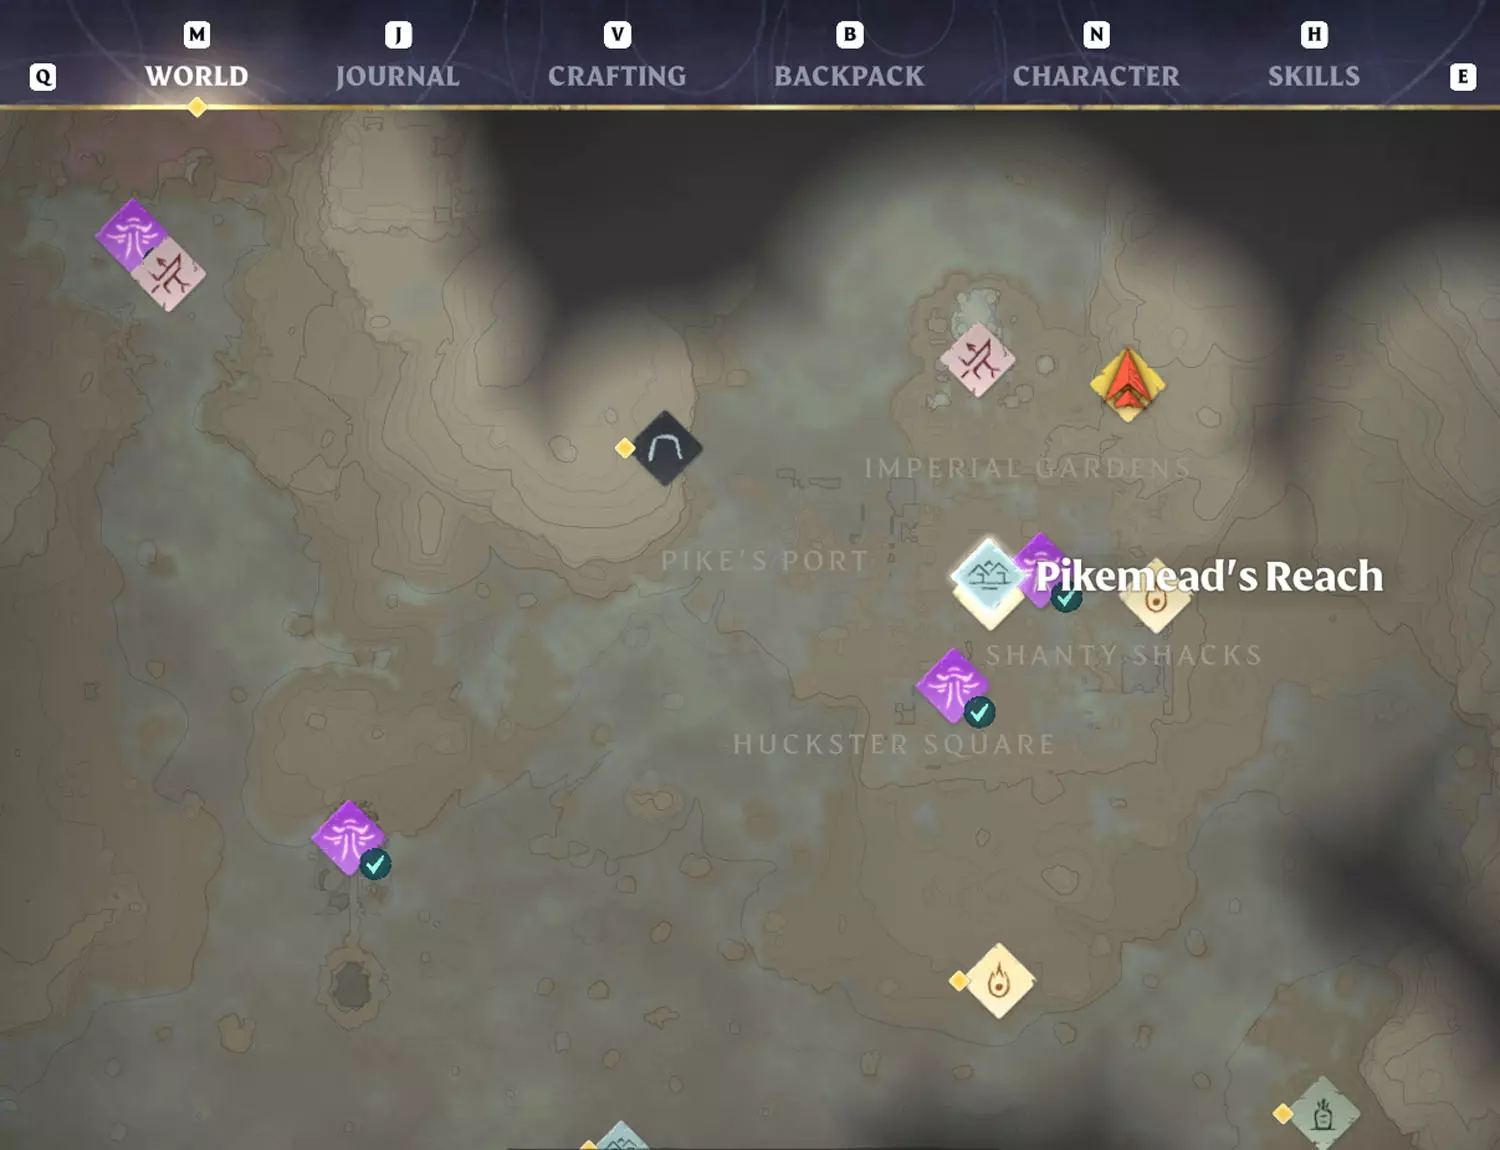
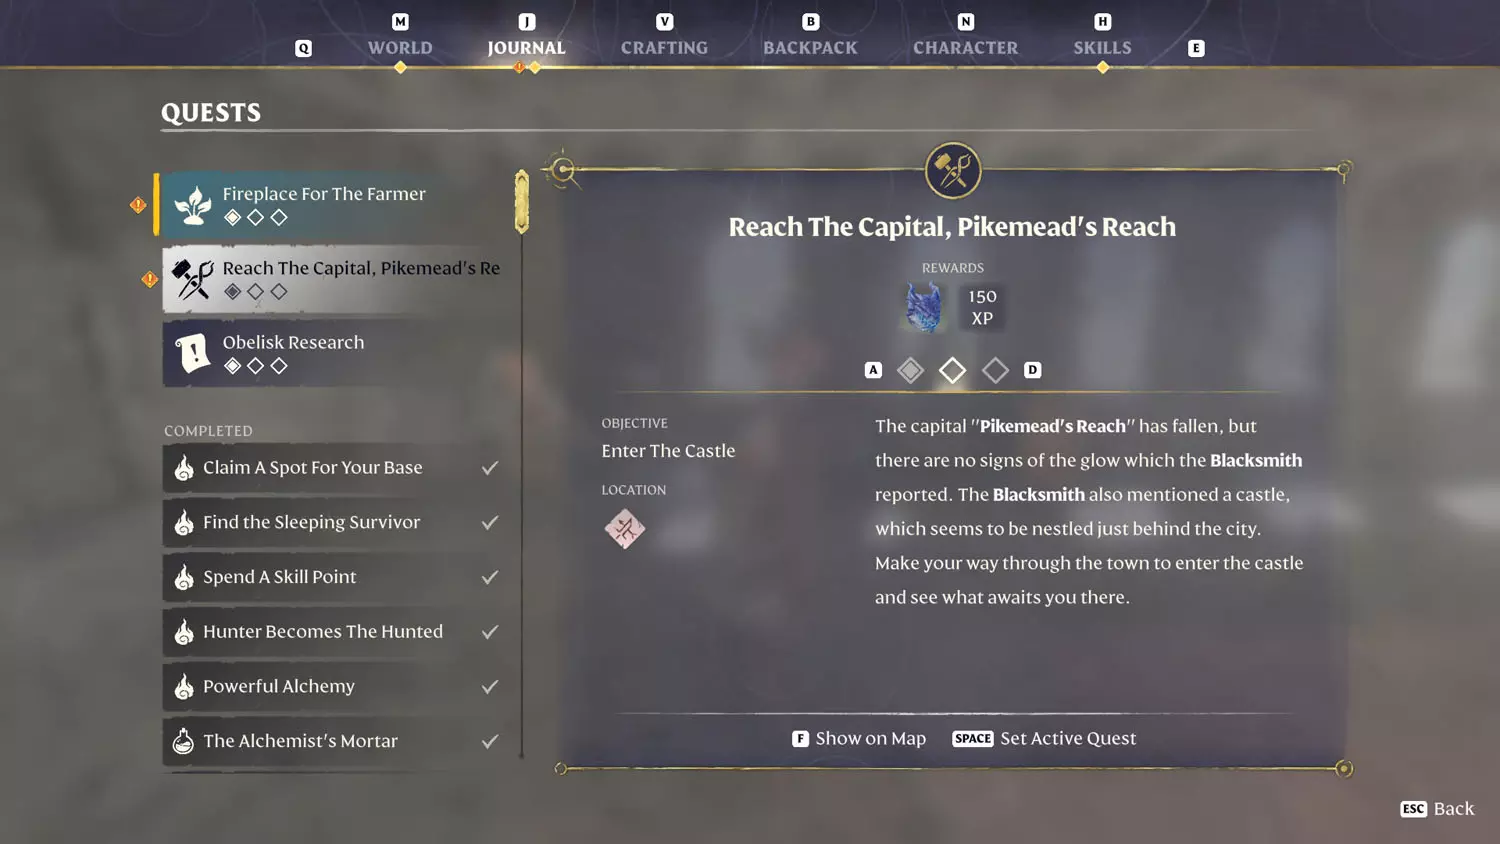
Reach The Capital, Pikemead’s Reach
Goodness. I’ve done so many quests ahead of this one. I believe finishing the Items, XP, and Loot Reward Quest: Lost In The Shroud will open up the dialogue option for this one - “Strange Dreams Of The Castle”.
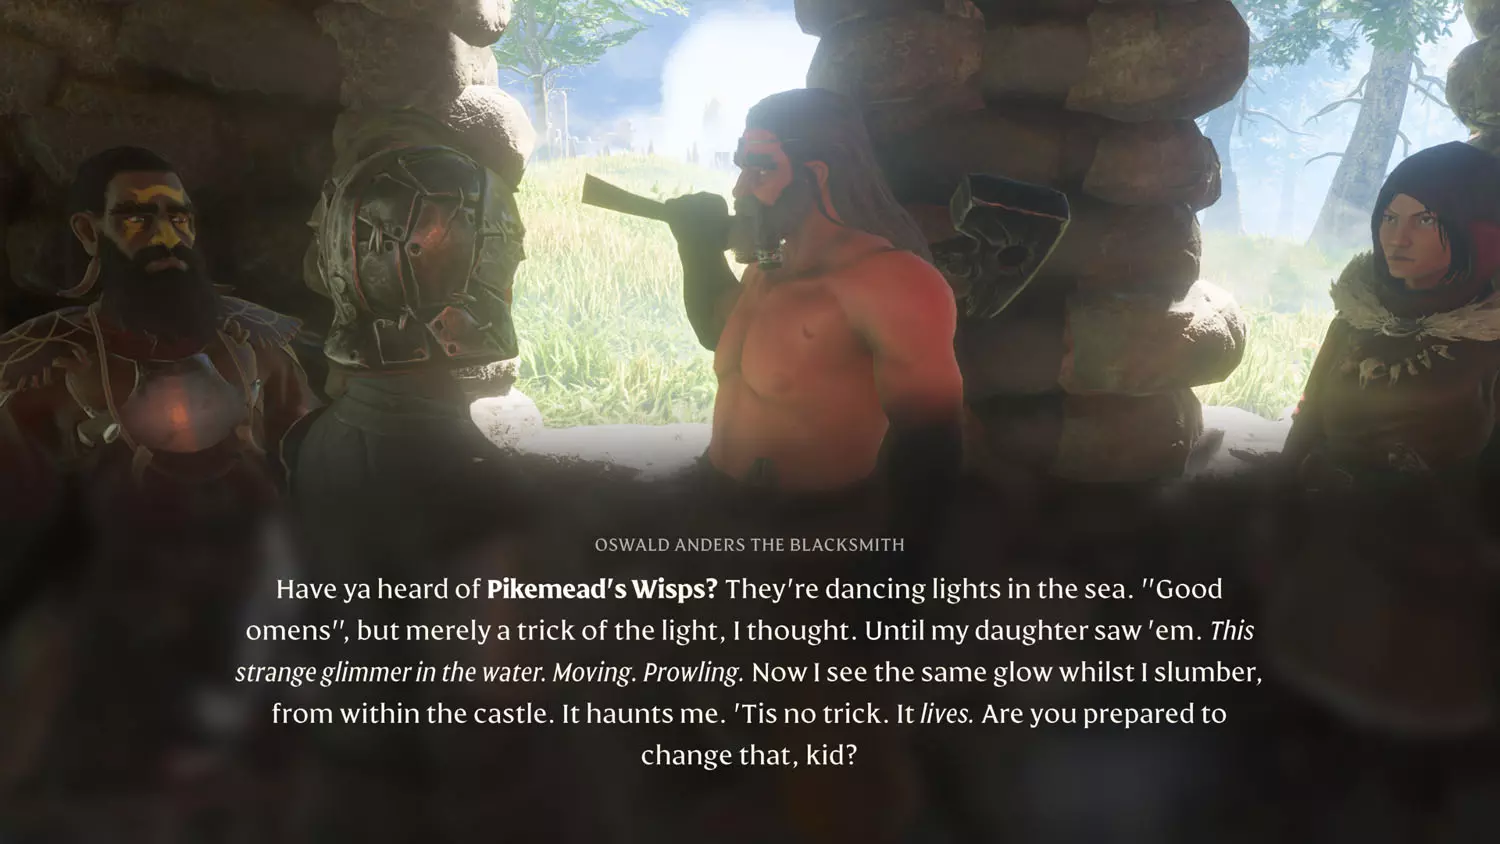
I would suggest traveling to the Ancient Spire - Revelwood Fast Travel and then glide as close as you can to Pikemead’s Reach.
The city may still be a bit distant, but I’m going to suggest you seek out the following Lore pages because Pikemead is a … mess. It’s a mess. Completing the Lore is honestly a GREAT way to get through the city, and you will automatically complete this quest by collecting those (mainly in completing the Nobles and History Lore’s Northern Caravan). Here’s the hot-mess-of-a-list. I wish you luck!
- Scavenger Lore: Royal Investigation 1/3 By Royal Decree.
- Nobles and History Lore: all five of A Scattered Legacy, Northern Caravan 2/3 Expedition Log #2 and 3/3 Commander Cyrus’s Fate, Gormander’s Imperial Gardens (both).
- Revelwood Lore: Skimmer’s Cove Mischief 1/1 Truth Or Dare? Fisher’s Tale 2/2 Glory Rises From The Depths Once More!, Skimmer’s Cove Warning 1/1 Good Folk, Heed This Warning:, Riddle (both) Raúl’s Fate 1/1 Veiled In Holy Light, The River Breaks Out (both), Under Fire 1/1 Ancients Help Us, New Storage 1/1 A New Room For Storage, Lover’s Quarrel (all three), A Knock At Night 1/1 The Catacombs, He Who Lives In The Walls 1/1 Bones, A Rising Tide 1/1 As The Tide Rises, and Fortification 1/2 Citywall Blocks.
Complete the first part of this quest by reaching Pikemead’s Reach.
Reach The Pike to complete the second part - The Pike is the castle.
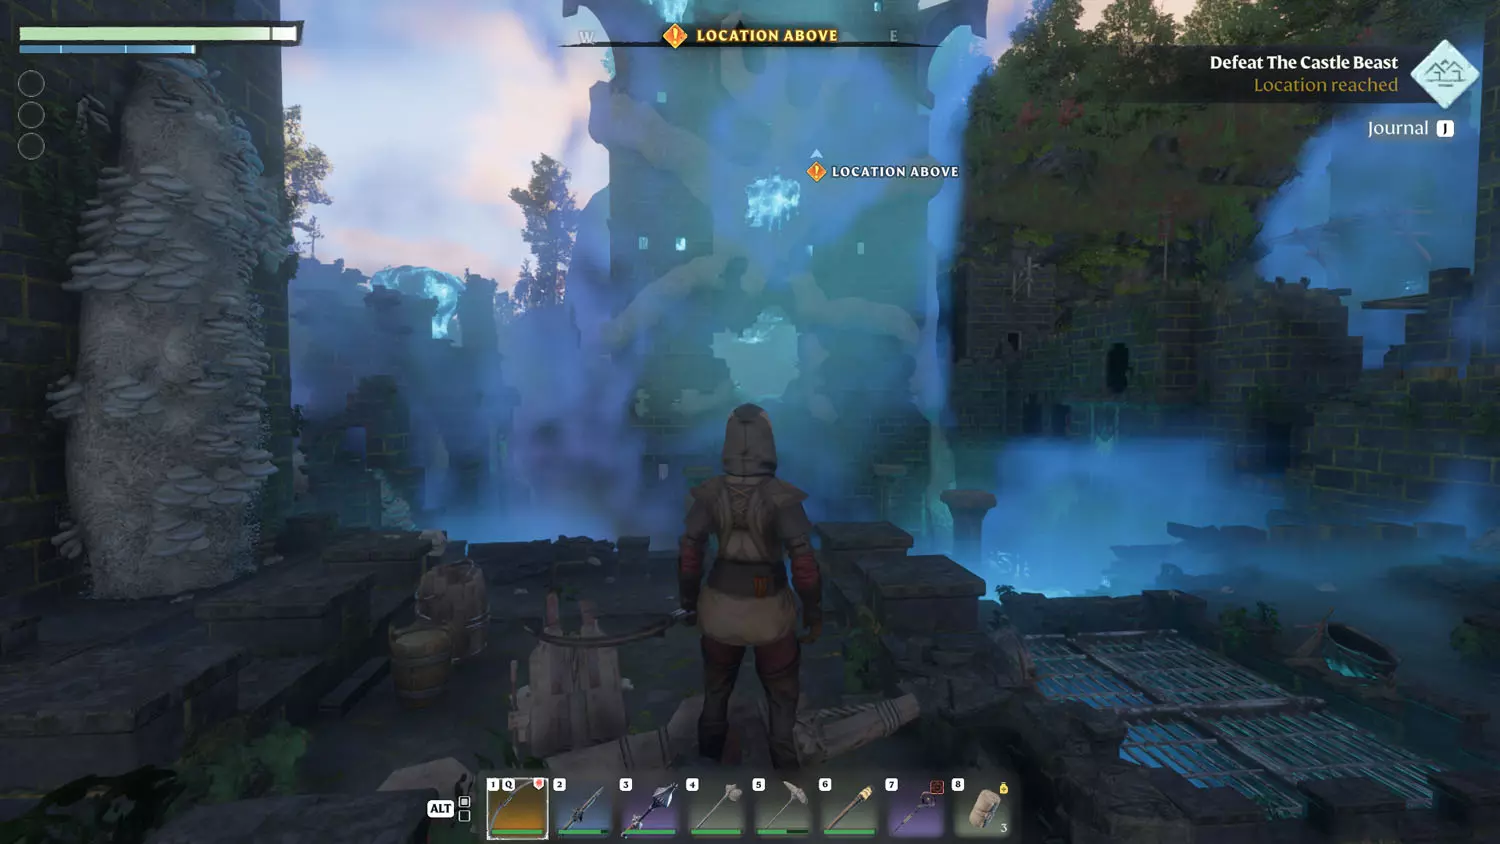
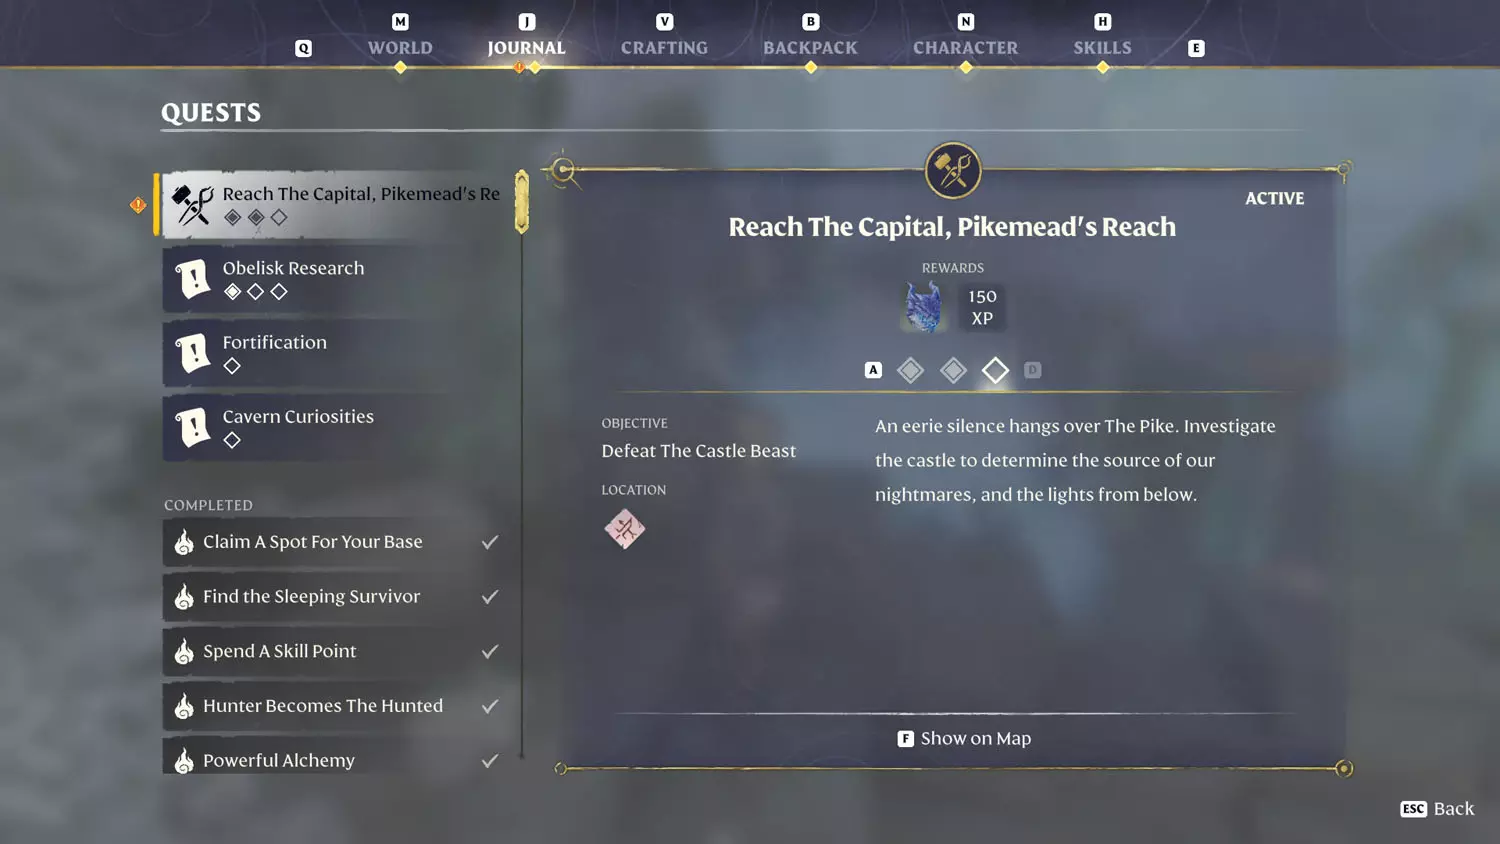
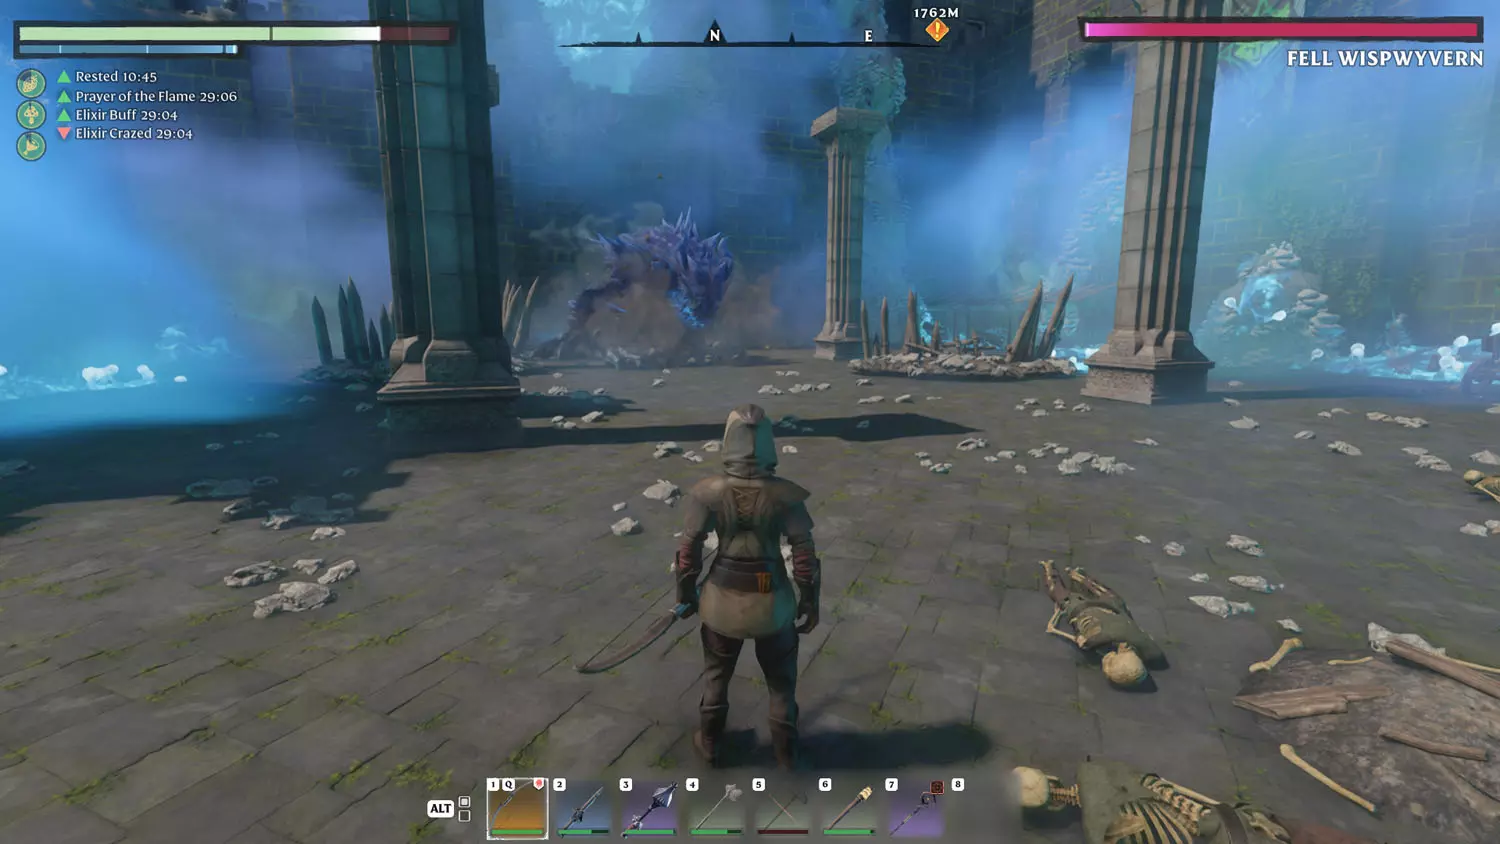
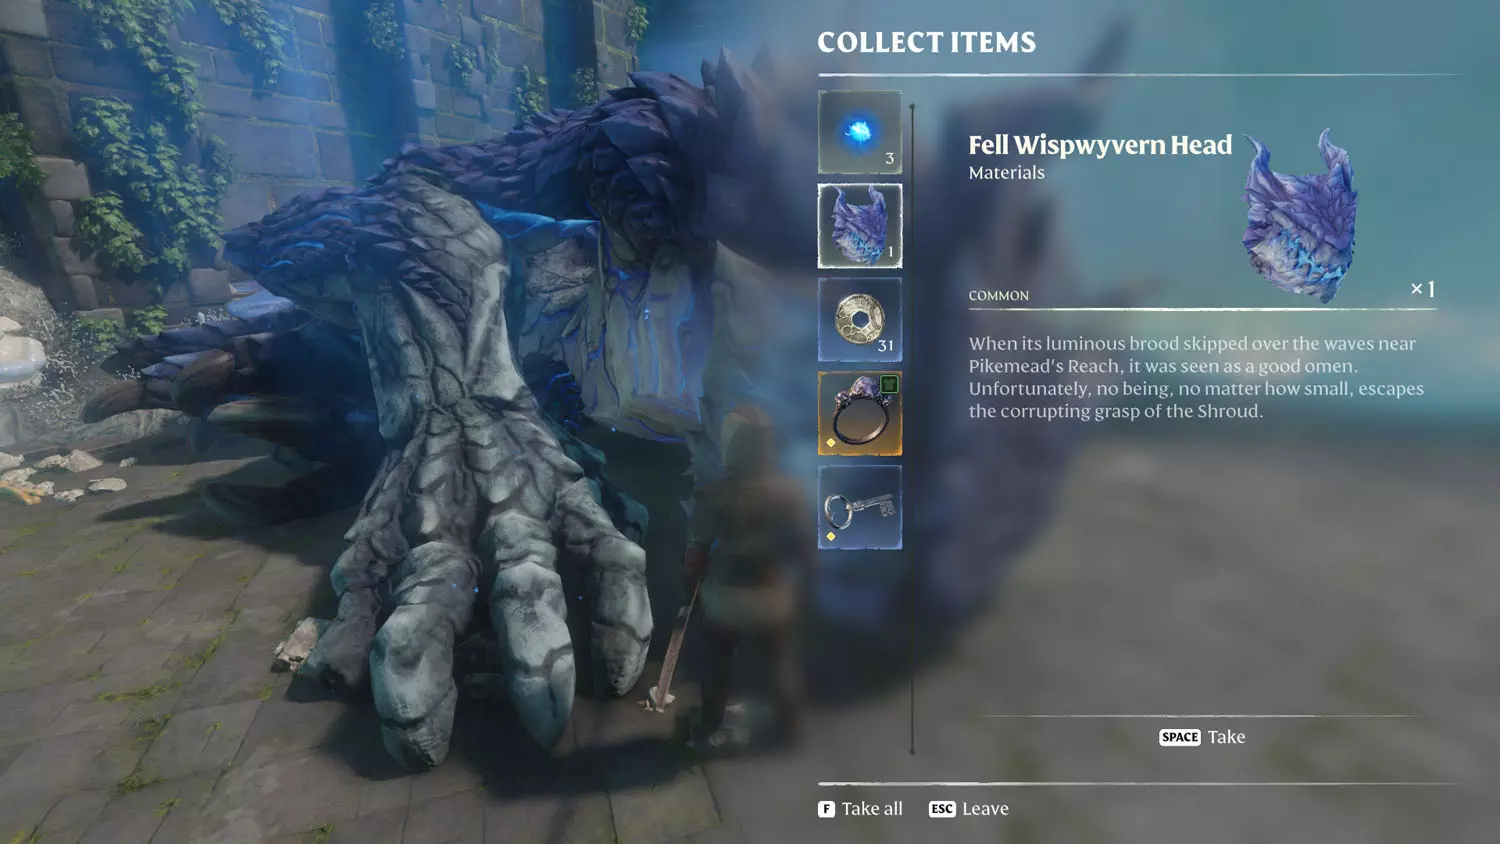
The third is completed after you defeat the Fell Wispwyvern.
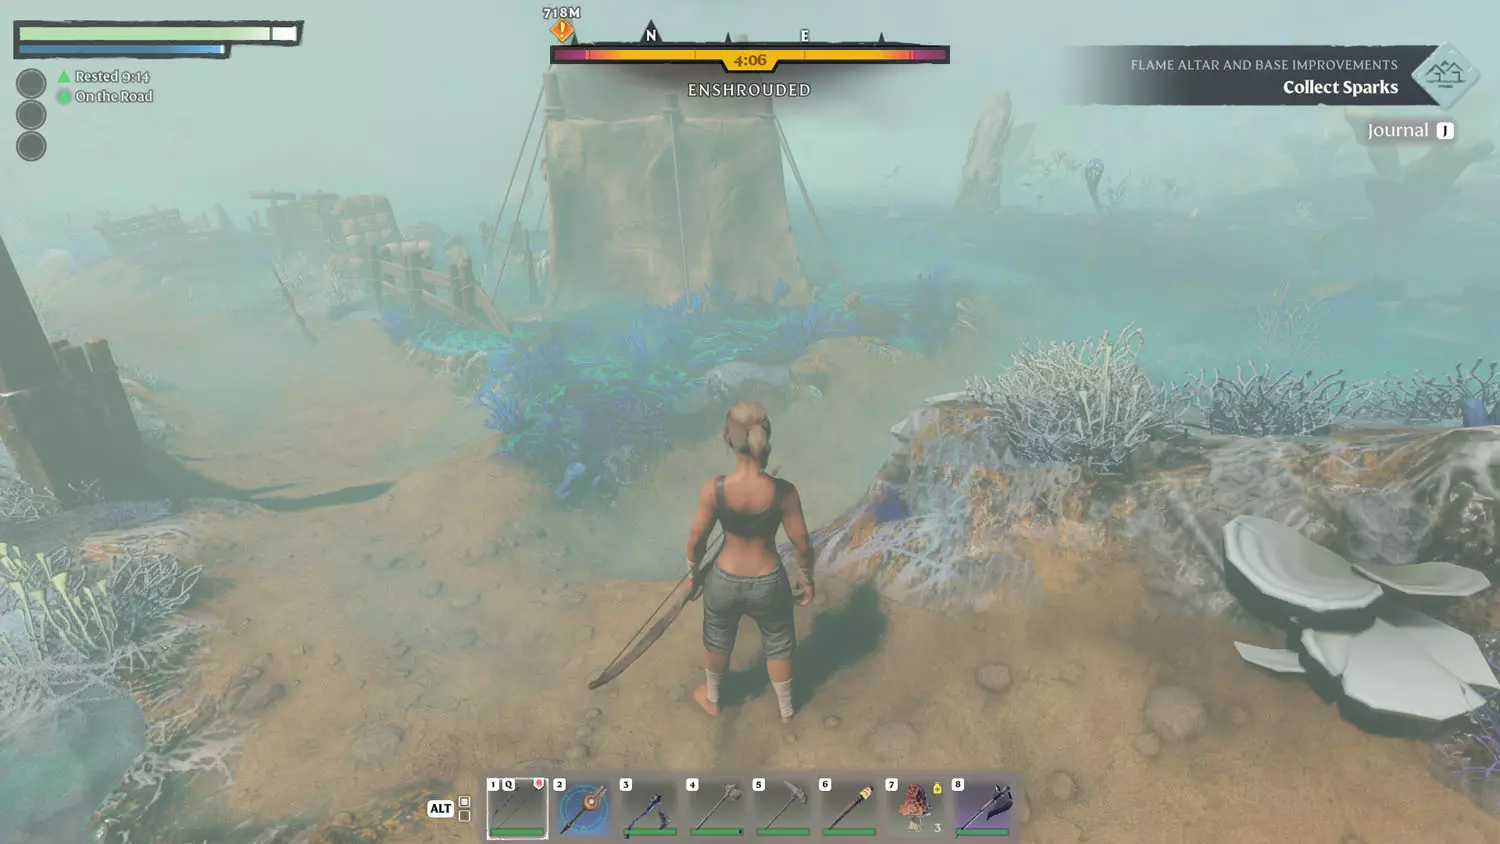
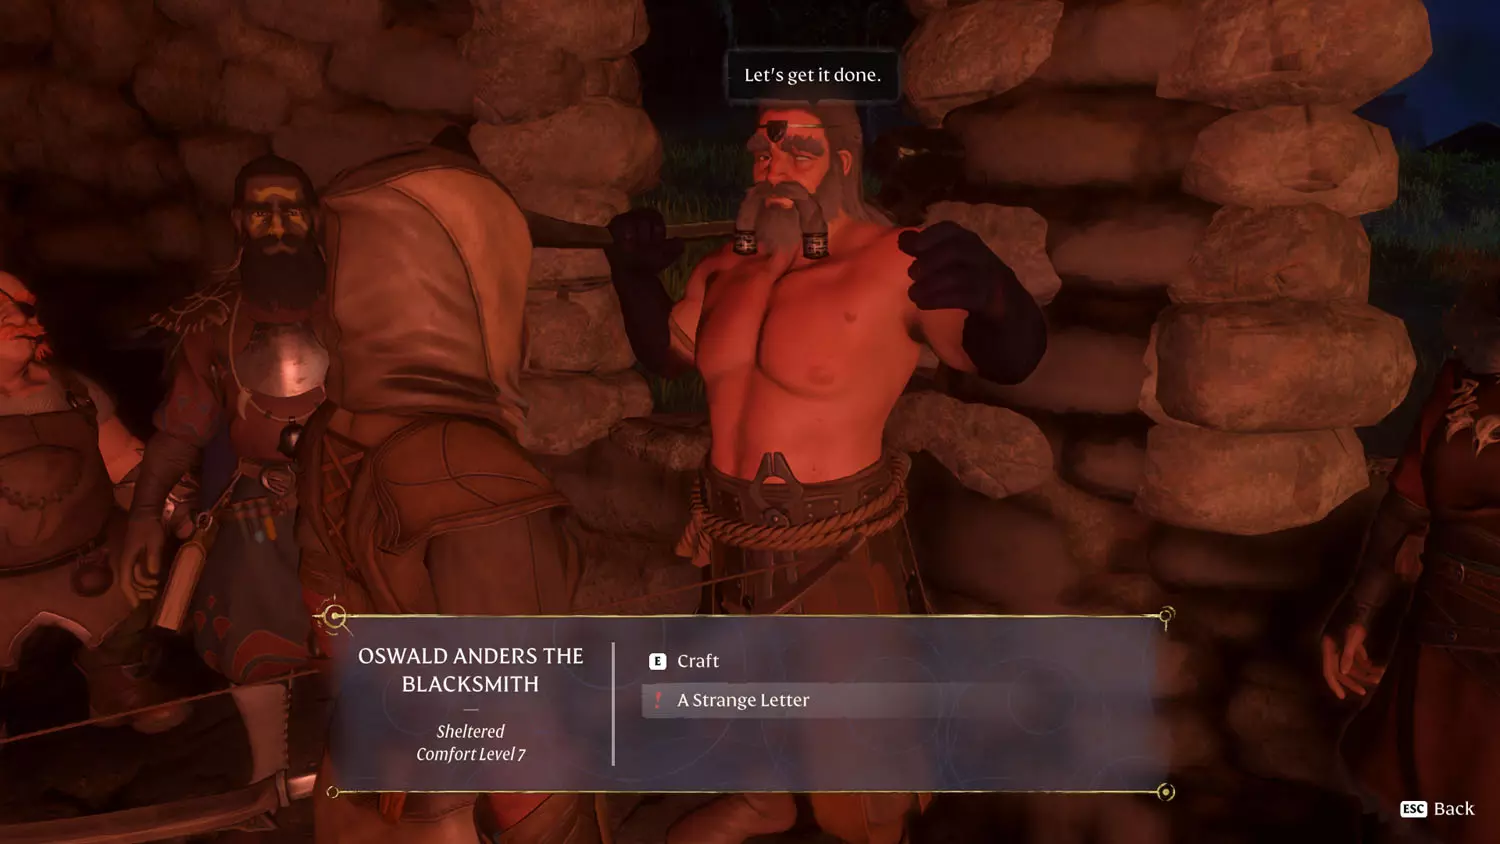
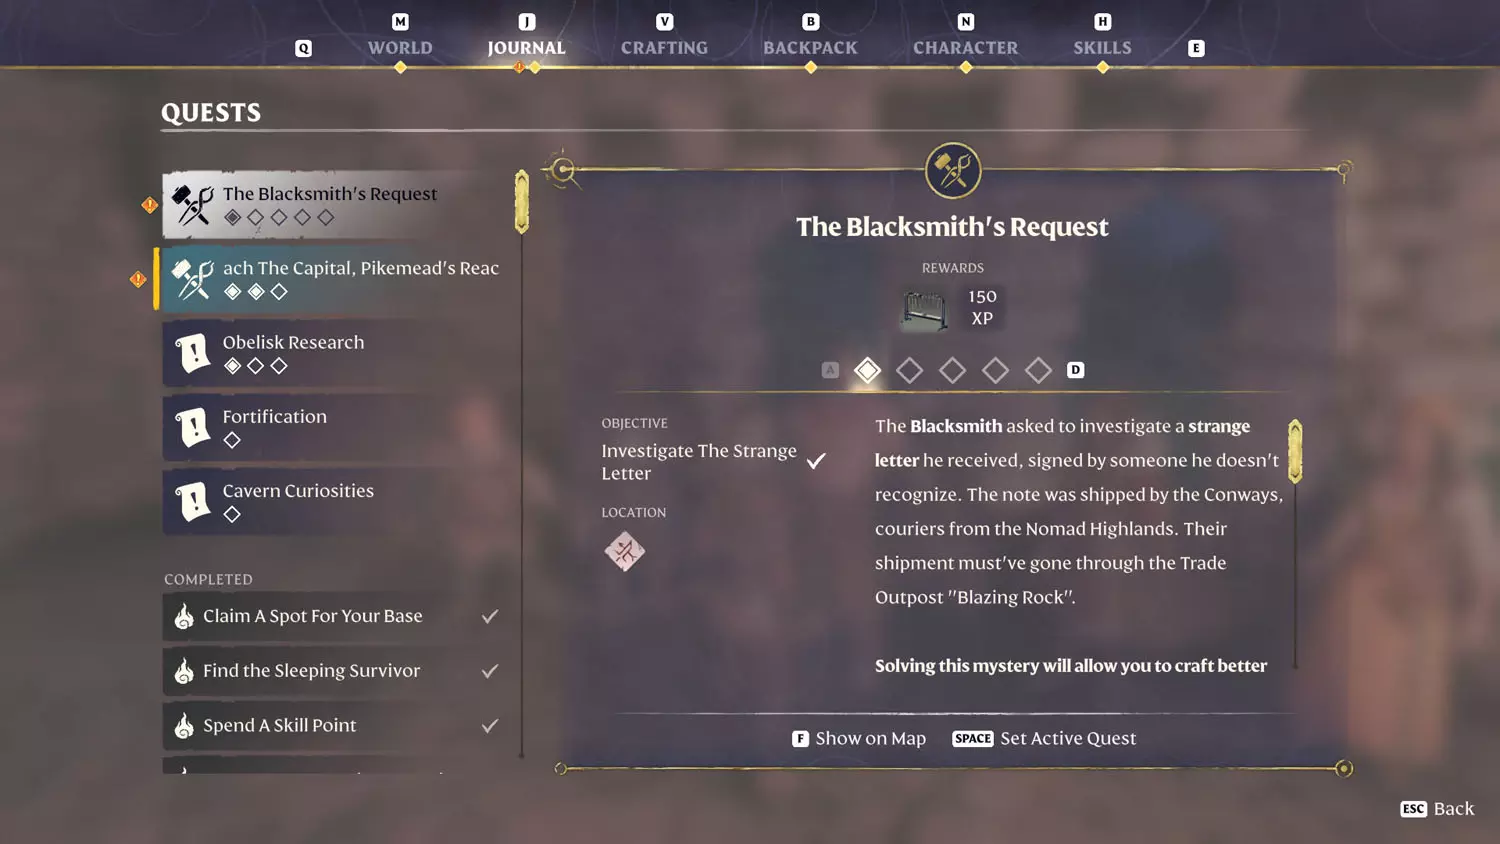
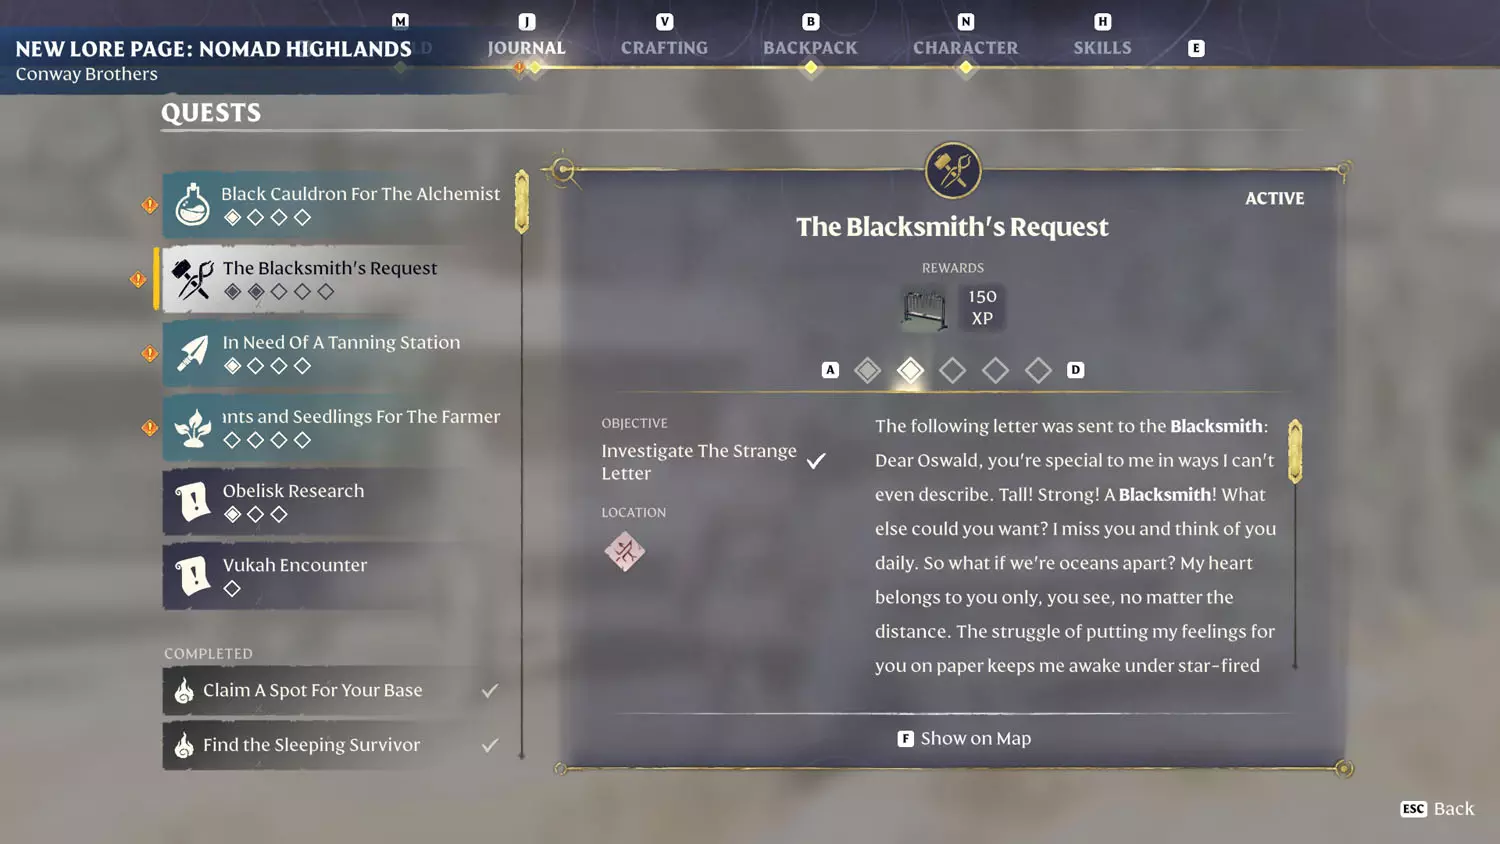
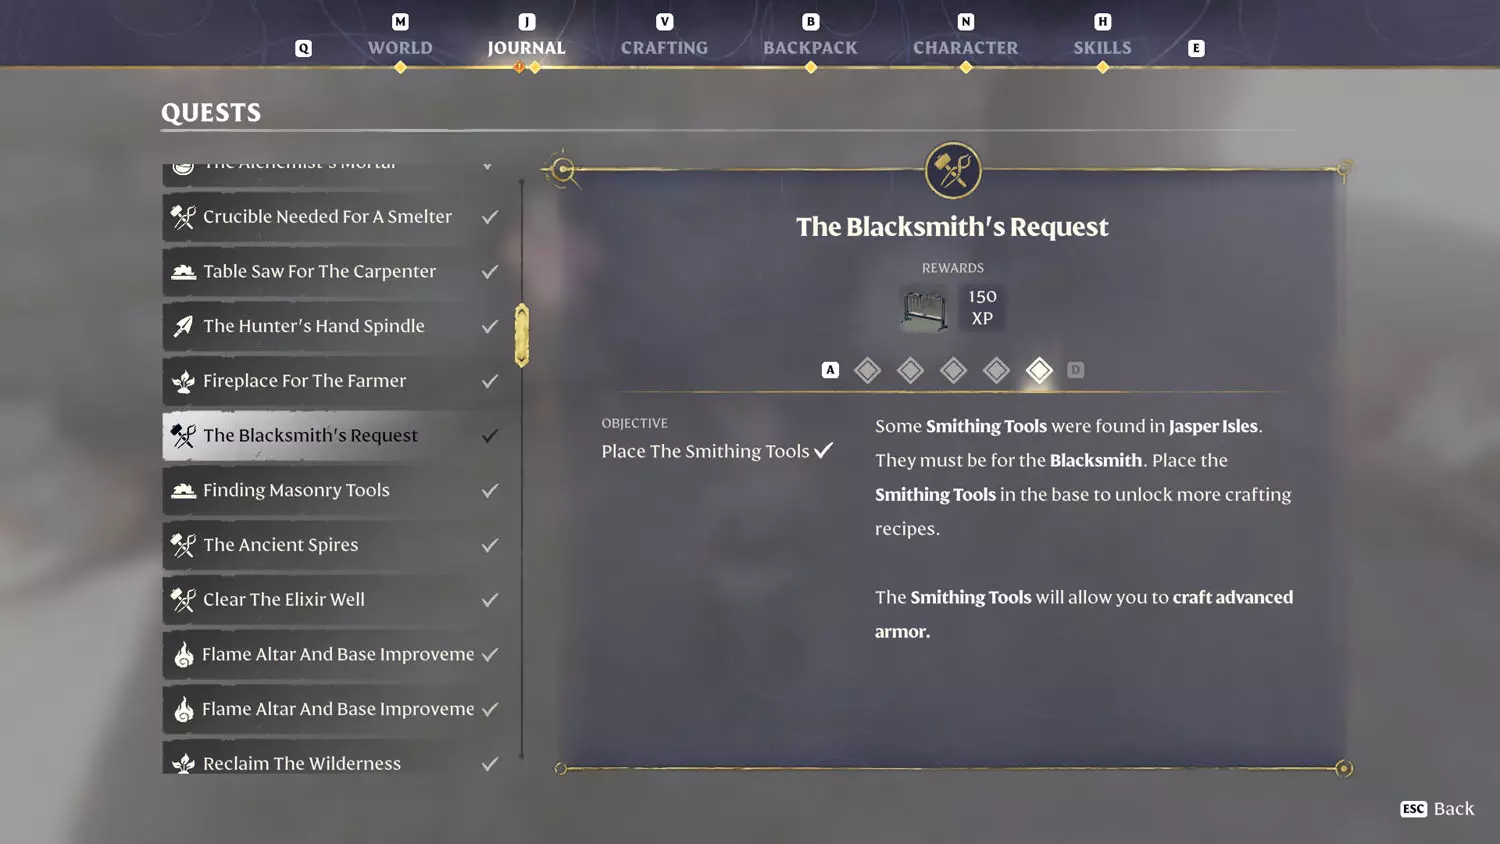
The Blacksmith’s Request
Immediately after placing the Fireplace (Farmer’s Quest: Fireplace For The Farmer) down, the dialogue option “A Strange Letter” will be available at the Blacksmith. Selecting it will start the quest. You will need to first complete his other Quest: Reach The Capital, Pikemead’s Reach before you can work on this one. Also, you’ll want to Strengthen The Flame from 3 to 4.
TIP: You may be able to unlock more dialogue options with the Blacksmith as you complete different parts of this quest. I did a quick run, so I may have missed some fun dialogue.
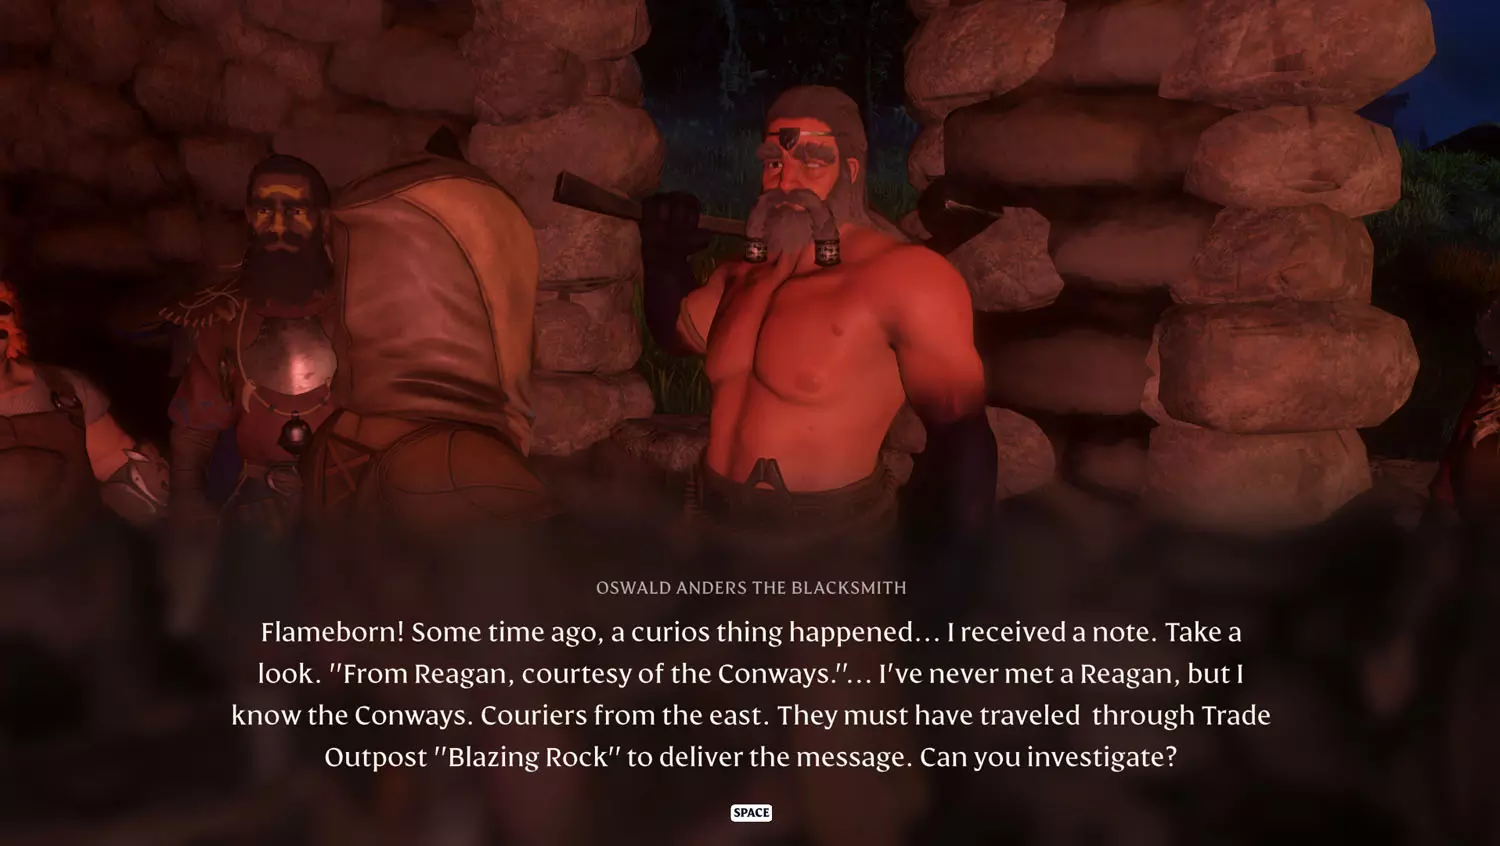
The next step is to head for Trade Outpost “Blazing Rock” and the Nomad Highlands Lore: Conway Brothers 1/3 Rafa,. Reading the note on the bulletin board will complete the second part of this quest.
TIP: This is also the location of the Items, XP, and Loot Rewards Quest: Vukah Encounter.

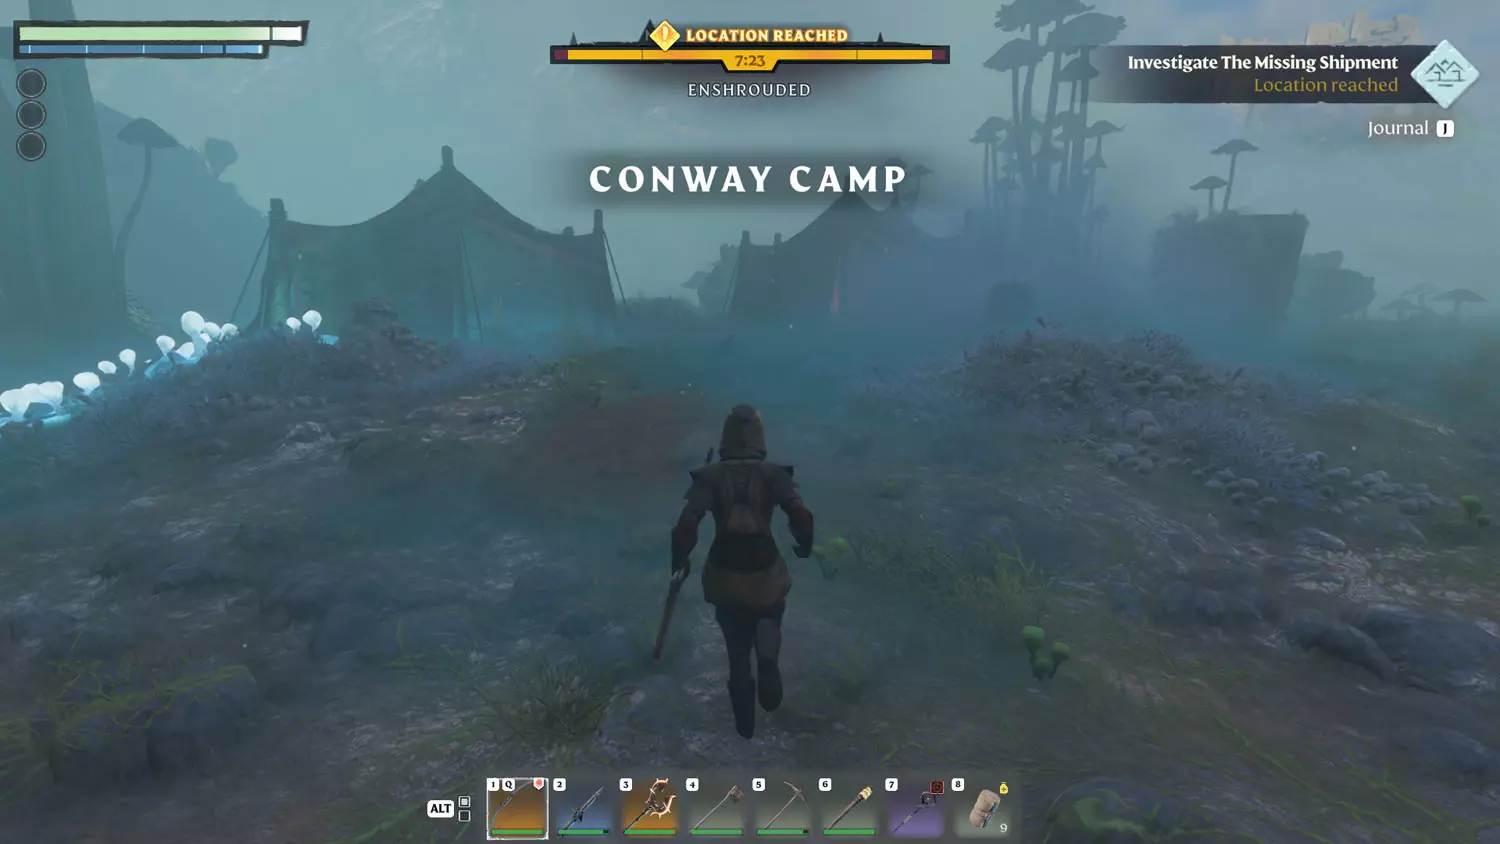
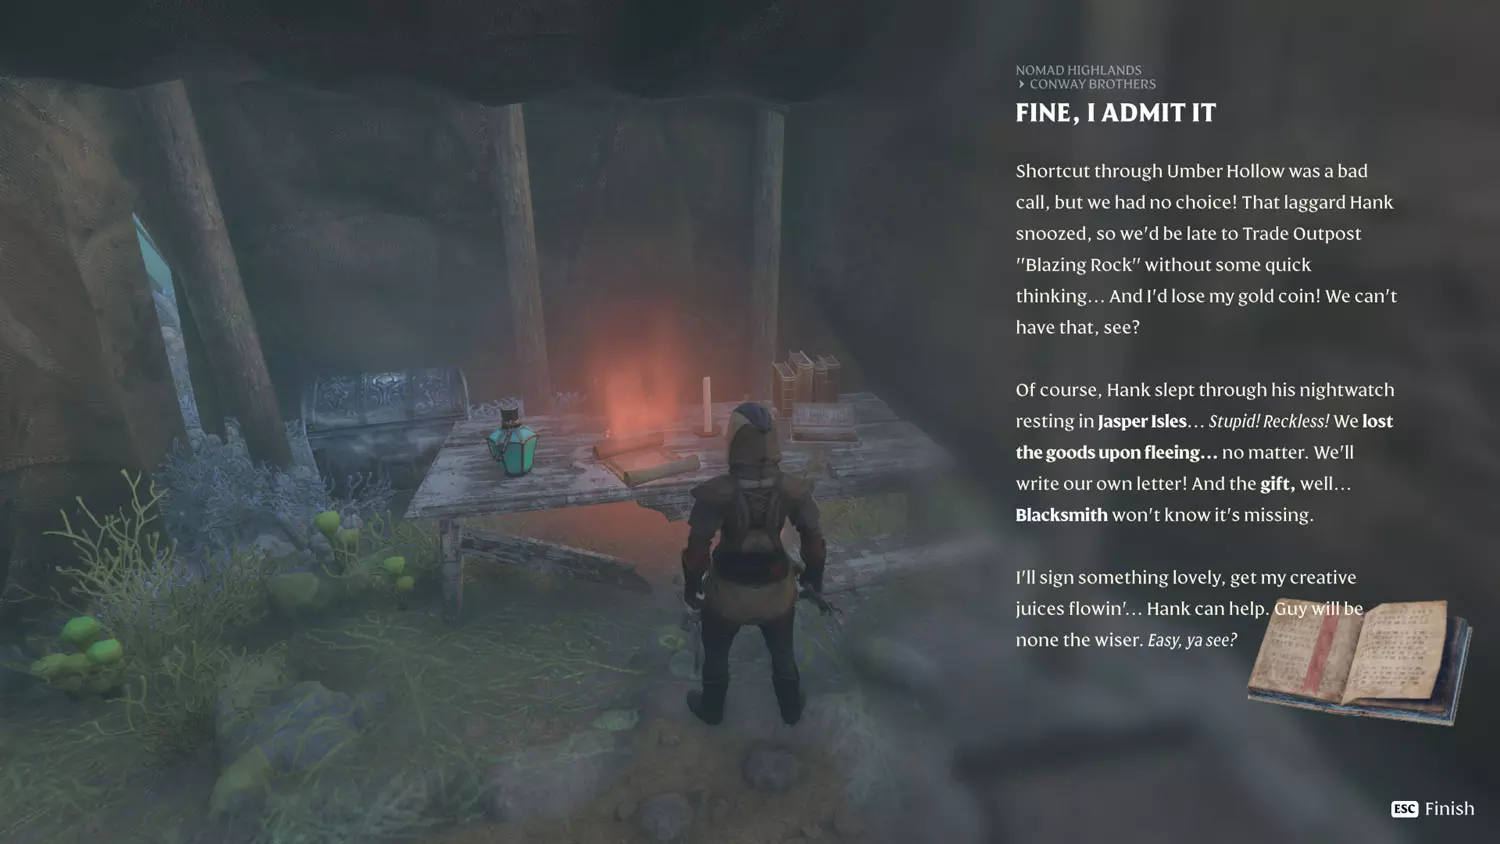
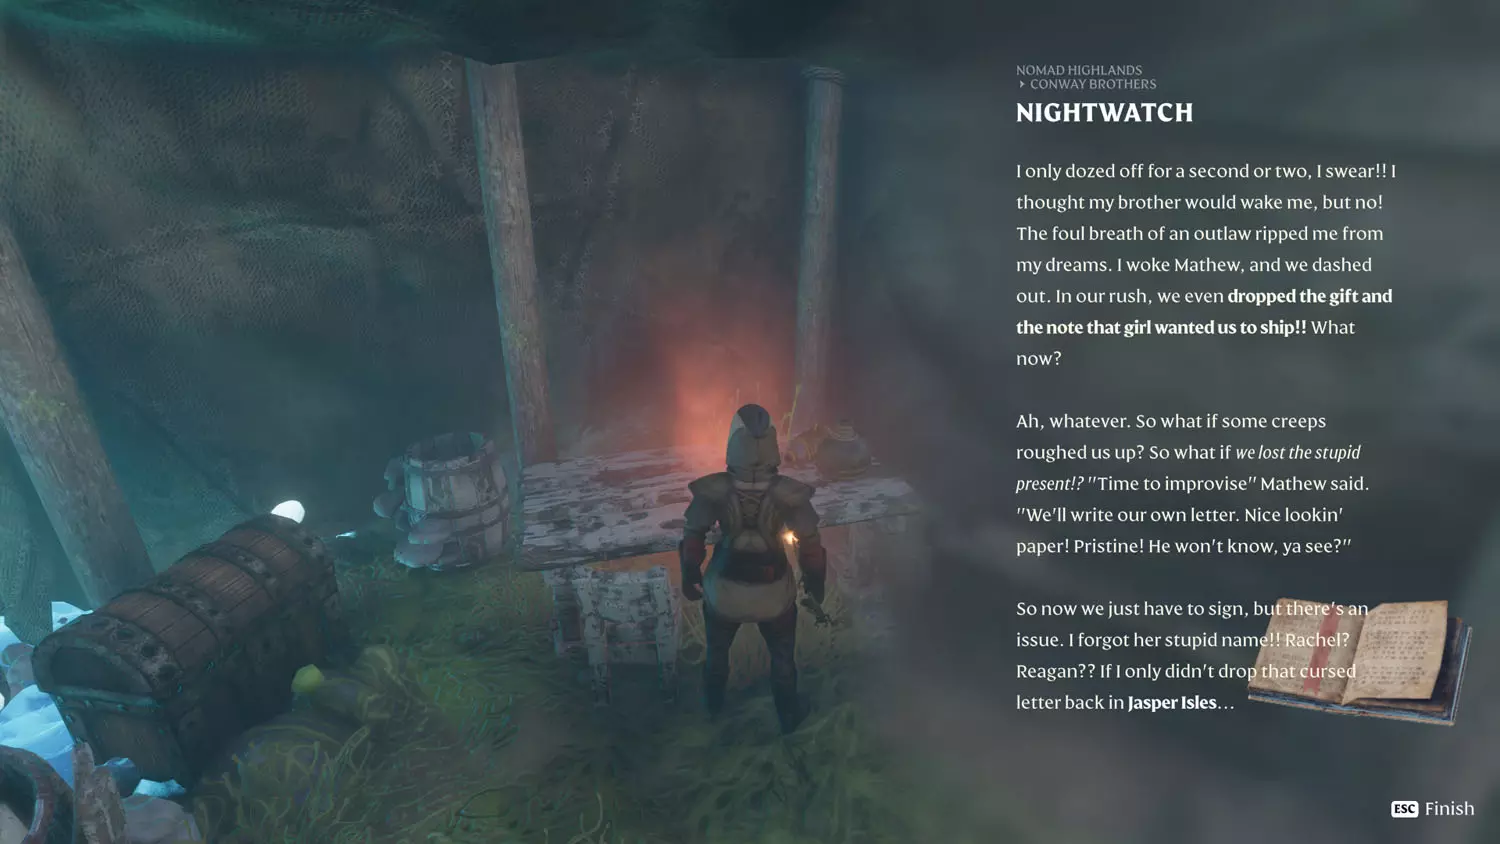
From here, head out for Conway Camp and the remaining two pieces of the Nomad Highlands Lore: Conway Brothers 2/3 Fine, I Admit It and 3/3 Nightwatch. Either piece of Lore will complete the third part of the quest.
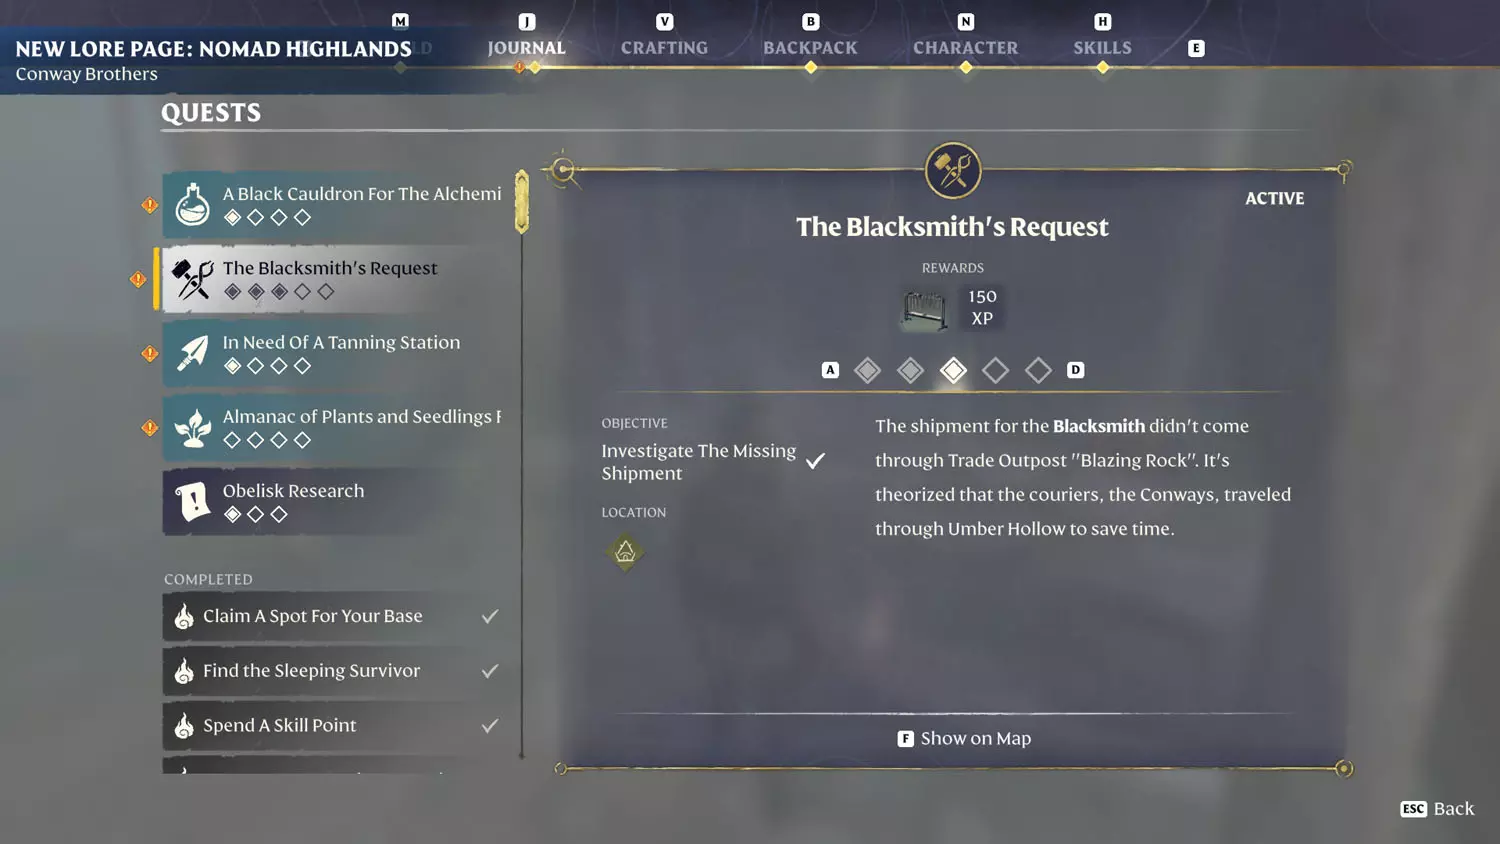
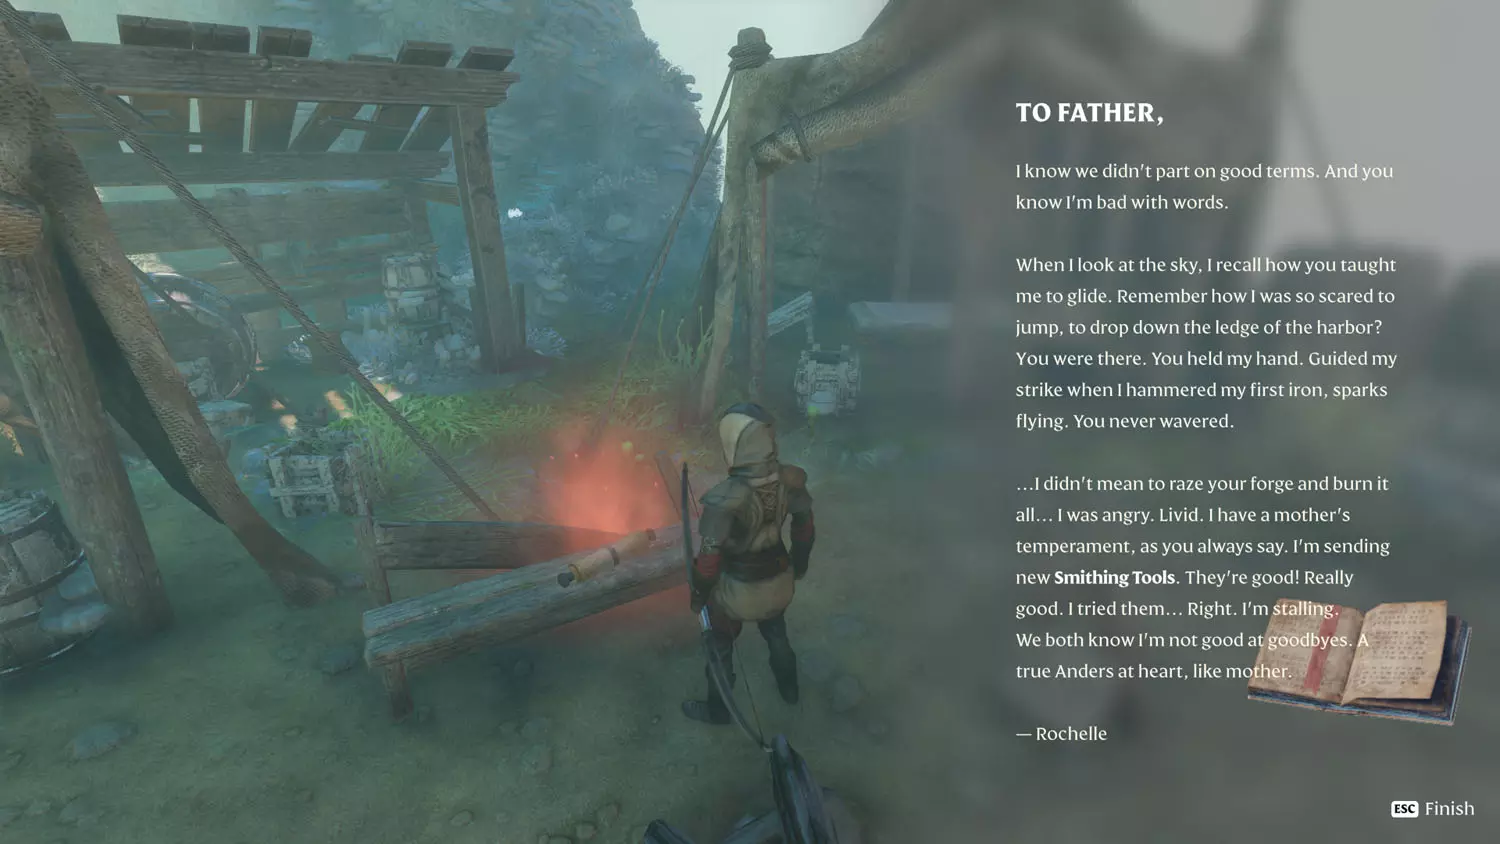
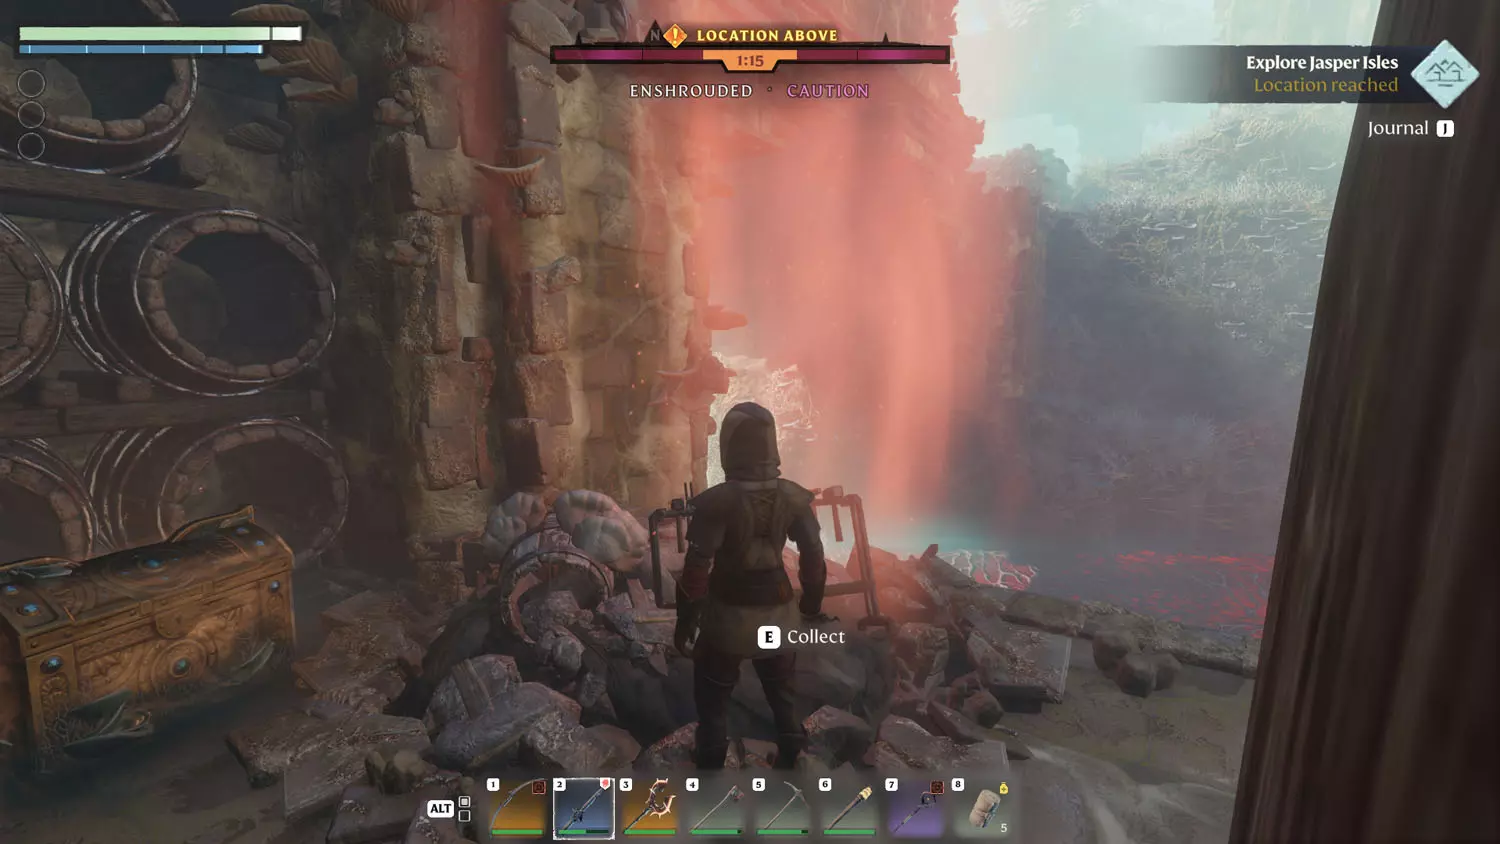
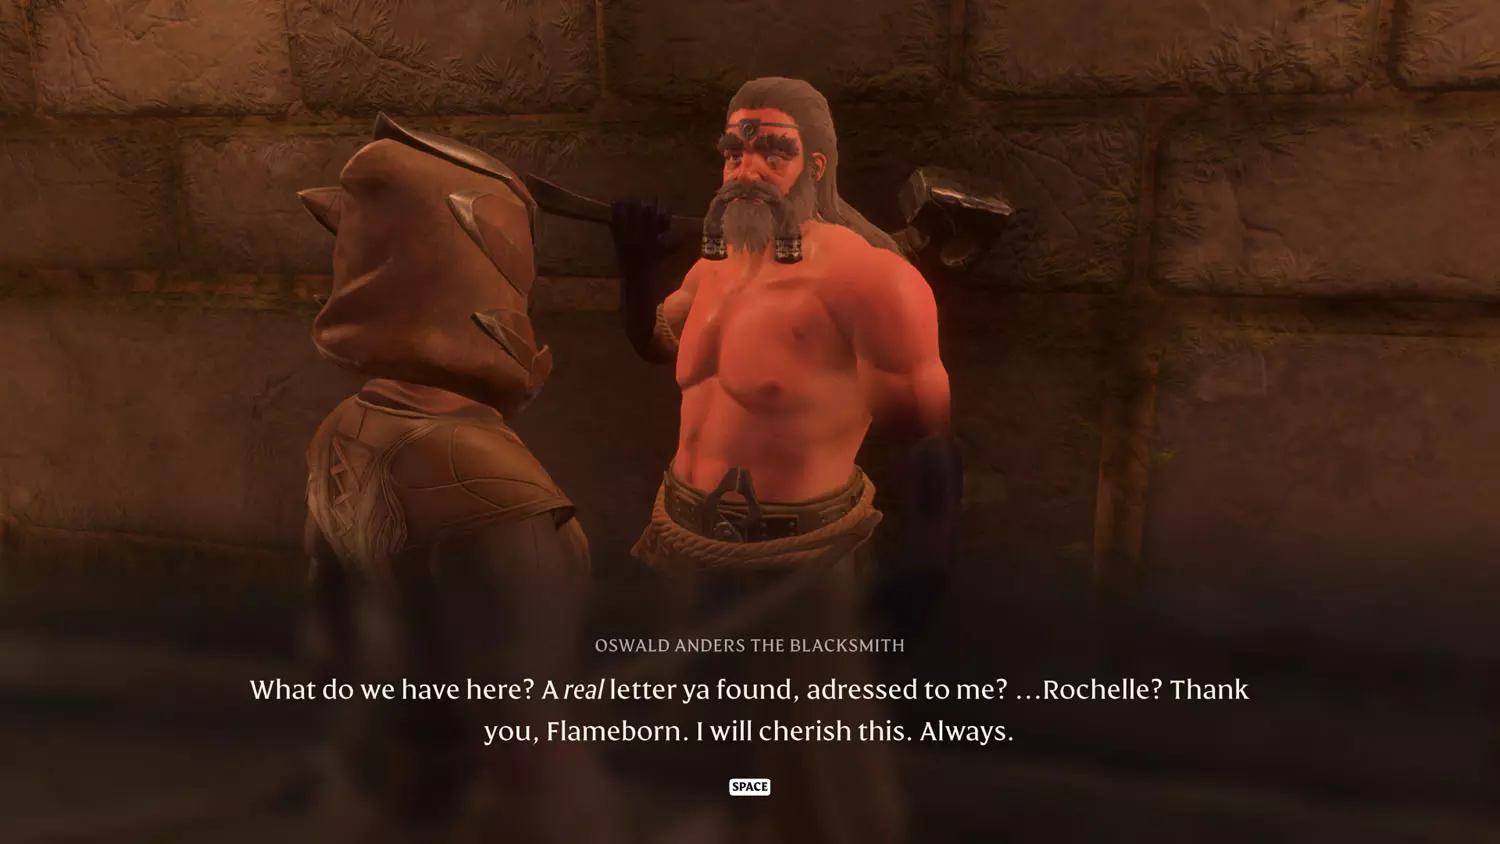
Now, on to the Lore heavy region of Umber Hollow’s Jasper Isles. The only Lore this quest relates to is the General Lore: Letter From Rochelle Anders 1/2 To Father,. Reading this letter will complete the fourth part of this quest.
TIP: Jasper Isles Scavenger Lore: Sister, Sister 1/3 Where Are You, My Sister?. Nomad Highlands Lore: Amber’s Final Resting Place 1/2 A Chosen Grave Site and 2/2 Our Dearest Amber; Rotting River 1/1 Downstream Of Something Foul;, Lake Of The Nomad Highlands 1/1 Creation Of A Lake, and lastly As Above So Below 1/2 Umber Hollow Rumors.
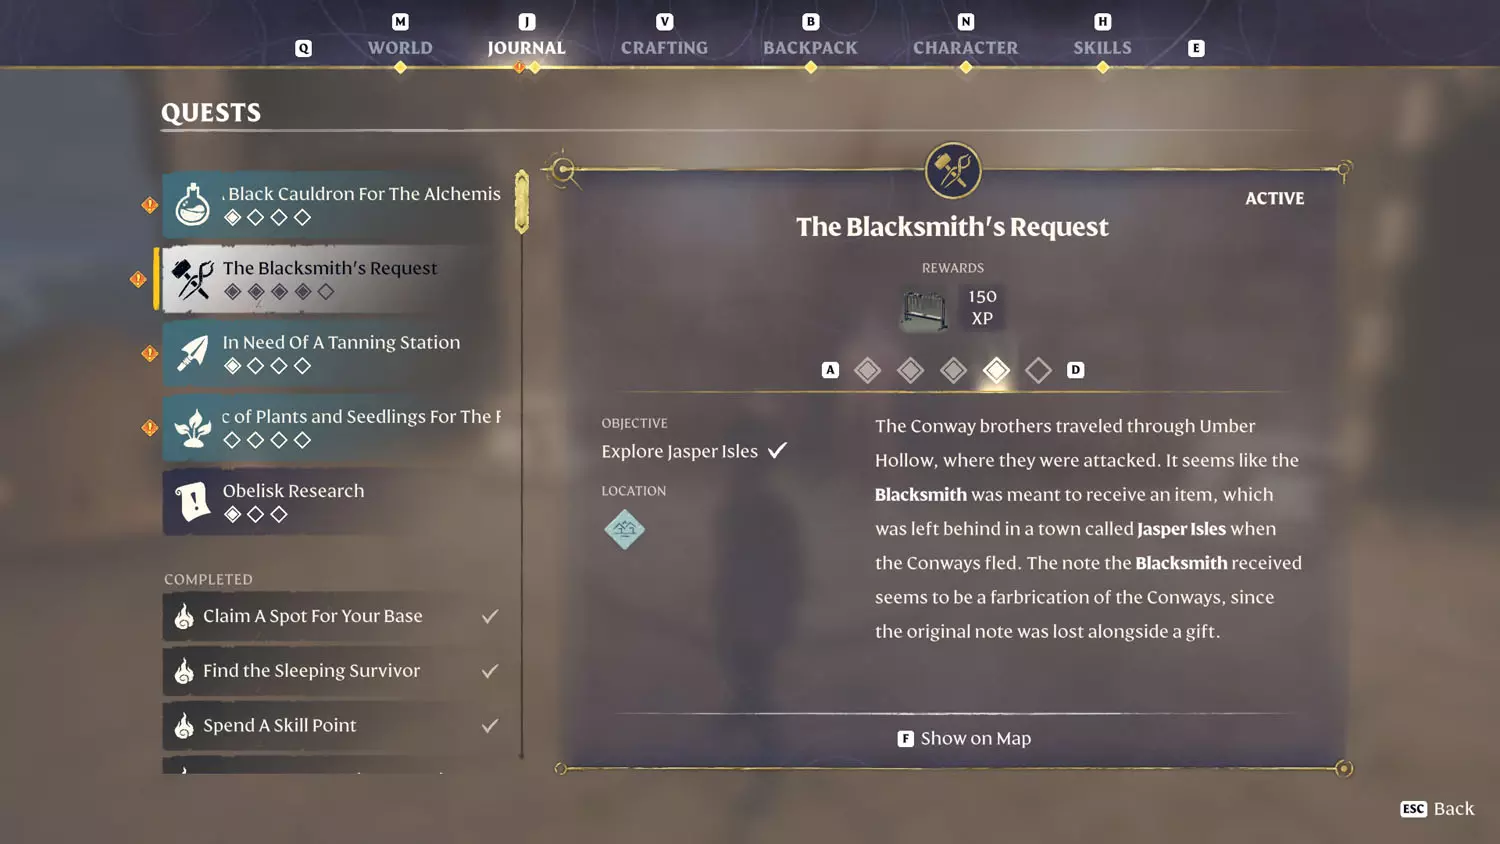
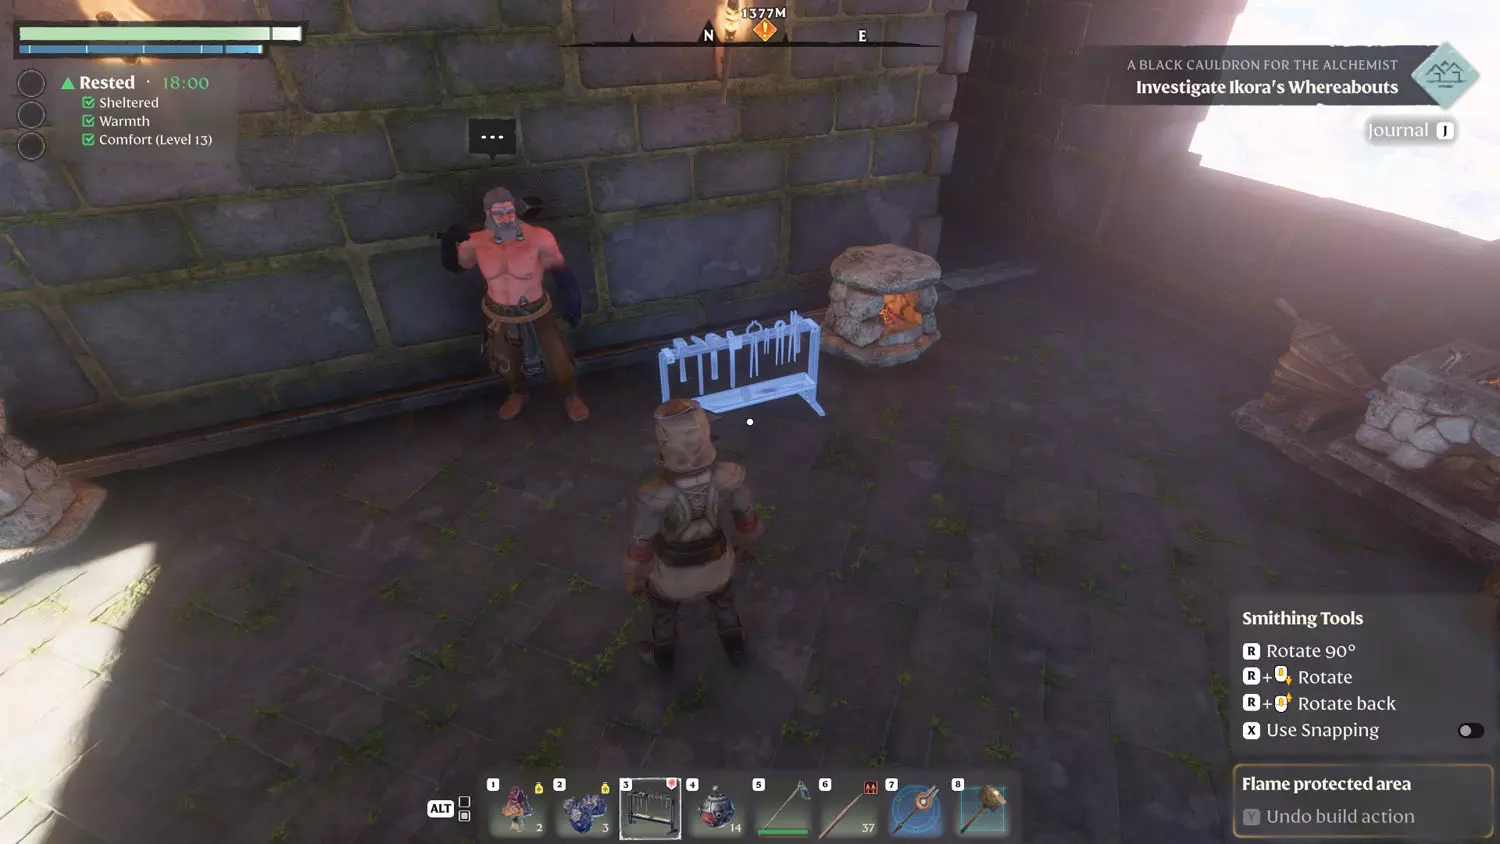
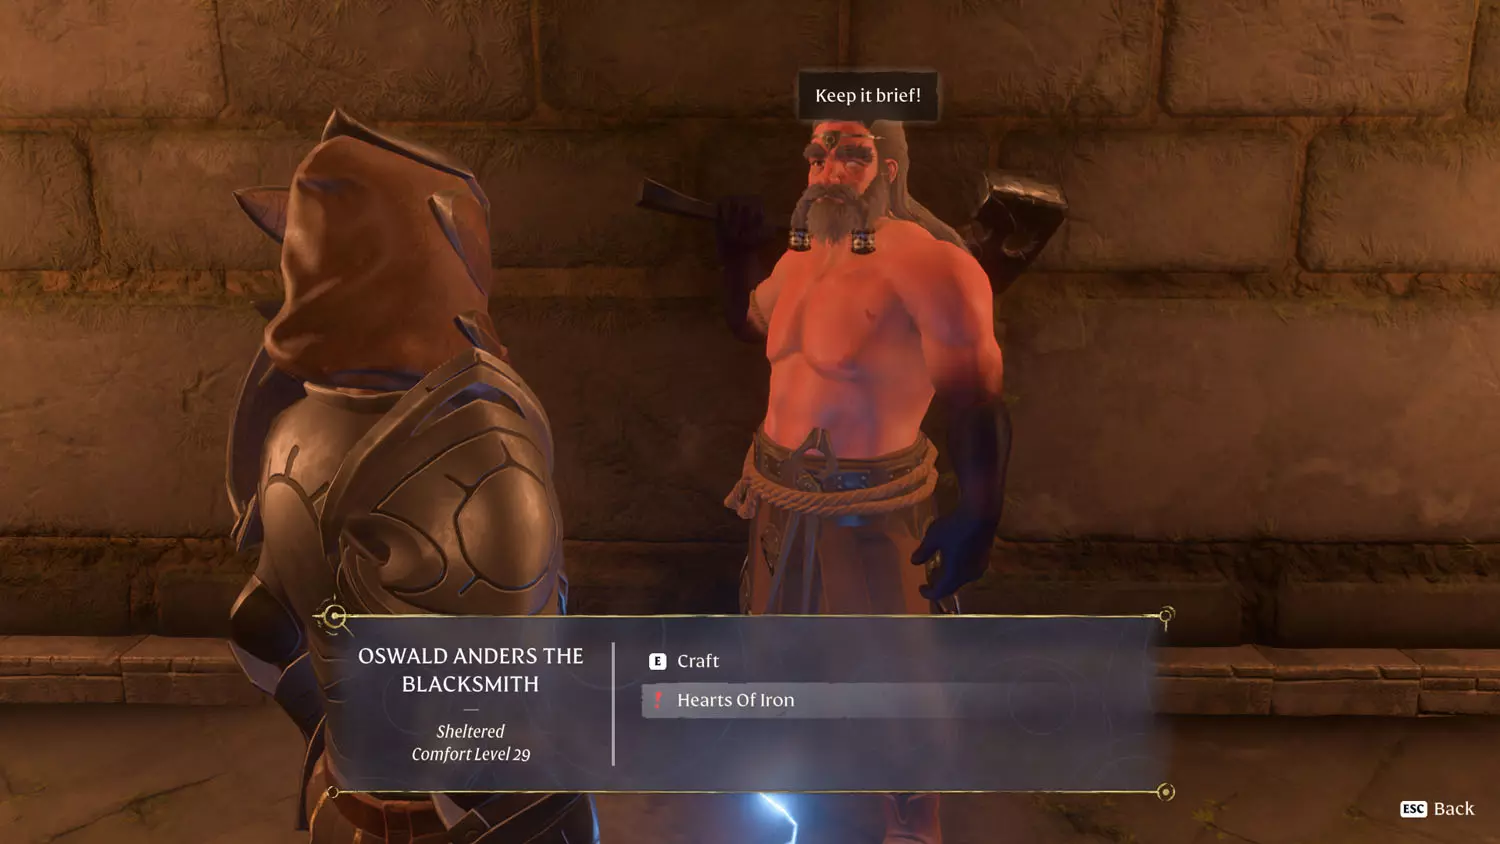
Next up is obtaining the Smithing Tools. The location is very near the Scavenger Lore: Sister, Sister 1/3 Where Are You, My Sister?. It’s also a simple glide away from the Nomad Highlands Lore: Amber’s Final Resting Place 1/2 A Chosen Grave Site. Once you have this, or even before you do, head back to the Blacksmith. He’ll have two dialogue options (unless you went back sooner).
“Mystery Solved” comes up as a dialogue option with the Blacksmith where he talks about the shipment. The second option, “Original Letter Found” is him getting happy over hearing from his daughter.
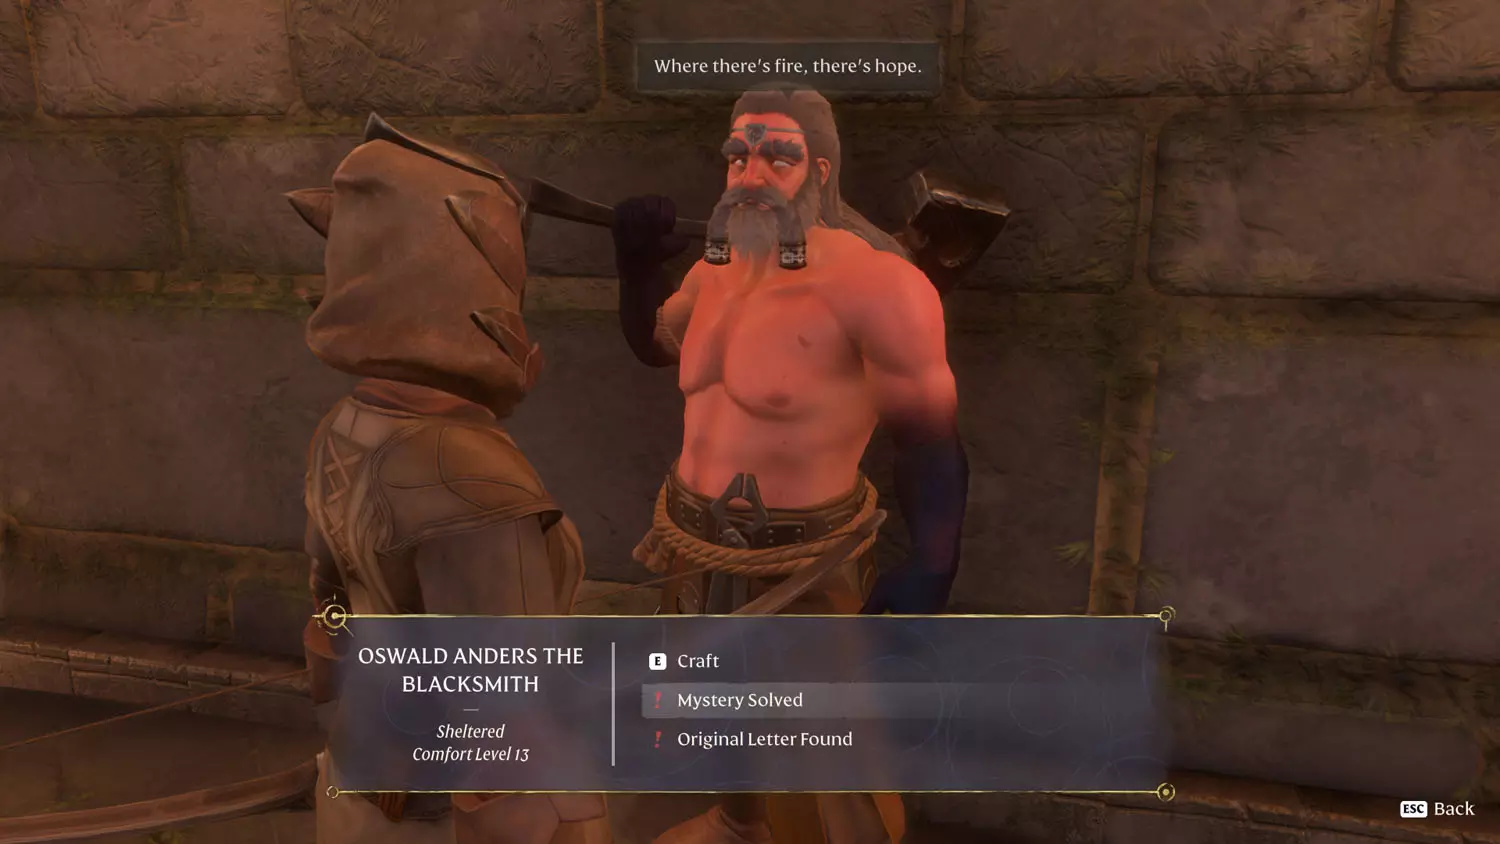
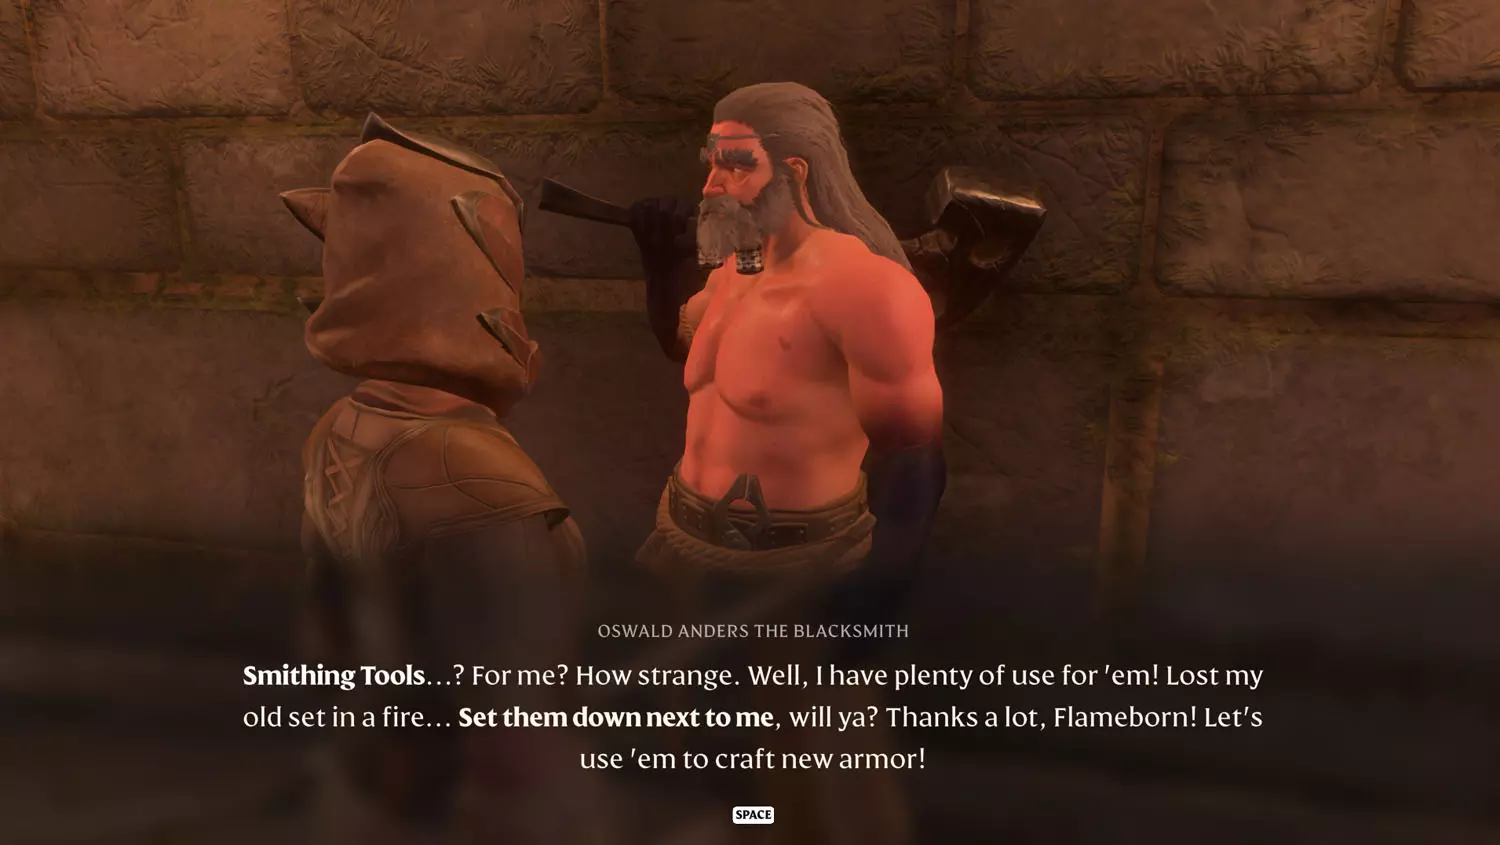
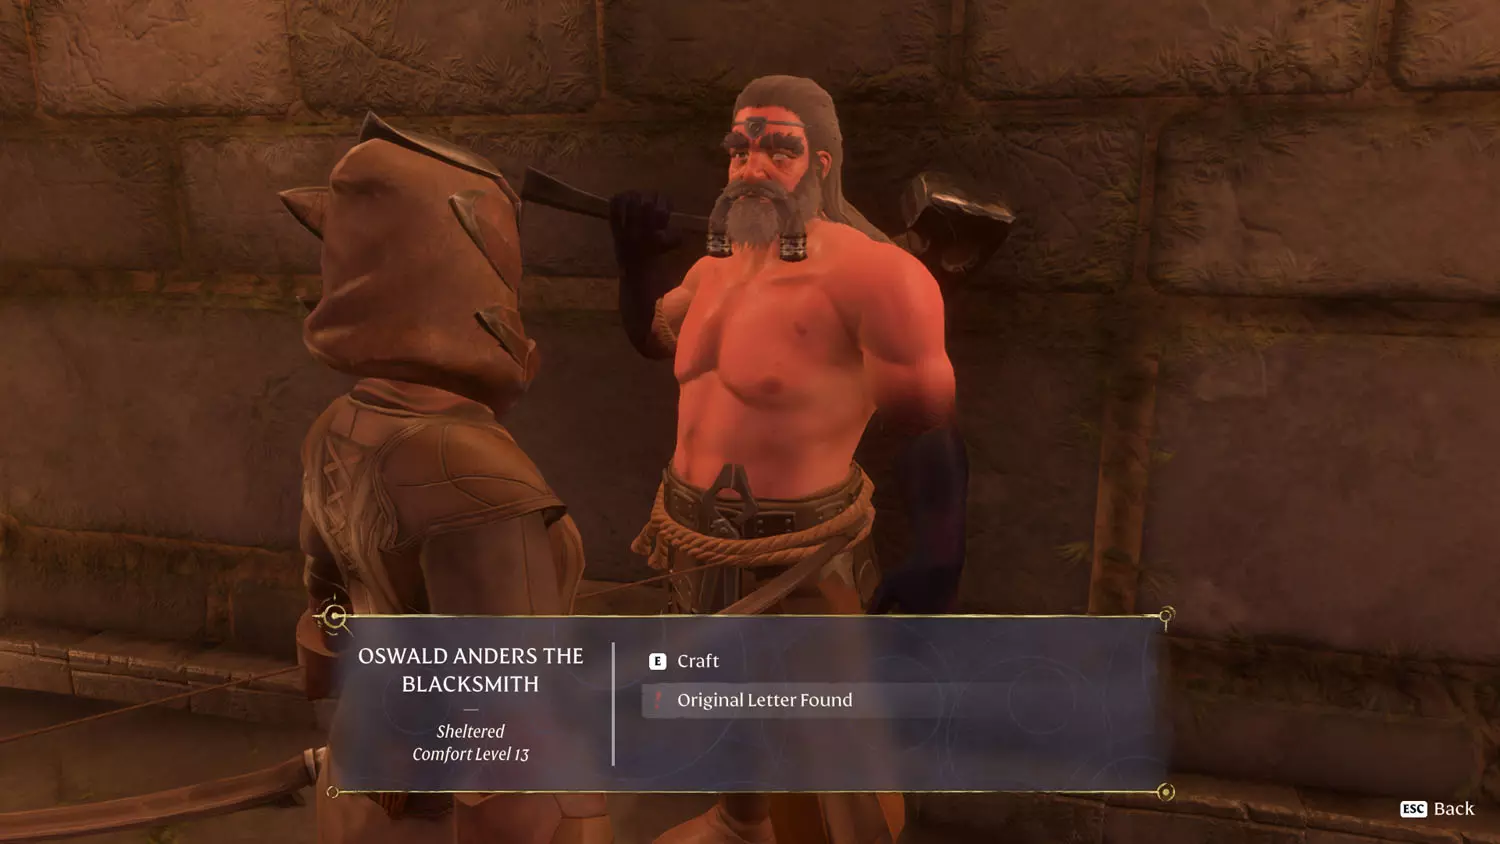
All that’s left is to place the Smithing Tools. Doing so completes the quest!
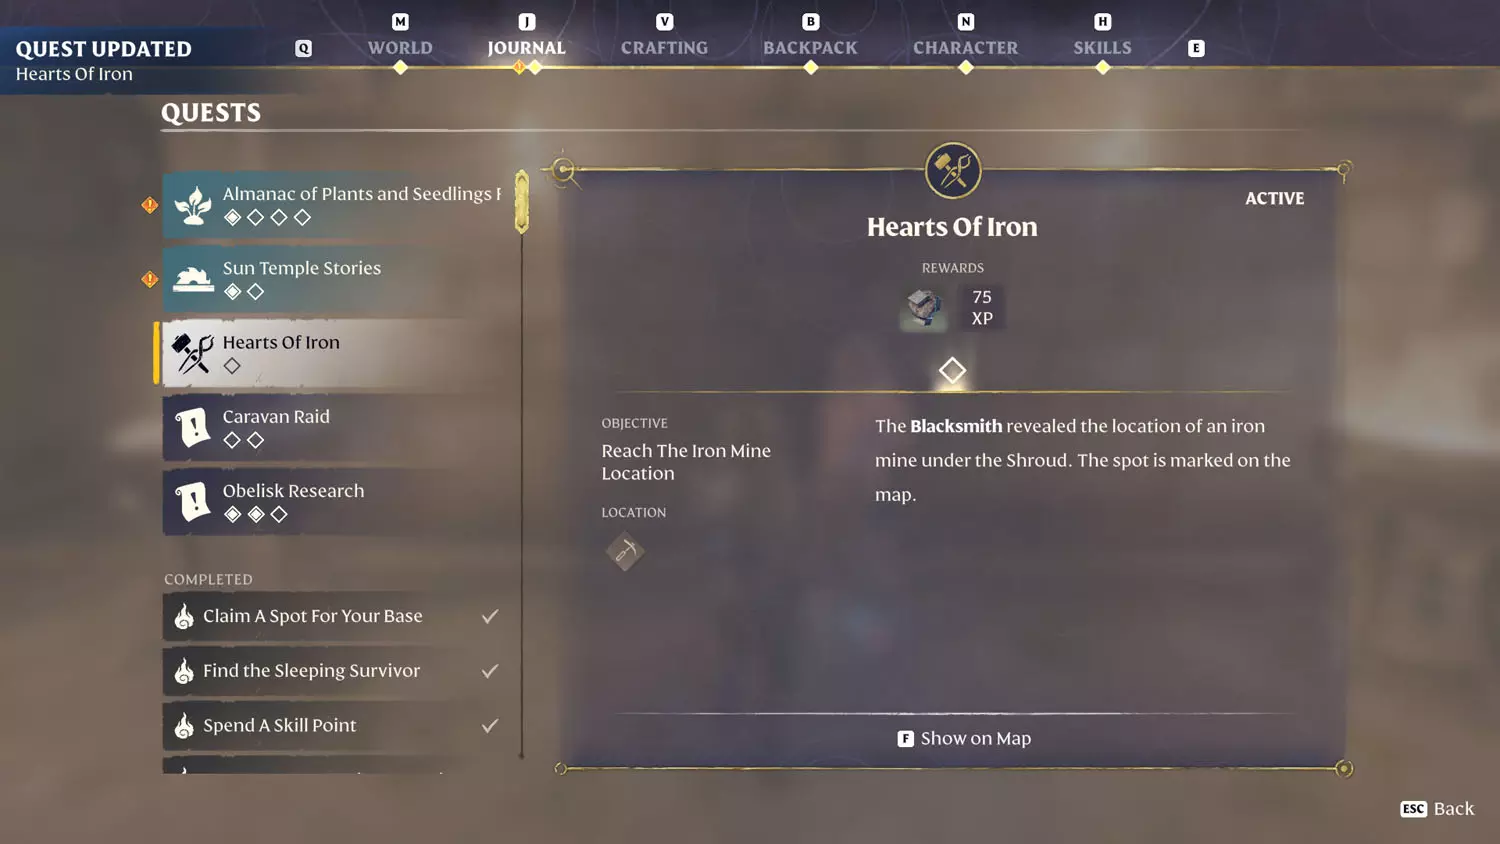
Hearts Of Iron
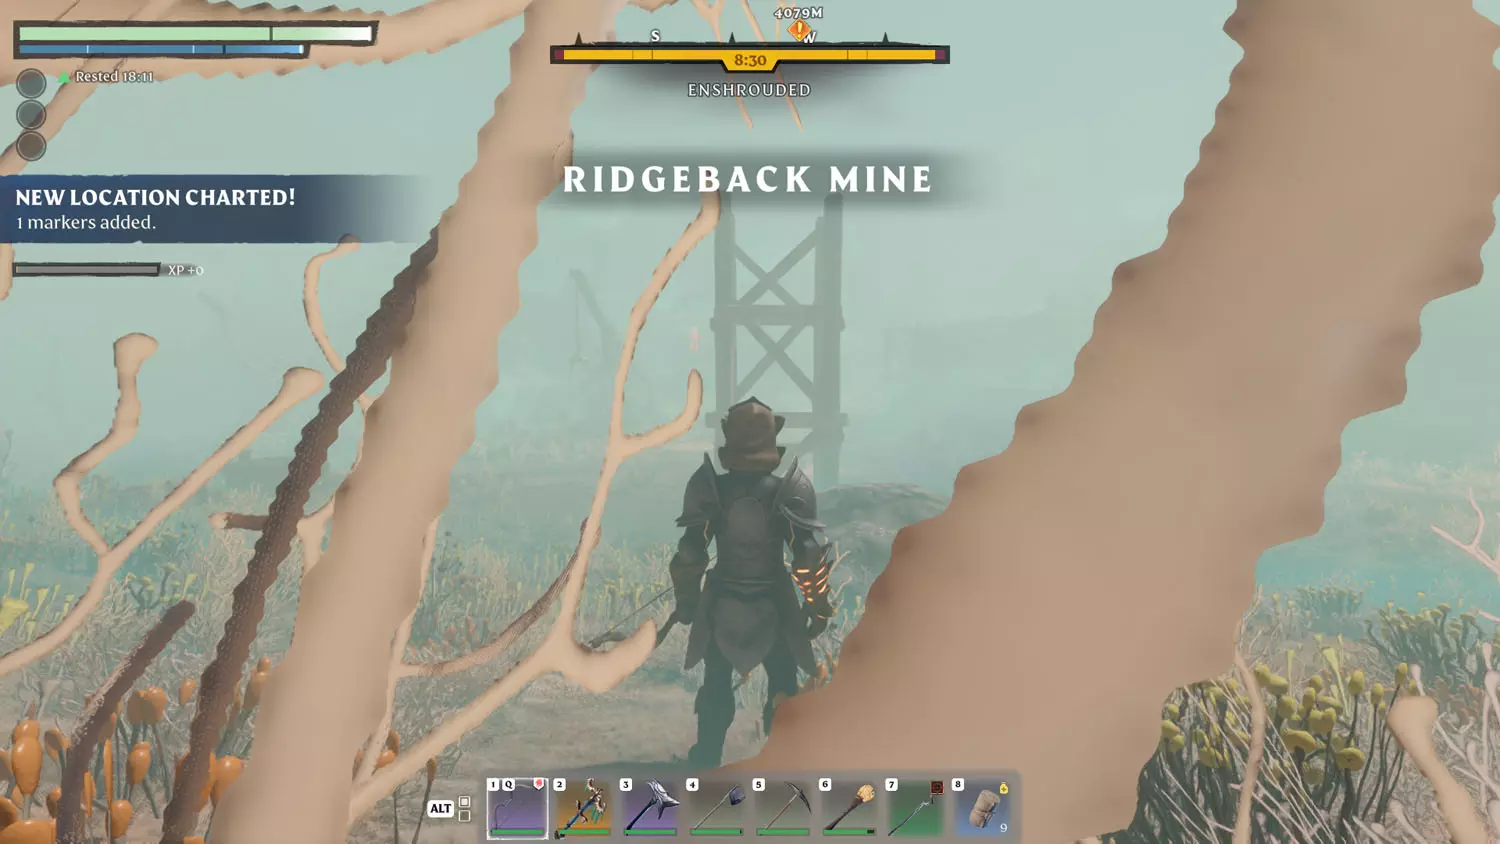
For me, this quest became available after I traveled to the Smothering Pit. When I returned to the Blacksmith, he had the dialogue option “Hearts Of Iron”. Speaking to him starts the quest, and reaching Ridgeback Mine will complete it.

NOTE: All content below is from BEFORE Hollow Halls Update - version number 510434. Content below is good for anything before March 26th, 2024. Content may still be relevant after March 26th, 2024 - but there may be gaps in the information below as more Lore and Quests were added by developers.

